Home Blog Page 3

Hosting Best Practices for Membership and LMS Websites

0

If you’re running a membership site or an LMS (Learning Management System), your hosting setup is mission-critical — following the Hosting Best Practices for Membership and LMS Websites ensures reliability and scale. These platforms typically combine e-learning videos, forums, user logins, course progress tracking, personalized dashboards, and high-volume simultaneous access. Unlike a simple blog or brochure site, membership and LMS platforms demand hosting that can handle complex workflows, scale with your user base, and maintain both speed and security at all times.

In this article we’ll walk through the hosting best practices you need to follow — from infrastructure and caching to backups, user isolation, and future scalability — to ensure your membership or LMS site is stable, secure, and built for growth. These Hosting Best Practices for Membership and LMS Websites apply whether you’re using WordPress, Moodle, or a custom LMS.

Understand Why Hosting Best Practices for Membership and LMS Websites Are Unique

Membership and LMS websites differ in three key ways from standard websites:

  1. High concurrency of authenticated users: Many users logged in at the same moment, consuming personalized content.
  2. Streaming and media delivery: Courses often include video, downloads, interactive modules, which require significant bandwidth and storage.
  3. User data and progress tracking: Your database must track user progress, access control, quiz results, certificates, and sometimes e-commerce transactions.

Because of these demands, your hosting must not just work, it must perform, scale, and secure sensitive user data without becoming a bottleneck.

Best Practice 1: Choose Hosting Built for High-Load and Authenticated Traffic

Select a hosting provider aligned with the Hosting Best Practices for Membership and LMS Websites — one whose stack is optimized for logged-in users and dynamic content (not just static page loads). Shared “cheap” hosting often fails here.

Best Practice 1: Choose Hosting Built for High-Load and Authenticated Traffic

Instead, opt for one of these:

  • Cloud VPS or managed cloud hosting — Provides dedicated CPU/RAM, isolated resources, and scalability.
  • Dedicated application-optimized hosting plans — Ensure they support many PHP workers, object caching (Redis/Memcached), and HTTP/2/HTTP/3.
  • CDN + origin shielding — While CDN’s excel for static assets, ensure your host supports edge-caching for dynamic or authenticated content.

You’ll want features like:

  • Minimum 4-8 GB RAM and 2+ vCPU for small LMS sites; higher if you expect hundreds of concurrent users.
  • NVMe SSD storage rather than HDD for fast I/O when reading/writing user progress data.
  • PHP 8.1+ with correct extensions for course or LMS plugins (e.g., LearnDash, LifterLMS, Tutor LMS).
  • Dedicated database server or at least database isolation to avoid resource contention.

Best Practice 2: Isolate Membership Logic and Protect User Data

Because you’re handling user accounts and likely payment transactions, hosting security and isolation matter a lot.

  • Use separate databases or at least separate tablespaces for user data from the rest of your site.
  • Enforce HTTPS site-wide (including login, dashboard, course pages) with HSTS.
  • Use a Web Application Firewall (WAF) and DDoS protection — membership sites are attractive targets.
  • Regular automatic backups (daily or more) and retention for at least 30 days.
  • Ensure your host provides staging environments — test plugin updates or theme changes before they affect thousands of users.

Best Practice 3: Streaming, Media Delivery & Storage Architecture

Membership and LMS sites often include video lessons, audio, downloadable PDFs or slides. Your hosting must be aligned with media delivery, following the Hosting Best Practices for Membership and LMS Websites.

  • Use a dedicated object storage (like S3-compatible) for large files and link it to your hosting plan to off-load burden.
  • Setup a CDN (Cloudflare, BunnyCDN, KeyCDN) for global delivery of media assets.
  • Ensure your hosting allows high bandwidth (unmetered or generous TBs/month) and has fast upload/download.
  • Use liquid caching combined with streaming technology (HLS/Adaptive bitrate) if you deliver live or many downloads.

Best Practice 4: Performance Optimization for Logged-In Users

Membership and LMS platforms are heavy users of PHP sessions, database queries, AJAX calls, and dynamic content.
To keep things performant:

  • Use object caching (Redis or Memcached) to reduce database load.
  • Enable full-page caching where possible (careful: it doesn’t apply to personalized dashboards).
  • Ensure adequate PHP workers — often hosts throttle this; requests may queue otherwise.
  • Use persistent database connections and optimize slow query logs.
  • Monitor key performance metrics: Response Time, TTFB, Resource Load, PHP Worker Busy, DB Query Time.

Testing is key: simulate 100–200 simultaneous logged-in users using tools like Loader.io or k6 and verify the system responds without exceeding CPU/Memory limits.

Best Practice 5: Scalability Planning & Future-Proofing

Your LMS may start with 100 users—but if a course goes viral or you license your platform to clients, that can become 10,000 users. Plan ahead by applying the Hosting Best Practices for Membership and LMS Websites to prepare for scaling smoothly.

  • Choose a host with vertical scaling (increase CPU/RAM without downtime) and horizontal scaling (add nodes/load-balancers).
  • Ensure your hosting provider supports load balancing and separate services (database cluster, app server cluster, media server).
  • Use staging and version control (Git) to manage updates and roll-outs without affecting the live network.
  • Monitor usage metrics: if CPU consistently above 70%, memory 80 %+, or storage close to 90 % capacity, trigger a scale-up.
  • Keep your stack modular: separate media, app, and database layers so you can upgrade one without disrupting all.

Best Practice 6: Backup, Recovery & Disaster Planning

A membership or LMS site often holds sensitive user data, course progress, and revenue-driving functionalities. A data-loss event or long outage is unacceptable.

  • Automate daily backups (files + database) and keep them off-site or replicated.
  • Keep retention point snapshots for rollback (7/30/90 days).
  • Test your restore process periodically (you should be able to restore in under 1 hour).
  • Have a warm standby environment or fallback host ready if your primary host fails.
  • Use activity logging and monitoring so you can audit access, errors, and suspicious behavior.

Best Practice 7: User Segmentation and Multisite Architecture

If you serve multiple courses or client portals, consider a multisite or multi-tenant architecture.
Hosting this properly means:

  • Mapping each tenant (client) to a subdomain or subfolder.
  • Ensuring your hosting plan supports WordPress multisite or multi-tenant setups with appropriate isolation.
  • Using a staging environment per sub-site or client, so updates don’t impact all users.

Select a host that provides free staging environments, Git push/pull, and isolated worker processes—so you can update one client portal without risking others.

Best Practice 8: Review Cost vs Value — Affordable Doesn’t Mean Cheap

Membership and LMS hosting may start small, but the growth curve is steep. Avoid the “cheap now, fail later” trap.

  • Calculate cost per concurrent user. A $10 host that crashes at 100 users is worse than a $30 host that holds 1,000 users.
  • Evaluate renewal terms and scaling costs — some hosts increase prices dramatically when you surpass limits.
  • Prioritize hosts with transparent pricing, ability to upgrade resources instantly, and no surprise charges for data transfer or backups.

How to Implement These Practices: A Real-World Scenario

Imagine you’ve built a course site using WordPress + LearnDash and want to apply Hosting Best Practices for Membership and LMS Websites from day one. You expect 200 simultaneous logins during launch, 5 hours of video content, and global access.

  1. Deploy your site on a cloud VPS with 4 vCPU, 8 GB RAM, NVMe storage.
  2. Off-load all videos to an S3-compatible object storage and deliver via CDN.
  3. Enable Redis object cache and full-page caching for non-user pages.
  4. Secure your site: HTTPS everywhere, WAF, daily backups.
  5. Create a staging sub-site for future updates to themes/plugins.
  6. Monitor user behavior and resource usage; when CPU >70% regularly, upgrade to 8 vCPU/16 GB RAM seamlessly.
  7. Keep an isolated backup host ready and test restore weekly.

By following this plan, you ensure your LMS is ready for growth, secure, and without surprises.

FAQs

Q1: Can a shared hosting plan handle an LMS or membership site?
Typically, no. Shared hosting is optimized for many small, anonymous visits — not heavy authenticated traffic, streaming, or database writes from logged-in users. You will face performance issues and downtime earlier.

Q2: What’s the minimum hosting spec for a small membership site?
For up to 500 active users, consider at least 2–4 vCPU, 4-8 GB RAM, NVMe SSD, and object caching enabled.

Q3: Do I need a CDN if my users are local (single country)?
Yes—CDN helps relieve server bandwidth and distributes media efficiently. Even within one country, a CDN improves performance and reliability.

Q4: How often should I scale up my hosting for an LMS?
S calewhen you observe consistent CPU usage above 70 % for 1+ hours, memory above 80 % usage, or when new course/content launches cause performance degradation.

Q5: Is a free staging environment necessary for membership sites?
Absolutely. When you update a plugin, you risk breaking access for all members. A staging environment lets you test changes safely before pushing them live.

Q6: What backup frequency is recommended?
Daily full backups (files + database) and incremental backups every 4-6 hours are ideal for busy LMS sites. Retain at least 30 days.

Conclusion

Running a membership or LMS website is a rewarding venture — but only if your hosting infrastructure is up to the task. By following these Hosting Best Practices for Membership and LMS Websites — choosing cloud hosting that’s built for dynamic user traffic, isolating workloads, optimizing performance, planning for scale, and securing your data — you create a foundation that supports growth rather than bottlenecks it.

Affordable hosting doesn’t mean sacrificing quality. The best hosts today offer enterprise-grade technology at startup-friendly prices. What matters is that you pick one that allows you to start lean and scale fast when the time comes.

Treat your hosting as part of your product roadmap — not just an expense line item. Get it right, and your membership or LMS site will be reliable, fast, and ready for whatever your users throw at it.

Hosting with Integrated CDN Free

0

Website speed is no longer a luxury—it’s a necessity. Google considers page loading speed a ranking factor, and users expect a site to load in under three seconds. Whether you’re running a personal blog, an eCommerce store, or a business website, slow load times can kill conversions and search rankings.

That’s where Hosting with Integrated CDN Free options come into play. Instead of relying solely on your hosting server, a Content Delivery Network (CDN) distributes your content across multiple global servers. When visitors access your site, they’re automatically served content from the server closest to them, reducing latency and ensuring a faster experience.

The best part? Many hosting companies now provide Hosting with Integrated CDN Free in their plans—meaning you don’t have to spend extra on performance optimization or complex setup. In this guide, we’ll explore the best WordPress hosting providers offering free CDN integration, their benefits, and how to choose the right one for your website.

What Is a CDN?

A CDN is essential, especially when paired with Hosting with Integrated CDN Free, as it ensures your website’s assets load quickly regardless of visitor location.

Benefits of Using a CDN

Choosing Hosting with Integrated CDN Free not only improves site speed but also strengthens SEO performance and reduces server load.

WordPress Hosts with a Free CDN

When comparing the best WordPress hosts, prioritize those that offer Hosting with Integrated CDN Free. These solutions combine global performance and affordability, helping your site load instantly for users anywhere in the world.

1. Bluehost

Bluehost

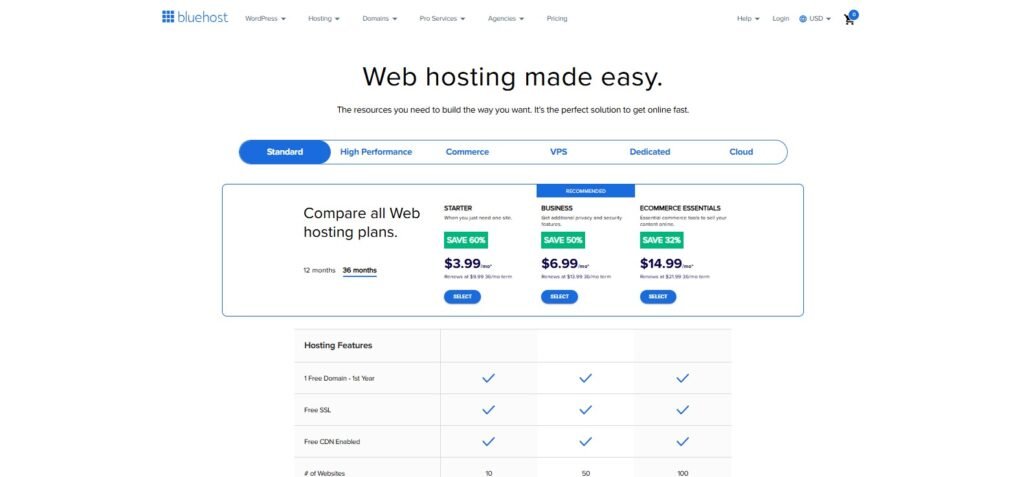
Bluehost is one of the most beginner-friendly WordPress hosting companies, officially recommended by WordPress.org. One of its standout features is the integration with Cloudflare CDN, included for free in all plans.

Key Advantages:

  • One-click CDN activation: No need for complicated technical setup. Simply enable Cloudflare from your dashboard.

  • Improved security: Built-in DDoS protection ensures your site stays online even during high-traffic attacks.

  • Global reach: Cloudflare’s expansive network ensures faster load times worldwide.

  • Affordable pricing: Plans start at budget-friendly rates, making Bluehost ideal for beginners and small businesses.

Best For: Bloggers, small businesses, and startups looking for reliable hosting with affordable free CDN integration.

2. SiteGround

SiteGround

SiteGround is a standout choice for those seeking Hosting with Integrated CDN Free, thanks to its in-house SiteGround CDN optimized for WordPress.

Key Advantages:

  • Custom CDN integration: Designed in-house for seamless WordPress optimization.

  • Built-in caching: SiteGround combines CDN with advanced caching technologies for maximum speed.

  • Security benefits: Your site gains an extra layer of protection with encrypted connections.

  • Data centers worldwide: Ensures your site is fast whether your visitors are in the US, Europe, or Asia.

Best For: Website owners who want all-in-one performance and security features without relying on third-party solutions.

3. WP Engine: Best Premium Host

Wpengine

If you’re running a mission-critical website, WP Engine is one of the best premium hosting providers in the market. It’s designed specifically for WordPress and comes with built-in CDN powered by Cloudflare Enterprise.

Key Advantages:

  • Enterprise CDN: Delivers unmatched speed and reliability compared to standard Cloudflare.

  • Automatic scaling: Handles sudden traffic spikes effortlessly.

  • Developer-friendly tools: Offers staging environments, Git integration, and advanced analytics.

  • SEO advantages: Faster sites directly boost search engine rankings.

Best For: Established businesses, eCommerce sites, and agencies that need top-tier performance and premium CDN integration.

4. Cloudways: Best Cloud Host

Cloudways

Cloudways delivers managed cloud hosting with flexible scalability and Hosting with Integrated CDN Free, powered by Cloudflare’s global network.

Key Advantages:

  • Flexible hosting: Choose your cloud provider and scale resources as needed.

  • Pay-as-you-go pricing: Only pay for what you use.

  • Performance-focused: Optimized stack with NGINX, Varnish, and Redis caching.

  • Global CDN support: Cloudflare ensures lightning-fast content delivery worldwide.

Best For: Tech-savvy users, developers, and agencies who want scalable hosting with integrated free CDN support.

5. GoDaddy: Best for Domains

GoDaddy hosting

GoDaddy is the world’s largest domain registrar, but it has also become a major player in the hosting space. One of the best parts about GoDaddy’s managed WordPress hosting is the built-in CDN powered by Cloudflare, available at no additional cost.

Key Advantages:

  • Integrated with domains: If you already purchased your domain from GoDaddy, managing hosting and CDN together is seamless.

  • Global edge servers: Cloudflare ensures content delivery from 200+ data centers worldwide.

  • Security features: The free CDN includes a Web Application Firewall (WAF) and DDoS protection.

  • 24/7 customer support: GoDaddy’s massive support team makes troubleshooting easy for beginners.

Best For: Beginners and small businesses who prefer everything (domain + hosting + CDN) under one roof without juggling multiple providers.

6. Bluehost.com

Although Bluehost was already mentioned earlier, it deserves a separate spotlight because of its direct website integration. When you host through Bluehost.com (the main portal, not reseller channels), you get Cloudflare CDN pre-enabled inside the hosting control panel.

Key Advantages:

  • Automatic activation: No need for separate DNS or account setup — everything works from the hosting dashboard.

  • Beginner-friendly interface: Bluehost.com simplifies CDN usage so you don’t have to worry about technical complexities.

  • Performance boost: With caching, SSL, and CDN all bundled, your WordPress site runs faster with minimal effort.

  • Budget plans: Ideal for those starting with shared hosting and planning to scale later.

Best For: First-time website owners who want the easiest free CDN setup without technical headaches.

7. Hostinger.com

Hostinger has gained massive popularity in recent years because of its low-cost hosting with premium features. One of those features is a free CDN included in most of its plans, making it a strong competitor in the budget hosting market.

Key Advantages:

  • LiteSpeed + CDN combo: Hostinger uses LiteSpeed servers combined with Cloudflare CDN, giving exceptional speed even on entry-level plans.

  • Global coverage: Cloudflare’s wide network ensures your website loads fast for audiences worldwide.

  • Free SSL certificates: Combined with CDN, this improves SEO and site trustworthiness.

  • Affordable pricing: Plans often start under $3/month, making it one of the cheapest ways to get hosting with integrated CDN.

Best For: Bloggers, freelancers, and startups seeking budget-friendly hosting with maximum performance value.

What Is a Content Delivery Network?

A Content Delivery Network (CDN) is a system of servers strategically distributed across different geographic locations. Instead of relying on a single hosting server to deliver your website content to visitors worldwide, a CDN stores cached versions of your site on multiple edge servers.

When a user visits your website, the CDN automatically serves content from the server closest to them. For example, if your hosting server is in the US but a visitor is browsing from Europe, the CDN will deliver content from a European edge server. This reduces latency, speeds up page load times, and improves the overall user experience.

Key Features of a CDN:

  • Content caching: Stores images, CSS, JavaScript, and even full web pages for faster delivery.

  • Load balancing: Distributes traffic across multiple servers to avoid overload.

  • Global reach: Makes your site accessible with high speed across continents.

  • Security protection: Many CDNs provide DDoS mitigation and web application firewall (WAF).

In short, a CDN is the backbone of modern website performance. Without it, your site would rely only on your host’s server, which may slow down visitors from distant locations.

What Are the Benefits of Using a Content Delivery Network?

A CDN is not just about speed — it impacts SEO, security, and even your bottom line. Here are the main benefits explained in detail:

1. Faster Website Speed

Speed is the number one benefit of using a CDN. Since files are cached on global servers, users don’t have to wait for data to travel halfway across the world. Faster websites improve engagement, reduce bounce rates, and encourage more conversions.

2. Improved SEO Rankings

Google considers page speed and Core Web Vitals as ranking factors. A CDN helps you meet these requirements by delivering optimized performance across devices and regions. This means better chances of ranking higher on search engine results pages (SERPs).

3. Reduced Server Load

When traffic spikes, your main hosting server could struggle. A CDN reduces this burden by offloading requests to edge servers. This ensures your site remains stable and doesn’t crash under heavy load.

4. Enhanced Security

Most CDNs provide features like DDoS protection, SSL integration, and bot filtering. These security layers protect your site from malicious attacks and ensure safe browsing for your visitors.

5. Global Accessibility

Without a CDN, a visitor from Asia accessing a US-based server may face significant delays. With CDN nodes distributed worldwide, your site feels “local” to every visitor, no matter where they’re located.

6. Better User Experience

Every second counts online. Studies show that a 1-second delay in page load can reduce conversions by 7%. A CDN ensures your website delivers a smooth, lightning-fast experience, which builds trust and keeps users engaged.

What Are the Biggest CDN Providers?

While many hosting companies now integrate free CDNs into their plans, there are standalone CDN giants that dominate the market. These providers power millions of websites and often serve as the backbone for integrated hosting solutions.

1. Cloudflare

Cloudflare is the most popular CDN provider, offering a free plan that’s widely used by individuals and businesses alike. It combines CDN with security features like DDoS protection and a web application firewall (WAF). Many hosts, including Bluehost and SiteGround, integrate Cloudflare directly into their dashboards.

Highlights:

  • Free and premium plans

  • 200+ global data centers

  • Security-focused features

  • Widely supported by WordPress hosts

2. Akamai

Akamai is one of the oldest and most powerful CDNs, serving enterprise-level businesses. With thousands of servers across the globe, Akamai powers some of the largest websites, including eCommerce giants and media platforms.

Highlights:

  • Enterprise-grade CDN

  • Extremely reliable for global brands

  • Advanced analytics and security features

3. Amazon CloudFront

Part of Amazon Web Services (AWS), CloudFront is a highly scalable CDN. It integrates seamlessly with AWS hosting, storage, and security services, making it a top choice for developers and large-scale businesses.

Highlights:

  • Pay-as-you-go pricing

  • Perfect for developers and enterprises

  • Powerful integrations with AWS ecosystem

4. Google Cloud CDN

Google Cloud CDN leverages Google’s massive global infrastructure. With direct integration into Google Cloud Hosting, it’s a powerful option for developers who want speed, security, and advanced analytics.

Highlights:

  • Backed by Google’s global network

  • Excellent for data-heavy applications

  • Highly scalable

5. Fastly

Fastly is a real-time edge cloud platform popular with publishers, streaming services, and API-heavy businesses. It’s known for ultra-low latency and developer-friendly tools.

Highlights:

  • Real-time content delivery

  • Strong support for streaming and dynamic content

  • Advanced caching features

Do I Need a CDN for WordPress Hosting?

The short answer: Yes, in most cases.
While some very small, local websites might not notice a dramatic improvement, most WordPress sites benefit significantly from a CDN. Here’s why:

1. Speed Is Critical

No matter where your audience is, users expect fast-loading pages. Even if your server is located near your target market, visitors from other regions may experience delays without a CDN.

2. SEO and Rankings

Since Google uses page speed as a ranking factor, a CDN can directly improve your search visibility. A slow site could cost you valuable traffic.

3. Security Protection

A CDN adds a crucial extra layer of security. For WordPress sites, which are often targeted by bots and hackers, this protection is invaluable.

4. Handling Traffic Spikes

If you publish viral content or run promotions, traffic can spike unexpectedly. A CDN ensures that your hosting server doesn’t buckle under the pressure.

5. Cost vs. Benefit

Most modern hosting providers now include a free CDN in their packages. Since you don’t need to pay extra or configure complicated systems, enabling CDN is a no-brainer.

Where Can I Find the Best Free CDN?

Finding the best free CDN depends on your website’s size, needs, and technical comfort level. Thankfully, there are multiple reliable options that deliver excellent performance without costing you extra.

1. Cloudflare Free CDN

Cloudflare is hands-down the most popular free CDN provider. It offers global coverage, DDoS protection, free SSL, and easy WordPress integration. Many web hosts (like Bluehost, Hostinger, and GoDaddy) already include Cloudflare in their hosting packages, so you may not even need to configure it manually.

Best For: Bloggers, small businesses, and startups that want plug-and-play CDN performance at no cost.

2. Jetpack Site Accelerator (WordPress CDN)

If you’re using WordPress, Jetpack’s Site Accelerator offers a built-in CDN for images, static files, and JavaScript. While not as comprehensive as Cloudflare, it’s a simple way to speed up your site directly from your WordPress dashboard.

Best For: WordPress beginners who want simple CDN integration with zero configuration.

3. Host-Integrated CDNs

Some hosting providers (like SiteGround CDN or WP Engine Cloudflare Enterprise) include their own customized CDN solutions. These are optimized specifically for WordPress hosting and often perform better than a standard free CDN.

Best For: Businesses and agencies who want reliability and speed tuned to WordPress.

4. Free Trials of Premium CDNs

Providers like Akamai, Fastly, and Amazon CloudFront often provide free trial credits. If you’re running a temporary project or want to test enterprise-level performance, these trials can give you an edge.

Best For: Developers and advanced users who want to experiment with enterprise-grade CDN services without committing immediately.

Conclusion

In 2025 and beyond, every website owner should choose Hosting with Integrated CDN Free for the best balance of performance, cost-efficiency, and SEO advantage. Providers like Bluehost, SiteGround, and Hostinger make it easy to enjoy global speed at zero extra cost.

The best part? You don’t need to pay extra for it. Providers like Bluehost, SiteGround, Hostinger, and GoDaddy bundle Cloudflare CDN for free, while premium hosts like WP Engine and Cloudways offer advanced CDN integrations.

If you’re serious about SEO, user experience, and online growth, choosing a host with free CDN integration is one of the smartest decisions you can make today.

FAQs About Hosting with Integrated Free CDN

1. Is a free CDN enough for my website?

Yes — for most small to medium websites, a free CDN like Cloudflare or Jetpack Accelerator is more than enough. They cover caching, SSL, and basic DDoS protection. For enterprise-level traffic or eCommerce, you may want to upgrade to a premium CDN.

2. Will a CDN replace my hosting provider?

No. A CDN works alongside your hosting, not as a replacement. Your web host stores your website’s files and database, while the CDN caches and distributes those files across global servers for faster delivery.

3. Does a CDN improve SEO rankings?

Indirectly, yes. A CDN improves page speed, which is a ranking factor for Google. Faster load times also lower bounce rates, increase user engagement, and boost conversions — all of which help SEO performance.

4. Do I need technical skills to set up a CDN?

Not necessarily. Most modern hosts like Bluehost, Hostinger, and GoDaddy allow one-click Cloudflare activation. WordPress users can also install plugins like Jetpack or W3 Total Cache to enable CDN easily.

5. What types of content does a CDN deliver?

A CDN primarily delivers static content like images, CSS, JavaScript, and fonts. Some advanced CDNs also support dynamic content acceleration, streaming media, and API requests.

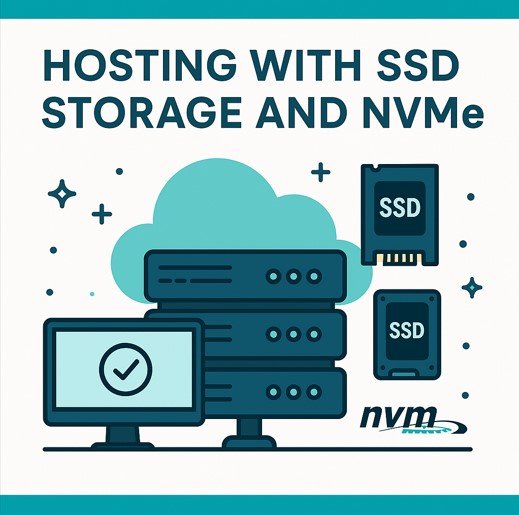
Hosting with SSD Storage and NVMe

0

In today’s digital world, the speed, reliability, and performance of your website can make or break your online success. Whether you’re running a small personal blog or a large eCommerce store, web hosting is at the heart of your online presence. Traditional hosting that relies on older hard disk drives (HDDs) is quickly becoming obsolete, making Hosting with SSD Storage and NVMe the new standard for speed and performance.

Enter SSD (Solid State Drive) VPS hosting and its even faster cousin, NVMe (Non-Volatile Memory Express) VPS hosting. These technologies are not just buzzwords—they represent a real leap forward in how websites are powered, delivering superior performance, reliability, and efficiency.

This article will guide you through everything you need to know about SSD and NVMe hosting, from how they work to their advantages, comparisons with other hosting types, and even why providers like Bluehost stand out in this space. By the end, you’ll know whether SSD or NVMe hosting is the right move for your website or business — and why Hosting with SSD Storage and NVMe offers the best balance between power and efficiency.

What is Hosting with SSD Storage and NVMe (SSD VPS Hosting)?

To understand SSD VPS hosting, let’s break the term into two parts:

  • SSD (Solid State Drive): A storage device that uses flash memory to store data instead of spinning disks like traditional HDDs. SSDs are faster, more durable, and more efficient.

  • VPS (Virtual Private Server): A hosting environment where a physical server is divided into multiple virtual servers, giving each user dedicated resources such as CPU, RAM, and storage. Unlike shared hosting, VPS hosting provides more control and reliability.

When combined, SSD VPS hosting means your website runs on a VPS server that uses SSDs instead of HDDs. This setup ensures faster read/write speeds, lower latency, and an overall smoother hosting experience.

In simple terms, SSD VPS hosting is like upgrading from a standard car to a high-performance sports car—it delivers the same basic function but with far more speed and efficiency.

How Does SSD VPS Hosting Work?

The magic of SSD VPS hosting lies in how data is accessed and delivered. Traditional HDD-based hosting relies on mechanical parts—spinning disks and read/write heads—to fetch data. This mechanical process slows down performance, especially when multiple users request information simultaneously.

With SSDs, there are no moving parts. Data is stored in interconnected flash memory chips, allowing for instant access. Here’s how it works:

  1. Data Storage: Your website files, databases, and applications are stored on SSD drives.

  2. Virtualization: A hypervisor divides the physical server into multiple VPS environments, allocating CPU, RAM, and SSD storage to each.

  3. Instant Access: Whenever a user visits your website, the server retrieves data from the SSD almost instantly—much faster than with HDDs.

  4. Efficient Caching: SSDs handle caching and database queries better, which improves performance for dynamic websites like WordPress, Magento, or WooCommerce stores.

This combination of virtualization and SSD technology ensures that your site enjoys both dedicated resources and lightning-fast storage performance, making it a powerful option for modern businesses.

What Are the Benefits of SSD VPS Hosting?

Switching from traditional HDD hosting to SSD VPS hosting provides a wide range of benefits that directly impact your website’s speed, reliability, and long-term growth. Let’s break them down:

1. Faster Performance

The biggest advantage of Hosting with SSD Storage and NVMe is speed. SSDs use flash memory to store and access data, which is up to 10x faster than HDDs.

  • Website Load Times: Faster storage means your website loads in seconds rather than lagging. Speed matters—Google reports that a 1-second delay in page load can reduce conversions by 7%.

  • Database Queries: Websites that rely on databases (like WordPress, Joomla, or Magento) benefit massively because SSDs handle queries almost instantly.

  • User Experience: Visitors are more likely to stay and engage with your site if it loads quickly. This also improves SEO rankings since Google prioritizes fast websites.

Simply put, SSD VPS hosting gives your website the “speed boost” it needs to stay competitive.

2. Improved Reliability

SSDs have no moving parts, unlike HDDs which rely on spinning disks and mechanical heads. This makes SSDs more durable and less prone to failure.

  • Fewer Hardware Failures: HDDs can fail due to mechanical wear, heat, or shock. SSDs are resistant to these issues.

  • Consistent Performance: Even during high-traffic spikes, SSD servers maintain stable speeds.

  • Data Integrity: Your website data is less likely to be corrupted or lost due to physical damage.

For businesses, reliability means less downtime and fewer headaches, ensuring customers can always access your site — a major strength of Hosting with SSD Storage and NVMe.

3. Enhanced Security

Security is a top concern in web hosting, and SSDs add an extra layer of protection.

  • Data Recovery: SSDs reduce the risk of data loss, which is crucial for sensitive information such as customer details or payment records.

  • Encryption-Friendly: SSD technology works seamlessly with encryption tools, making it easier to secure your website data.

  • Isolation in VPS: Since VPS hosting isolates your server environment, your website is safer from vulnerabilities in other users’ accounts.

While SSDs don’t replace firewalls or SSL certificates, they significantly reduce risks related to hardware-based data loss.

4. Energy Efficiency

SSDs consume less power than HDDs because they don’t need energy to spin disks or move mechanical arms.

  • Lower Hosting Costs: Hosting providers save on energy and cooling, which can translate into better pricing for users.

  • Eco-Friendly: Using SSD VPS hosting contributes to a greener internet by reducing the carbon footprint of data centers.

In today’s eco-conscious market, energy efficiency isn’t just a cost-saving feature—it’s a brand value.

5. Lower Latency

Latency is the delay between a user’s action and the server’s response. SSDs dramatically cut down this delay.

  • Instant Data Access: SSDs deliver data in microseconds compared to milliseconds with HDDs.

  • Better for Dynamic Sites: Lower latency is especially important for eCommerce websites, SaaS applications, and gaming platforms where real-time responsiveness is crucial.

  • Improved SEO & Conversions: Faster response times mean better search engine visibility and more satisfied users.

6. Longer Lifespan

SSDs generally last longer than HDDs because they aren’t subject to mechanical wear and tear.

  • Endurance: High-quality SSDs are designed to handle frequent read/write cycles without breaking down.

  • Reduced Maintenance: With fewer hardware replacements, you save time and money in the long run.

  • Stable Performance: SSDs maintain consistent performance even after years of use, unlike HDDs which slow down over time.

For businesses planning long-term growth, SSD VPS hosting offers a future-proof solution.

Who Should Choose SSD VPS Hosting?

Not every website requires the power of Hosting with SSD Storage and NVMe, but those that do gain a serious performance edge. But for businesses and individuals who rely on speed, reliability, and scalability, it’s a game changer. Let’s look at who benefits most from SSD VPS hosting:

1. eCommerce Websites

If you run an online store, performance is everything. Shoppers expect lightning-fast page loads, smooth navigation, and secure transactions.

  • Cart Abandonment: Studies show that 40% of shoppers abandon websites that take more than 3 seconds to load.

  • Database-Heavy Operations: Platforms like WooCommerce, Shopify (self-hosted), or Magento handle thousands of product entries, customer data, and payment records. SSD VPS ensures these queries are handled instantly.

  • SEO & Conversions: Faster hosting directly improves search rankings and boosts conversion rates, making SSD VPS hosting essential for serious online retailers.

2. Content-Rich Websites

If your site contains a large amount of multimedia content such as videos, images, and interactive features, SSD VPS hosting ensures smooth delivery.

  • Media-Heavy Sites: Blogs with HD images, online magazines, streaming platforms, or educational sites benefit from faster load speeds.

  • Caching Efficiency: SSDs handle caching mechanisms (like WordPress caching plugins) far better, improving performance for content-rich environments.

  • User Experience: Visitors won’t have to wait for images or videos to load, which reduces bounce rates.

3. Multiple Websites

Developers, agencies, or individuals hosting multiple sites under one account need a hosting solution that can handle the load.

  • Resource Allocation: SSD VPS hosting provides isolated resources for each site, avoiding resource hogging.

  • Management Flexibility: You can easily manage several websites without experiencing slowdowns.

  • Professional Hosting: Ideal for freelancers, digital marketers, or agencies managing multiple client websites.

4. Web Applications

If you’re running complex web applications—such as CRMs, ERPs, SaaS products, or custom-built platforms—SSD VPS hosting offers the speed and stability required.

  • High-Performance Computing: Applications require constant data read/write cycles, which SSDs handle effortlessly.

  • Low Latency: Essential for real-time apps like chat platforms, financial dashboards, or gaming apps.

  • Scalability: VPS environments can scale resources as your application grows.

5. Growing Businesses

Startups and small businesses that expect rapid growth should invest in SSD VPS hosting from the beginning.

  • Future-Proofing: Instead of constantly upgrading from shared hosting, SSD VPS gives you a scalable environment to grow.

  • Professional Image: Faster and more reliable websites improve customer trust and brand reputation.

  • Cost-Effective: Though more expensive than shared hosting, SSD VPS is more affordable than dedicated servers—making it the sweet spot for growing businesses.

What is NVMe VPS Hosting? Is It Worth It?

While SSD VPS hosting is already a huge leap forward compared to traditional HDD hosting, NVMe VPS hosting takes performance to the next level.What is NVMe VPS Hosting?

  • NVMe (Non-Volatile Memory Express): A storage protocol designed specifically for SSDs, allowing them to communicate directly with the CPU via PCIe (Peripheral Component Interconnect Express) lanes instead of older SATA connections.

  • Why It Matters: Traditional SSDs connected through SATA are limited in speed (around 500–600 MB/s). NVMe SSDs, on the other hand, can achieve speeds of 3,000–7,000 MB/s, depending on the generation (Gen 3 vs Gen 4).

Key Benefits of NVMe VPS Hosting

  1. Blazing-Fast Speeds: Perfect for sites handling large amounts of data and traffic.

  2. Reduced Latency: NVMe minimizes delays by accessing data almost instantly.

  3. Scalable Performance: As websites and apps grow, NVMe ensures they don’t slow down.

  4. Better Multitasking: Handles thousands of simultaneous read/write requests with ease.

Is It Worth It?

Yes—if your website or business demands maximum performance. For example:

  • High-traffic eCommerce stores with thousands of products.

  • SaaS or web applications with real-time data processing.

  • Enterprise-level businesses where speed directly impacts revenue.

However, for small blogs or personal sites, NVMe hosting might be overkill. In such cases, SSD VPS hosting already provides more than enough performance.

Comparison of Hosting Types: Shared vs SSD VPS vs NVMe VPS

When comparing different hosting solutions, it becomes clear that Hosting with SSD Storage and NVMe delivers the fastest speeds and most reliable uptime among modern VPS options.

FeatureShared HostingSSD VPS HostingNVMe VPS Hosting
PerformanceLow (resources shared with many users)High (dedicated SSD storage per VPS)Ultra-High (NVMe delivers maximum read/write speeds)
SpeedSlower, often 2–4 seconds per page loadFast, 10x better than HDD hostingSuper Fast, up to 5–7x faster than SATA SSDs
ReliabilityProne to downtime if other sites use too many resourcesReliable with isolated resourcesExtremely reliable with dedicated NVMe power
SecurityShared environment = higher risksStronger isolation = better securitySame VPS isolation + faster recovery
ScalabilityVery limitedEasily scalable (RAM, CPU, storage)Highly scalable with enterprise-grade performance
Best ForHobby sites, personal blogseCommerce, agencies, content-rich websites, SMBsEnterprises, SaaS apps, high-traffic websites

Why is Bluehost the Right Choice for SSD VPS Hosting?

When it comes to choosing a hosting provider, the market is full of options. But not all hosting companies deliver the same level of performance, reliability, and support. Bluehost has built a reputation as one of the most trusted hosting providers worldwide, especially for small to medium businesses. Let’s break down why Bluehost stands out as the right choice for SSD VPS hosting.

1. SSD-Powered VPS Infrastructure

Bluehost uses SSD storage across all VPS plans, ensuring faster performance compared to traditional HDD hosting. This means your websites, databases, and applications benefit from:

  • Quick load times that improve SEO and conversions.

  • Stable performance even during high-traffic surges.

  • Efficient caching and queries for CMS platforms like WordPress.

2. Reliable Uptime and Performance

Bluehost offers 99.9% uptime guarantees, which means your website is online almost all the time. For businesses, even a few minutes of downtime can mean lost sales and credibility. With SSD VPS hosting from Bluehost, downtime risks are minimized.

  • Consistent Speed: Faster servers powered by SSD technology.

  • Less Latency: Smooth experience for global visitors.

3. Scalable VPS Plans

As your business grows, you need hosting that can scale with you. Bluehost provides flexible VPS hosting plans where you can upgrade CPU, RAM, and storage resources easily.

  • Start with what you need today.

  • Scale up without migrating to a new host.

  • Add resources instantly as your website traffic increases.

4. Robust Security Features

Security is non-negotiable, especially for eCommerce and data-driven websites. Bluehost VPS hosting comes with:

  • Advanced firewalls for threat protection.

  • Free SSL certificates to secure customer transactions.

  • Root access for developers who want full control.

With SSD storage, data loss risks are further minimized, giving businesses peace of mind.

5. User-Friendly Management

Not everyone running a business is a server expert. Bluehost makes VPS hosting simple with:

  • cPanel/WHM access for easy management.

  • 1-click installations for WordPress and other applications.

  • Intuitive dashboards that allow non-technical users to manage hosting without hassle.

This balance of power and simplicity is why many businesses prefer Bluehost.

6. 24/7 Expert Support

Bluehost provides 24/7 customer support via chat, phone, and email. Whether you’re troubleshooting performance issues, setting up new features, or scaling your VPS resources, expert help is always available.

Support

7. Value for Money

Compared to premium hosting providers, Bluehost delivers excellent value at competitive prices. Businesses get SSD-powered VPS hosting without paying enterprise-level costs.

  • Affordable monthly plans.

  • Transparent pricing (no hidden charges).

  • A strong balance between price and performance.

Final Thoughts

When it comes to web hosting, speed, security, and reliability are no longer “nice-to-have” features—they are must-haves. Traditional HDD-based hosting simply can’t keep up with the demands of today’s digital world.

  • SSD VPS hosting gives you a massive performance boost, improved security, and reliability at a price that growing businesses can afford.

  • NVMe VPS hosting takes things even further, delivering enterprise-grade speeds for businesses and applications where every millisecond counts.

  • And when it comes to providers, Bluehost remains a top choice thanks to its SSD-powered VPS infrastructure, excellent uptime, scalability, and user-friendly management tools.

If your business depends on online performance—whether through eCommerce, content, apps, or multiple websites—investing in Hosting with SSD Storage and NVMe is not just a smart move, it’s a strategic necessity.

???? Ready to take your website to the next level? Consider upgrading to Bluehost’s SSD VPS hosting today and experience the speed and reliability your business deserves.

FAQs

1. What is the difference between SSD hosting and HDD hosting?
SSD hosting uses solid-state drives for storage, which are faster, more reliable, and energy-efficient compared to HDDs that rely on spinning disks.

2. Is SSD VPS hosting good for WordPress websites?
Yes, WordPress sites benefit significantly from SSD VPS hosting because it handles database queries and caching faster, resulting in quicker page loads.

3. Who should choose NVMe VPS hosting?
NVMe VPS hosting is ideal for high-traffic eCommerce stores, SaaS applications, enterprise sites, or any website where ultra-fast speed and minimal latency are critical.

4. Is NVMe hosting much faster than SSD hosting?
Yes. While regular SSDs (SATA-based) offer around 500–600 MB/s speeds, NVMe SSDs deliver 3,000–7,000 MB/s speeds, depending on the generation.

5. Can I upgrade from SSD VPS to NVMe VPS later?
In most cases, yes. Many hosting providers, including Bluehost, allow you to scale up your VPS resources, including storage type, as your needs grow.

6. Is Bluehost the only provider offering SSD VPS hosting?
No, but Bluehost is one of the most trusted providers. They combine SSD performance with reliable uptime, strong security, affordable pricing, and user-friendly management tools.

7. Does SSD VPS hosting improve SEO?
Indirectly, yes. Faster load times improve user experience and reduce bounce rates, both of which are factors search engines consider for rankings.

8. Is SSD VPS hosting expensive?
It costs more than shared hosting but less than dedicated hosting. Given its speed, reliability, and scalability, it offers the best value for growing businesses.

9. Do small websites need NVMe VPS hosting?
Not necessarily. For small blogs or personal sites, SSD VPS hosting is more than enough. NVMe is better suited for performance-critical websites.

10. How do I know if it’s time to upgrade to SSD VPS hosting?
If your website is slowing down, experiencing downtime, handling more traffic, or if you’re running multiple sites/applications, it’s time to move to SSD VPS hosting.

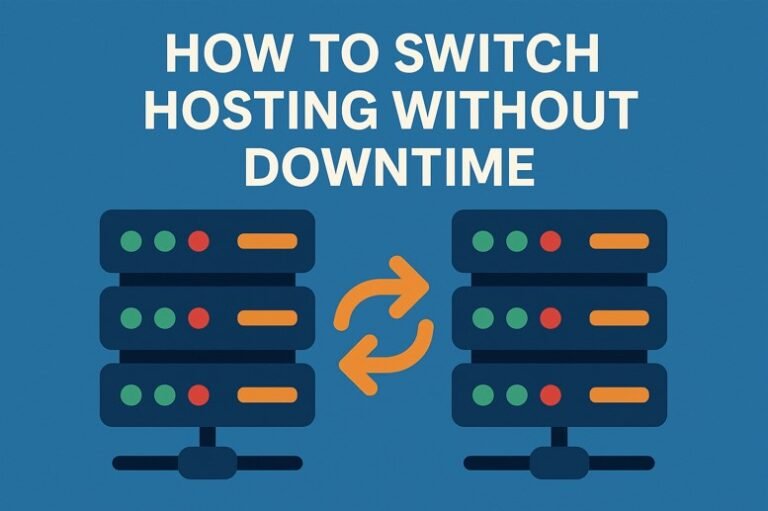
How to Switch Hosting without Downtime

0

Switching from one hosting provider to another — or learning how to switch hosting without downtime — is something every website owner eventually faces—whether because of slow performance, poor customer support, high costs, or the need for better features. But while the reasons for moving are clear, the biggest fear is often downtime. Even a few minutes offline can mean lost sales, frustrated visitors, and damaged SEO rankings.

The good news? In 2025, website migration has become easier than ever. Thanks to advanced migration tools, flexible hosting providers, and smarter DNS management, you can move your site seamlessly without your visitors noticing a thing. But success doesn’t happen by accident—it requires careful planning and step-by-step execution.

This website migration guide will walk you through the complete process of how to switch hosting without downtime in 2025. You’ll learn:

  • Why preparation is the secret weapon of a smooth migration.

  • The importance of full backups (and what to back up).

  • How to choose a new host that supports your long-term growth.

  • The exact steps for moving files, databases, and DNS records.

  • Common mistakes to avoid during the migration process.

  • When it’s smarter to let your hosting provider handle the move.

By following this guide, you won’t just transfer your website—you’ll ensure your online presence stays uninterrupted, your SEO rankings remain intact, and your users never experience the dreaded “site unavailable” page.

Migrating hosting in 2025 is no longer about risk—it’s about opportunity. Done right, this transition can improve speed, security, and reliability while giving you the freedom to scale your website as your business grows.

Prep work – the first step in how to switch hosting without downtime

A successful website migration is like a successful trip—you don’t just pack your bags and leave; you plan your route, check the weather, and make sure nothing important gets left behind. The same principle applies when switching hosting. Preparation is the single most important step, and it often decides whether your migration is seamless or stressful.

Why preparation matters

Most downtime during migration doesn’t happen because servers fail. It happens because site owners rush the process, forget essential files, or misconfigure DNS. With proper prep work, you eliminate these risks before they happen. Think of it as a pre-flight checklist: if every item is ticked off, the flight (your migration) will be safe and smooth.

Key steps in preparation

  1. Audit your website
    Start by making a complete inventory of your current setup. This includes:

    • All website files (HTML, CSS, JavaScript, media).

    • Databases (MySQL, MariaDB, or other).

    • Custom configurations such as .htaccess, cron jobs, and redirects.

    • SSL certificates.

    • Email accounts connected to your domain.
      By having this list, you’ll know exactly what needs to be transferred—nothing gets overlooked.

  2. Check hosting requirements
    Every website runs on a specific stack. Make sure your new host supports the same or better versions of the technologies you rely on:

    • PHP version compatibility (e.g., PHP 8.2 in 2025).

    • MySQL/MariaDB database versions.

    • CMS requirements (WordPress, Joomla, Drupal, etc.).

    • Any custom scripts or applications.
      A mismatch here can break your site after migration, so verify before moving.

  3. Evaluate traffic patterns
    Use your analytics tool (Google Analytics, Plausible, etc.) to identify when your site experiences the least traffic. This is your ideal migration window. Even if downtime is unlikely, planning the migration during off-peak hours adds an extra layer of safety.

  4. Lower DNS TTL in advance
    At least 24–48 hours before migration, reduce your domain’s TTL (Time to Live) settings to around 300 seconds (5 minutes). This makes DNS propagation much faster when you switch nameservers later.

  5. Stage your migration plan
    Write down the exact steps you’ll follow:

    • Backup → Upload files → Import database → Test → Switch DNS → Monitor.
      Treat it like a project checklist, not guesswork.

Pro tip

If you run an ecommerce store or business site, schedule migration during hours when you expect the fewest transactions. Announcing a brief “site maintenance window” to users is better than surprising them with downtime.

In short, preparation reduces surprises. By auditing, checking compatibility, planning timing, and lowering DNS TTL, you’re not just preparing to migrate—you’re preparing for a flawless migration.

Backup everything

If there’s one golden rule in learning how to switch hosting without downtime, it’s this: never move without a backup. Even the most experienced developers and hosting providers agree—things can and do go wrong. A misplaced file, a corrupted database, or a failed DNS update can cause your site to crash. Without a reliable backup, you risk losing years of work, customer data, and SEO equity.

Backup

Why backups are non-negotiable

  • Protection against errors: If you accidentally delete a folder or misconfigure your CMS, backups let you roll back instantly.

  • Security assurance: If your site is hacked during the transition, a clean backup helps restore it safely.

  • Peace of mind: Migration becomes less stressful when you know you can restore everything at any moment.

What you need to back up

  1. Website files

    • HTML, CSS, and JavaScript files.

    • CMS directories like WordPress’s wp-content folder.

    • Media uploads, themes, and plugins.
      Use an FTP client (FileZilla, Cyberduck) or your hosting cPanel’s File Manager to download all files. Compress them into a ZIP archive for easy upload to the new server.

  2. Databases

    • Export your MySQL or MariaDB database using phpMyAdmin or command line tools.

    • For WordPress, this means saving your posts, users, comments, and settings.

    • Always check the SQL file for completeness—sometimes large exports can be truncated.

  3. Email accounts
    If your hosting provider manages your emails, make sure you copy them. Options include:

    • Downloading via IMAP to a mail client like Outlook/Thunderbird.

    • Using migration tools provided by your host.
      Neglecting email migration often leads to lost messages and disrupted communication.

  4. SSL certificates
    Websites running on HTTPS need SSL certificates reinstalled on the new server. Depending on your provider, you may:

    • Export and reinstall the same certificate.

    • Or request a re-issue.
      Without SSL, your website will show browser security warnings after migration.

  5. DNS and configuration files
    Don’t forget .htaccess, cron jobs, robots.txt, and sitemap.xml. These small files play a big role in SEO and website functionality.

How to store backups safely

  • Keep at least two copies: one on your computer and one in cloud storage (Google Drive, Dropbox, or dedicated backup services).

  • Encrypt sensitive data (like user details and payment info).

  • Test your backups by restoring them in a local or staging environment before the actual migration.

Pro tip

Many hosts now offer one-click backups or automated daily snapshots. Even if your current host provides this, create a manual backup yourself. Having independent control ensures you’re not locked into their system.

In short: a proper backup is your insurance policy. You may never need it, but if migration fails, it will save your business, your SEO rankings, and your sanity.

Choose your new host wisely

Migrating a website isn’t just about moving files from Point A to Point B—it’s about choosing a hosting provider that will support your site’s long-term success. The host you pick determines how fast your website loads, how secure it is, and how well it handles traffic spikes. Switching hosts is a chance to upgrade—not just relocate.

What to look for in a new hosting provider

  1. Reliability and uptime
    Downtime is the very problem you’re trying to avoid. Look for providers that guarantee 99.9% uptime or better. Check independent reviews, monitoring reports, and customer feedback before committing.

  2. Speed and performance
    In 2025, speed is non-negotiable. Your host should offer:

    • SSD or NVMe storage for ultra-fast data access.

    • Built-in CDN (Content Delivery Network) support.

    • Optimized server configurations for WordPress, WooCommerce, or other CMSs.
      Faster servers mean better user experience and higher Google rankings.

  3. Scalability
    Can your hosting grow with your business? If you expect traffic surges, make sure your host offers easy upgrades—moving from shared hosting to VPS or cloud hosting should be seamless.

  4. Customer support
    When something goes wrong during migration, you need instant help. Choose a provider with 24/7 live chat or phone support. Test their support responsiveness before signing up—slow responses now mean slower fixes later.

  5. Migration assistance
    Many hosting providers now offer free professional migration. Their technicians move your files, databases, and email accounts for you, drastically reducing the risk of errors. If you’re not confident in doing it yourself, this is a huge advantage.

  6. Security features
    Look for features such as:

    • Free SSL certificates.

    • Automated backups.

    • Malware scanning and DDoS protection.

    • Firewalls and two-factor authentication for account security.

  7. Value for money
    Don’t just chase the cheapest deal. Compare features like bandwidth, storage, free domain offers, and renewal prices. Many hosts advertise low intro rates but have high renewal fees—always read the fine print.

Hosting types to consider in 2025

  • Shared Hosting: Budget-friendly, but best only for small, low-traffic sites.

  • VPS Hosting: Offers dedicated resources and flexibility at mid-range cost.

  • Managed WordPress Hosting: Optimized performance and updates for WordPress sites.

  • Cloud Hosting: Highly scalable and reliable, perfect for growing businesses.

  • Dedicated Hosting: Premium choice for enterprise websites needing maximum control.

Pro tip

Check whether your new host has data centers close to your target audience. If most of your visitors are in the U.S., hosting your site in a European server may slow down performance. Local or region-based hosting reduces latency and improves load times.\

The steps for a smooth migration

Now that you’ve prepared your site, created backups, and selected a new host, it’s time for the most critical stage in how to switch hosting without downtime: the actual migration. Done right, these steps will move your entire website without downtime.

Step 1: Transfer your files

Your website files are the foundation of your site—HTML, CSS, PHP scripts, images, themes, and plugins. Here’s how to move them safely:

  • Use FTP/SFTP: Connect to your old host and download all files to your local computer using an FTP client like FileZilla. Then upload them to your new host.

  • Use cPanel File Manager: If both hosts offer cPanel, you can compress your files into a .zip, download them, and re-upload them to the new server for faster transfer.

  • Check hidden files: Don’t forget .htaccess and other configuration files—they’re easy to overlook but essential for redirects and permissions.

Pro tip: Maintain the same folder structure (e.g., public_html or www) to avoid broken links or missing files.

Step 2: Migrate your databases

For dynamic websites (WordPress, Joomla, Magento, etc.), databases are the heart of your site. Without them, your site won’t function.

  • Export database: In your old hosting panel, open phpMyAdmin and export your database as an .sql file.

  • Create a new database: On your new host, create a new database, username, and password.

  • Import database: Use phpMyAdmin on the new host to import the .sql file.

  • Update config file: Edit your CMS configuration file (e.g., wp-config.php in WordPress) with the new database details.

Pro tip: Watch for database prefix changes (wp_ vs custom_)—mismatches can cause errors.

Step 3: Additional configurations

After files and databases are in place, there are smaller but equally important adjustments:

  • SSL certificate: Reinstall or re-issue your SSL certificate to maintain HTTPS. Many hosts now provide free Let’s Encrypt SSLs.

  • File permissions: Ensure correct read/write permissions for files and folders to avoid security holes.

  • Email accounts: Recreate email accounts associated with your domain in the new hosting panel.

  • Cron jobs & redirects: Re-add scheduled tasks and verify .htaccess rules work as expected.

Step 4: Update DNS settings

DNS (Domain Name System) is what connects your domain name to your hosting server. Handling this properly ensures zero downtime.

  • Lower TTL before migration: As mentioned earlier, set TTL to around 300 seconds (5 minutes) 24–48 hours before migration.

  • Update nameservers: Log into your domain registrar (e.g., GoDaddy, Namecheap) and update nameservers to those provided by your new host.

  • Allow propagation: DNS propagation can take a few hours to 48 hours worldwide, but with low TTL, changes are reflected faster.

  • Test during propagation: Access your site using your computer’s hosts file or the temporary URL provided by your new host to confirm it’s working correctly.

Pro tip: Don’t cancel your old hosting plan until propagation is fully complete and you’ve confirmed your new site works on all devices.

Step 5: Test everything

Once DNS is pointing to your new server, it’s time to test thoroughly:

  • Check homepage and internal pages.

  • Verify forms, checkout processes, and interactive features.

  • Test SSL/HTTPS redirect.

  • Ensure images, CSS, and JavaScript load correctly.

  • Run a speed test to confirm performance.

By following these steps carefully, you ensure your site not only migrates smoothly but also continues running without interruption—your visitors won’t even notice you’ve switched hosts.

Common mistakes to avoid

Even with a clear migration plan for how to switch hosting without downtime, many website owners stumble over avoidable mistakes. These errors often lead to unnecessary downtime, broken websites, or lost SEO rankings. Knowing what to watch out for can save you hours of troubleshooting and weeks of lost traffic.

1. Skipping backups

The single biggest mistake is assuming nothing will go wrong. Without a backup, one small error—like an incomplete file transfer—can wipe out your entire website. Always keep at least two backup copies: one local and one on cloud storage.

2. Ignoring version compatibility

Your site may work perfectly on the old host but fail on the new one if there’s a mismatch in software versions. For example:

  • WordPress plugins that require PHP 8.2 may break on a server running PHP 7.4.

  • Databases built on MariaDB 10.6 may behave differently on MySQL 5.7.
    Always check compatibility in advance.

3. Not testing before DNS switch

Many people update DNS immediately after uploading files, without testing. The result? Visitors see a broken website while you scramble to fix it. Always test your site on the new host using:

  • The temporary URL provided by your host, or

  • Your computer’s hosts file to map your domain to the new server’s IP.

4. Cancelling old hosting too early

Eager to save money, some users cancel their old hosting as soon as they switch DNS. But DNS propagation can take up to 48 hours globally. During this time, some visitors may still be directed to the old server. Cancel only after full propagation is confirmed.

5. Overlooking SEO elements

If your migration causes broken links or missing files, search engines may penalize you. Common SEO issues include:

  • Forgetting to move robots.txt or sitemap.xml.

  • Not preserving URL structures (leading to 404 errors).

  • Neglecting 301 redirects for changed URLs.

6. Failing to migrate email accounts

If your email is tied to your hosting provider, forgetting to migrate email accounts can disrupt business communication. Clients sending messages during propagation may experience delivery failures.

7. Not monitoring after migration

Migration isn’t over once DNS updates. You need to monitor your site for at least a week. Use tools like:

  • Google Search Console to check crawl errors.

  • Uptime monitoring tools (e.g., UptimeRobot, Pingdom).

  • Analytics reports to ensure traffic flows normally.

When to let your hosting handle it?

Not every website owner needs to go through the technical hassle of migration. While it’s empowering to manage everything yourself, sometimes the smartest decision is to let your hosting provider handle the migration for you.

When should you hand it over?

  1. Mission-critical websites
    If your site generates significant revenue (e.g., ecommerce stores, SaaS apps, or client portals), the cost of downtime is far too high to risk. A professional migration team will ensure your site transitions without glitches.

  2. Lack of technical expertise
    Not everyone is comfortable dealing with FTP, databases, and DNS settings. One misstep can break your site or cause extended downtime. In these cases, using your host’s migration service provides peace of mind.

  3. Complex setups
    Websites with multiple databases, advanced caching systems, or custom-coded scripts are harder to move. Professional teams can replicate server environments and configurations accurately.

  4. Large websites with heavy data
    Moving a site with gigabytes of media files, customer records, or blog posts is tricky. Hosting companies often have special tools that transfer large data sets much faster and more securely than manual methods.

  5. Email migration challenges
    If you have dozens of company email accounts tied to your old host, migrating them manually can be overwhelming. Hosting support teams can migrate emails seamlessly, avoiding missed communication.

Benefits of letting your host migrate

  • Expertise: Hosting providers do migrations daily. Their teams know how to spot and prevent issues before they occur.

  • Time-saving: Instead of spending hours learning the process, you can focus on your business.

  • Minimal risk: With professional help, the chance of data loss or misconfiguration drops significantly.

  • Often free: Many top hosts in 2025 (like SiteGround, A2 Hosting, and WPX) now include free migration services with new plans.

A little planning saves a lot of fixing

When it comes to website migration, the old saying holds true: an ounce of prevention is worth a pound of cure. Most migration disasters don’t happen because the process is impossible—they happen because of poor planning.

Why planning is critical

  • Downtime prevention: Careful preparation ensures visitors never see an error page.

  • SEO preservation: Migrating without losing rankings requires maintaining URL structures, redirects, and sitemaps.

  • Stress reduction: A clear roadmap removes the guesswork, so you don’t scramble mid-migration.

The payoff of proper planning

With a little foresight—like scheduling migration during off-peak hours, testing on the new host before going live, and lowering DNS TTL—you save yourself from endless troubleshooting later. Instead of fixing broken links or panicking over lost emails, you’ll have a seamless, invisible transition.

Final thoughts

Knowing how to switch hosting without downtime in 2025 means this process is no longer a high-risk move. Done correctly, it’s an opportunity to improve speed, reliability, and scalability. Whether you migrate manually or let your hosting provider handle it, the key to success is preparation, backup, and testing.

Conclusion

Mastering how to switch hosting without downtime isn’t just possible—it’s achievable with the right approach. By auditing your site, creating full backups, choosing a reliable host, and carefully managing DNS, you can migrate smoothly without losing visitors or rankings.

Don’t think of hosting migration as a burden. Think of it as a fresh start—a chance to strengthen your website’s foundation, improve performance, and scale with confidence.

???? Ready to switch hosts? Start planning your migration today. With the right preparation and a step-by-step strategy, you’ll move your site seamlessly—and your visitors won’t even notice the change.

FAQs

Q1. How do I switch hosting without downtime?
By preparing in advance, creating backups, uploading files and databases to the new host, testing on a temporary URL, and only updating DNS once everything is verified, you can switch hosts without downtime.

Q2. How long does it take to migrate a website to a new host?
The migration process itself can take just a few hours. However, DNS propagation may take 24–48 hours globally. With TTL lowered before migration, changes usually update much faster.

Q3. Will switching hosts affect my SEO rankings?
Not if done correctly. Maintain the same URL structure, move sitemaps and robots.txt, and set proper redirects. Done carefully, your rankings will remain intact.

Q4. Can I migrate my website myself, or do I need expert help?
You can migrate a website yourself if you’re comfortable with FTP, databases, and DNS. But for complex or business-critical sites, it’s often best to let your host handle it professionally.

Q5. What is the biggest risk during hosting migration?
The two biggest risks are data loss and downtime. Both can be avoided by creating full backups, testing the site before DNS updates, and keeping the old hosting active until migration is fully complete.

Q6. Do I need to migrate email accounts too?
Yes, if your email accounts are hosted with your old provider. Failing to migrate them can cause lost emails. Many hosts provide free tools or support for email migration.

Q7. Can I move from shared hosting to cloud or VPS hosting without downtime?
Yes. The process is the same—backup, transfer, test, and switch DNS. In fact, upgrading to VPS or cloud often improves performance and scalability.

Q8. Should I migrate my site during the day or night?
Choose off-peak hours when your site has the lowest traffic. This minimizes disruption if any issues occur during testing.

Best Managed Hosting for Agency Clients: A Complete 2026 Guide for Digital Agencies

0

Last Updated on April 6, 2026

Running a digital agency means juggling multiple client websites, deadlines, and deliverables—all while maintaining flawless uptime and performance. In this environment, best managed hosting for agency clients isn’t just a convenience—it’s a strategic advantage. The right hosting partner handles server management, security, backups, and updates, freeing agencies to focus on what they do best: creativity, growth, and client satisfaction.

This article explores the best managed hosting for agency clients, featuring platforms that go beyond basic hosting—platforms that go beyond basic hosting to offer scalability, collaboration tools, white-label management, and dedicated support. Whether you’re managing 10 client sites or 100, choosing a hosting provider that can grow with your agency and protect your reputation is critical to long-term success.

Why Do You Need the Best Managed Hosting for Agency Clients?

Running a digital agency is not just about building beautiful websites—it’s about delivering reliability, speed, and peace of mind for your clients. That’s why traditional hosting solutions often fall short. Agencies require hosting plans designed with multi-client management, scalability, and dedicated support in mind.

Let’s break down the main reasons why an agency web hosting plan is a must-have:

A Single Provider for All Clients

Handling multiple clients with different hosting providers is chaotic. You have to juggle multiple logins, invoices, and support teams, which eats away at productivity. An agency-focused hosting plan simplifies this by centralizing all websites under one dashboard.

  • You can manage client accounts easily.

  • Billing and renewals are streamlined.

  • Troubleshooting is faster because everything is within one hosting ecosystem.

This not only saves your team time but also allows you to offer a more professional, branded experience to clients.

Cost Efficiency

Buying individual hosting accounts for each client quickly becomes expensive. With an agency plan, you benefit from bulk pricing or reseller discounts. Instead of paying for 20 separate hosting accounts, you can host all 20 client websites under one plan at a fraction of the cost.

  • Lower operating costs mean higher profit margins.

  • You can offer clients competitive pricing while still making a healthy return.

  • Many best managed hosting for agency clients providers include white-label options, letting you resell hosting under your own brand.

For agencies scaling fast, this cost efficiency is a game-changer.

Priority Support

When you’re an agency, downtime doesn’t just hurt you—it hurts your clients. That’s why most agency hosting providers offer priority support. This means your tickets and live chat requests jump ahead in the queue, giving you faster resolution times.

  • No waiting for hours when a client site is down.

  • Direct access to specialized technical teams.

  • 24/7 live chat, email, and sometimes phone support.

With priority support, you protect your reputation and keep clients happy.

Managed Services

Maintaining multiple websites involves constant updates, backups, and security patches. Agency hosting often includes fully managed services, meaning the hosting provider handles technical tasks such as:

  • Automatic WordPress updates.

  • Daily backups with one-click restore.

  • Malware scanning and firewall protection.

  • Server monitoring and performance optimization.

This frees your team from time-consuming technical work, allowing you to focus on growth, design, marketing, and client acquisition.

How to Choose a Web Host

Not all best managed hosting for agency clients providers are built the same. Some excel in speed, others in customer support, while a few shine in scalability and managed solutions. For agencies, the right choice means balancing all these factors to ensure client satisfaction and long-term growth. Here’s a complete breakdown of what to look for when choosing a web host:

Check Hosts’ Speed and Performance

Speed isn’t just a luxury—it’s a ranking factor. Search engines like Google prioritize fast-loading websites, and users abandon slow pages in seconds. That means your clients lose both traffic and revenue if their websites are sluggish.

  • Look for hosts with SSD/NVMe storage for faster data retrieval.

  • Choose providers that integrate CDNs (Content Delivery Networks) to serve global audiences quickly.

  • Ensure caching solutions (like object caching and full-page caching) are built into the hosting plan.

A host that invests in performance optimization saves your agency from angry client calls about “slow websites.”

Look for Scalability

Your clients’ businesses will grow—and so will their traffic. The last thing you want is to migrate websites every time a client outgrows a plan. Scalable hosting allows you to upgrade resources seamlessly as needed.

  • Check if the provider offers easy upgrades from shared hosting to VPS, cloud, or dedicated servers.

  • Look for one-click scalability, especially if you manage e-commerce or seasonal businesses.

Scalability ensures you never say “no” to a client’s growth ambitions.

Evaluate Their Reliability

Reliability boils down to one thing: uptime guarantees. If a client’s site goes down, even for a few minutes, it damages trust and can cost them sales.

  • Look for hosts with at least 99.9% uptime guarantees.

  • Review independent uptime monitoring reports before committing.

  • Providers with SLA-backed guarantees (Service Level Agreements) are more trustworthy.

Anything below 99.9% uptime is a red flag.

Gauge Their Security and Backup Solutions

Security is no longer optional—especially if your clients handle sensitive data. Agencies must ensure their host provides advanced security by default.

  • SSL certificates (free and automatic renewals).

  • Firewalls, malware scanning, and DDoS protection.

  • Daily or hourly backups with one-click restore options.

  • Options for two-factor authentication (2FA) and account-level security.

Without strong security, one breach can wipe out client trust and damage your agency’s reputation.

Rate Their Customer Support

The single biggest differentiator in web hosting is customer support. When something goes wrong, you need immediate help.

  • Ensure they offer 24/7 live chat, email, and phone support.

  • Test response times before committing—send a pre-sales chat to see how fast and knowledgeable they are.

  • Check reviews on platforms like G2 or Trustpilot for real customer experiences.

Great support transforms hosting from a vendor relationship into a true partnership.

Consider Your Budget

Hosting is an investment, but budgets still matter. Agencies need a balance between affordability and premium features.

  • Avoid ultra-cheap hosts—they often come with hidden costs (slow speeds, weak support, limited security).

  • Look for providers that offer agency/reseller pricing to maximize margins.

  • Prioritize value over the lowest price.

Remember, clients will gladly pay more for reliability if you deliver consistent results.

Verify Their Compliance

Depending on your clients’ industries, compliance may be essential. A healthcare client, for example, requires HIPAA-compliant hosting, while e-commerce sites may need PCI DSS compliance for secure transactions.

  • Ask providers about their compliance certifications.

  • Ensure GDPR compliance for handling EU customer data.

  • For financial, legal, or medical clients, double-check regulatory support.

Compliance ensures you’re not only delivering websites but also protecting your clients legally.

Best Managed Hosting for Agency Clients (Top Providers in 2026)

Choosing the right web host can make or break your agency’s reputation. Clients expect their websites to be fast, secure, and always available. That means you need a hosting partner with top-tier infrastructure and 24/7 support with live chat. Below are the 7 best hosting providers for agencies in 2026:

1. Liquid Web

Liquid Web is a powerhouse in the hosting industry, built for businesses and agencies that demand premium solutions. Their Heroic Support® team is available 24/7 via live chat, phone, and tickets, and their specialists are known for quick resolutions.

  • Best For: Agencies with enterprise-level clients.

  • Key Features:

    • Managed VPS, dedicated, and cloud hosting.

    • 99.99% uptime guarantee.

    • Free migrations handled by experts.

    • Advanced DDoS protection and daily backups.

    • Customizable solutions for agencies.

If your agency handles large-scale clients with mission-critical websites, Liquid Web offers the reliability and support you need.

2. Cloudways

Cloudways simplifies cloud hosting by offering a managed platform on top of providers like AWS, Google Cloud, and DigitalOcean. Their 24/7 live chat support is one of the most responsive in the industry.

Cloudways

  • Best For: Agencies that want cloud flexibility without server management headaches.

  • Key Features:

    • Pay-as-you-go pricing with no contracts.

    • Vertical scaling with just one click.

    • Built-in caching and Cloudflare CDN.

    • Team collaboration features for agencies.

    • Free SSL and firewalls.

Cloudways is a smart choice for agencies looking for affordable, flexible hosting with cloud-level scalability.

3. SiteGround

SiteGround has built a reputation for excellent support, with 24/7 live chat and phone availability. It’s a favorite among WordPress developers and agencies because of its simplicity and reliable performance.

SiteGround

  • Best For: WordPress-focused agencies that need reliable hosting.

  • Key Features:

    • Powered by Google Cloud infrastructure.

    • Daily backups and advanced caching.

    • Free CDN and SSL certificates.

    • White-label hosting options for agencies.

    • AI-powered anti-bot system for security.

SiteGround balances affordability and performance, making it ideal for agencies managing small to mid-sized business websites.

4. WP Engine

WP Engine is a premium managed WordPress hosting provider, trusted by major brands worldwide. They provide 24/7 support with WordPress experts, ensuring fast problem resolution.

Wpengine

  • Best For: Agencies that specialize exclusively in WordPress projects.

  • Key Features:

    • Staging and development environments.

    • Genesis framework and StudioPress themes included.

    • Auto-updates for WordPress and plugins.

    • Enterprise-grade security with proactive threat detection.

    • Global data centers for faster delivery.

If your agency builds high-traffic WordPress sites, WP Engine ensures unmatched performance and reliability.

5. Kinsta

Kinsta is a modern, high-performance hosting platform powered by the Google Cloud premium tier network. Their 24/7 live chat support is staffed by WordPress experts only—no outsourced generalists.

  • Best For: Agencies that want scalability and enterprise-level performance.

  • Key Features:

    • Auto-healing PHP technology for uptime.

    • Application and database hosting.

    • Multi-site support with centralized management.

    • Free premium migrations.

    • Advanced analytics dashboard.

Kinsta is built for agencies that need speed, scale, and support at a premium level.

6. A2 Hosting

A2 Hosting is known for its Turbo servers, which claim to deliver up to 20x faster performance. Their “Guru Crew Support” is available 24/7 via live chat, email, and phone.

  • Best For: Agencies seeking a budget-friendly yet powerful hosting solution.

  • Key Features:

    • Free site migrations.

    • Developer-friendly tools (PHP, MySQL, Node.js, etc.).

    • Anytime money-back guarantee.

    • Turbo SSD servers with built-in caching.

    • Strong uptime and DDoS protection.

If your agency is growing but still budget-conscious, A2 Hosting offers high value without compromising support quality.

7. InMotion Hosting

InMotion Hosting is particularly popular among agencies for its reseller and white-label hosting plans. Their 24/7 support team is well-rated for responsiveness.

  • Best For: Agencies looking to resell hosting under their own brand.

  • Key Features:

    • Free SSD storage and unlimited bandwidth.

    • White-label reseller hosting.

    • DDoS protection and malware defense.

    • Website builder tools included.

    • U.S.-based support team with live chat.

For agencies interested in adding hosting as a service, InMotion makes it easy to manage clients and expand your offerings.

Getting Started with Best Hosting for Agencies in 2026

Switching to an agency-focused hosting provider may feel like a big task, but with the right process, you can transition smoothly while minimizing downtime. Here’s a practical step-by-step roadmap to help agencies get started in 2026:

1. Audit Your Current Hosting Setup

Before moving to a new provider, take stock of your existing environment:

  • List all client websites you manage.

  • Identify current pain points (slow performance, poor support, downtime, limited scalability).

  • Review how much you’re currently spending versus what value you’re receiving.

This baseline will highlight why you need a change and help you choose the right hosting plan.

2. Define Your Agency Requirements

Not every agency has the same needs. For example, a WordPress-only agency may prioritize managed WordPress hosting (like WP Engine or Kinsta), while a multi-platform agency may need cloud hosting (like Cloudways or Liquid Web).

Ask yourself:

  • Do you want reseller/white-label options to package hosting into your services?

  • Do your clients need enterprise-grade compliance (HIPAA, PCI DSS, GDPR)?

  • Are your projects traffic-heavy (e.g., e-commerce stores, SaaS platforms) that require scalability?

Clarifying requirements ensures you don’t overspend or underserve clients.

3. Test Customer Support in Advance

Since 24/7 live chat support is critical, test it before you commit:

  • Ask pre-sales questions and measure how fast and helpful the support team is.

  • Check if they resolve issues directly or just forward canned responses.

  • Look for providers where technical staff—not outsourced agents—answer your queries.

This gives you confidence that when emergencies arise, you’ll get the support you need.

4. Check Migration Assistance

Migrations can be stressful, especially when moving multiple client websites. Thankfully, the best agency-friendly providers offer free or assisted migrations.

  • Confirm how many sites they’ll move for free.

  • Ask about potential downtime during migration.

  • Ensure backup systems are in place before and after the switch.

Smooth migrations mean your clients won’t even notice the change.

5. Start Small, Then Scale

The smartest approach is to start with a manageable plan and upgrade as your agency grows.

  • Begin with hosting a few client sites to test performance and support.

  • As you gain confidence, migrate more clients.

  • Scale into higher tiers (VPS, cloud, or dedicated) when demand increases.

This gradual rollout reduces risks and helps you build client trust while adapting to the new system.

6. Add Hosting to Your Agency Services

Many providers like InMotion and SiteGround offer white-label or reseller hosting, meaning you can sell hosting directly under your agency’s brand. This creates:

  • An additional revenue stream.

  • A seamless, all-in-one solution for clients.

  • Stronger long-term client relationships, since hosting is bundled with design, SEO, or development.

Agencies in 2026 that embrace hosting as part of their core service package will enjoy higher client retention and recurring income.

Conclusion

For agencies in 2026, choosing the right hosting provider is more than just a technical decision — it’s a strategic business move. The wrong host can lead to slow websites, costly downtime, and frustrated clients, while the right one builds trust, improves performance, and strengthens your reputation.

The key is finding the best managed hosting for agency clients that combines high-performance infrastructure with 24/7 support and live chat. This ensures that no matter when a problem arises, you have experts available to solve it instantly.

If you need enterprise-grade reliability, providers like Liquid Web and Kinsta are excellent. If you want cloud flexibility, Cloudways is a top contender. For WordPress-focused agencies, WP Engine and SiteGround provide unmatched ease of use and strong support. And for those looking to resell hosting as a service, InMotion Hosting and A2 Hosting offer cost-effective and scalable solutions.

At the end of the day, the right hosting isn’t just about uptime — it’s about giving your clients the confidence that their digital presence is in safe hands. Agencies that invest in the best hosting providers now will position themselves as trusted, growth-ready partners for years to come.

???? Next Step: Choose one of the recommended providers above, start with a manageable plan, and scale as your agency grows. Your clients will thank you — and your agency will enjoy smoother operations, stronger profits, and long-term success.

FAQs

Q1: Why is 24/7 support with live chat so important for agencies?
Because websites don’t sleep. Issues like downtime, security threats, or sudden traffic spikes can happen anytime. With 24/7 live chat, you can get immediate help without waiting for email tickets.

Q2: What makes agency hosting different from regular hosting?
Agency hosting is designed to manage multiple client websites under one dashboard, often with features like white-label branding, reseller options, and bulk pricing.

Q3: Which hosting is best for WordPress agencies?
For WordPress-specific agencies, WP Engine, Kinsta, and SiteGround are among the best because they’re optimized for WordPress and backed by WordPress experts.

Q4: Can I resell hosting services to my clients?
Yes. Many providers like InMotion Hosting and A2 Hosting offer reseller hosting plans, allowing you to package hosting under your agency’s brand.

Q5: Is managed hosting worth it for agencies?
Absolutely. With managed hosting, the provider takes care of updates, backups, security, and performance optimization — freeing your agency to focus on growth, design, and client work.

Q6: How much should agencies budget for reliable hosting?
It depends on scale. Smaller agencies may spend $30–$100 per month, while larger agencies managing dozens of clients might invest $200–$500+ monthly. The investment pays off in client trust and reduced support headaches.

Q7: Can I migrate my clients’ sites easily to a new host?
Yes. Most top hosting providers offer free migration services or guided migration tools to ensure a smooth, downtime-free transfer.

Best Hosting with SSD Storage and NVMe Drives – 2026 Edition

0

Last Updated on April 6, 2026

What’s Changed in Hosting Storage Technology (and Finding the Best Hosting with SSD Storage and NVMe Drives)

Web hosting — especially the Best Hosting with SSD Storage and NVMe Drives — used to rely on HDDs and early-generation SSDs, but now performance has evolved dramatically. Nowadays, the performance landscape has shifted dramatically.
Hosts increasingly advertise NVMe (Non-Volatile Memory Express) drives — which deliver far faster read/write speeds and input/output operations per second (IOPS) compared to older SSDs.
For example:

  • NVMe hosting is listed as a key criteria in “Top 10 NVMe Hosting Providers You Should Test in 2026”.
  • Another review signals that SSD hosting (including NVMe) is becoming essential for performance.

Why does this matter for your website?

From first principles: your site’s speed, reliability and scalability are heavily influenced by the underlying hardware and I/O performance. If your host uses outdated drives (HDD or slow SSD), you face:

  • Slower page loads (especially for dynamic content and database queries)
  • Higher latency, which hurts user experience and SEO
  • Bottlenecks as traffic grows or as your site uses more complex featuresThat’s why choosing the Best Hosting with SSD Storage and NVMe Drives can dramatically cut load times and prevent scalability issues.

In contrast, a host with genuine NVMe storage gives you:

  • Faster response times for your database and file system
  • Better performance under load (more visitors or larger files)
  • Scalability headroom so you’re less likely to need a move in the short term

Who Benefits Most from the Best Hosting with SSD Storage and NVMe Drives?

If you run a simple brochure-site with a handful of static pages, decent shared SSD hosting might suffice. But if you fit any of these, NVMe becomes a strong advantage:

  • You host a dynamic website (CMS like WordPress) with frequent database operations
  • You serve a large volume of files — images, videos, downloadable assets
  • You expect higher traffic or spikes (seasonal, viral, promotional)
  • You care about SEO and user experience — every millisecond matters

What key terms to watch when evaluating hosts

When browsing hosting plans, especially in 2026, be alert for the following:

  • “NVMe SSD” — means Non-Volatile Memory Express storage (faster than standard SSD)
  • Storage size vs resource allocation — a plan might list “NVMe 50 GB” but if RAM/CPU is weak, you’ll still face slowdowns
  • Unmetered or generous bandwidth — because if you have fast storage but traffic/transfer is constrained, bottleneck shifts elsewhere
  • IOPS / disk performance mention — some reviews highlight the importance of I/O performance (not just raw storage size) for modern sites.
  • Transparency on hardware — ensure the host is actually using NVMe and not simply “SSD branded” but slower tech hidden beneath

How to Evaluate Hosting Plans with SSD/NVMe Storage

1. Look Beyond the “SSD” or “NVMe” Label

Just because a plan says “SSD” or “NVMe” does not guarantee high performance — only the Best Hosting with SSD Storage and NVMe Drives truly delivers consistent speed. The underlying protocol, resource allocation, and how the host implements the storage matter greatly.

  • NVMe (Non-Volatile Memory Express) is a storage protocol optimized for flash SSDs over PCIe that offers significantly faster data transfer speeds and lower latency compared to older SSDs.

  • In contrast, a generic SSD (especially SATA-based) might still be slow under heavy load or many concurrent users.

  • Hosts using NVMe often highlight improved performance (e.g., lower latency, higher IOPS) especially for high-traffic, media-rich, or dynamic sites.

Therefore: When evaluating, check for phrases like “NVMe SSD”, “PCIe NVMe”, “dedicated NVMe storage”, or “NVMe cloud servers”. Also check whether the SSD is shared among many clients or you have dedicated I/O allotment.

2. Match the Specs to Your Website’s Load & Usage

Every website has its own demands. To choose the right plan, do a quick audit of your needs:

  • How many visitors/month do you expect (and where do they come from geographically)?

  • How many files, images, or other media assets will you store and serve?

  • How dynamic is the site (CMS database queries, interactive maps, etc)?

  • Will you scale up soon (e.g., add more features, more traffic, bigger media)?

Once you know that, compare hosting plans based on key spec categories:

SpecMinimum to CheckWhy It Matters
Storage type & sizeBest Hosting with SSD Storage and NVMe Drives”, “100 GB+” — indicates real NVMe performance and future-proof setup.Faster storage means faster load for files & database.
Bandwidth / data transferUnmetered or large transfer (≥100 GB+)Media-rich sites consume bandwidth quickly.
CPU & RAMMulti-core, ≥2-4 GB RAM for moderate sitesEven with fast storage, weak CPU/RAM bottlenecks slow the site.
I/O / disk performanceIf disclosed: IOPS, latency numbersNVMe excels here; ensures responsiveness under load.
Server location / global reachData centres near your audience + CDNFaster access for visitors worldwide.
Scalability & upgrade pathAbility to scale storage, RAM, CPU easilyYour needs will grow — you don’t want to migrate again soon.

3. Understand the Pricing & Renewal Terms

Many hosts offer introductory pricing that looks very good — but compare the renewal price and check if the “NVMe” label carries through.

  • Some plans say “SSD/NVMe” but the entry tier might use slower infrastructure when traffic loads up.

  • Ensure what “unlimited” actually means: many unlimited plans have “fair use” clauses or shared resource limits — safe for small sites, risky for scale.

  • Check how much you’ll pay after the first billing term, and whether adding more storage or bandwidth increases cost significantly.

4. Real-World Performance Evidence

Look beyond spec sheets — the best way to evaluate is real-world performance metrics and third-party reviews.

  • Look at reviews of “NVMe hosting” — many mention significantly faster page loads, especially under traffic spikes.

  • Even if a host claims NVMe, check whether their data centre, CDN integration, and caching are equally strong.

  • Check uptime records and load patterns — some sites published lists of “Top NVMe hosting providers in 2026” based on actual speed and reliability tests.

5. Avoid Key Mistakes & Blind Spots

Even with NVMe, you can still pick a weak plan by overlooking these:

  • Misleading storage size: 25 GB NVMe might sound good but insufficient if you host large media.

  • Shared I/O resources: Storage is NVMe but you share the same I/O bus with many clients — performance suffers during peaks.

  • Weak network / no CDN: Fast storage helps, but if your network or delivery path is slow, your visitors still wait.

  • Poor support or location: Fast hardware but forced through one congested data centre may tilt performance.

  • Upgrade ceiling issues: If you can’t scale easily as you grow, you’ll end up migrating again.

Essential Features in SSD & NVMe Hosting (2026)

1. True NVMe Architecture — Not “NVMe-Labeled SSDs”

Some budget hosts advertise “NVMe SSD storage” but actually use hybrid arrays where only a portion runs on NVMe and the rest on SATA SSD.
Before you buy, confirm:

  • Storage Bus: PCIe 4.0 or higher (not SATA III).

  • NVMe Controller: Enterprise-grade NVMe interface with full-queue depth (not just cached SSD).

  • Dedicated I/O allocation: so other tenants don’t slow your disk access.

Why this matters: A real NVMe host can handle 600k + IOPS — about 10 × faster than SATA SSD — which means WordPress queries, image calls, and database lookups execute in milliseconds, not seconds.

2. Caching Stack Integration

Speed depends not only on storage but on how data is cached and served. Look for hosts that provide:

  • LiteSpeed Cache or NGINX FastCGI Cache — server-level acceleration.

  • Object Cache (Redis/Memcached) — keeps database queries in memory.

  • HTTP/3 (QUIC) support — lowers latency, especially for mobile users.

  • Full-page caching with rules for logged-in and anonymous visitors.

A good NVMe plan couples these caches with its disk speed to deliver sub-1-second loads even under traffic surges.

3. Content Delivery Network (CDN)

No matter how fast your storage, physical distance still slows things down.
Choose hosting that bundles or integrates easily with:

  • Cloudflare CDN (Enterprise or Pro)

  • BunnyCDN or KeyCDN for global static-file distribution

  • Image optimization edge caching for large media libraries

This ensures your NVMe speed is felt globally — not just near your data center.

4. Backup & Snapshot Automation

NVMe drives are fast but not immune to data loss.
A 2026-ready host should offer:

  • Daily automated backups (kept 7–30 days).

  • Instant snapshots before plugin/theme updates.

  • Off-site backup integration (Google Drive, S3, Dropbox).

Tip: NVMe’s speed makes snapshot creation nearly instant — use that to your advantage before major site changes.

5. Scalable Resource Pools

One reason to choose NVMe hosting is scalability.
You’ll want:

  • Adjustable CPU/RAM from control panel.

  • Ability to scale storage without downtime.

  • Easy migration between shared → VPS → cloud within same ecosystem.

This flexibility ensures you won’t outgrow your infrastructure in six months.

6. Security Layer Optimized for Speed

Modern NVMe hosts implement security at the edge to avoid CPU drag:

  • Hardware-level firewalls (WAF)

  • Realtime malware scanning

  • Two-factor authentication

  • Bot & DDoS protection integrated with CDN

These prevent slowdowns caused by malicious traffic or brute-force attempts.

7. Developer & Performance Tools

Even non-developers benefit from a robust dashboard:

  • SSH/SFTP access

  • Git integration

  • Staging environments

  • One-click cloning for test sites

  • Uptime monitoring and analytics

The faster your workflow, the faster you can optimize the site further — matching NVMe’s speed on the backend with your development speed.

8. Transparent Resource Monitoring

Hosts that include NVMe often also provide performance dashboards showing CPU, memory, and I/O usage.
Use this to identify bottlenecks early — for instance, if CPU throttling (not disk speed) is your limiting factor.

9. Data-Center Proximity & Redundancy

Pick a provider offering multiple NVMe-equipped data centers in regions matching your audience.
Global redundancy plus NVMe replication means near-instant failover in case of hardware issues.

10. SLA & Uptime Commitment

Finally, NVMe hosts should guarantee 99.99 % uptime with an SLA (Service Level Agreement).
A high-performance drive means little if your site still goes down weekly.

Top SSD/NVMe Hosting Providers of 2026

1. Hostinger – Best Value NVMe Hosting

Among the Best Hosting with SSD Storage and NVMe Drives in 2026, Hostinger consistently ranks high for balance of cost and performance. According to comparative reviews, Hostinger is repeatedly cited as a top provider for NVMe hosting thanks to its price-performance balance.
Strengths:

  • Plans clearly list NVMe storage (e.g., 50 GB NVMe) for entry/medium tiers.
  • Strong upgrade path from shared → VPS → cloud.
  • Global data centre presence, decent support.
    Weaknesses:
  • Entry-level NVMe plans may still have limited CPU/RAM — so if you run heavy applications the “NVMe” alone may not suffice.
  • Renewal pricing and resource ceilings should be checked.

Verdict: Great choice if you want NVMe hosting without a premium cost — especially for blogs, portfolios, small business sites. If you grow into high-traffic or resource-intensive territory, you’ll need to upgrade.

2. Bluehost – Trusted Brand with NVMe Options

Bluehost

Bluehost is highlighted in reviews as offering NVMe storage in their hosting plans, including shared, VPS and dedicated tiers.
Strengths:

  • Officially recommended by WordPress.org, good for WP-users. Clear labelling of “NVMe 4, NVMe 8” etc for VPS plans.
    Weaknesses:
  • For smaller plans storage may still be limited (e.g., 10 GB NVMe mentioned) for lightweight sites.
  • Shared account performance may still depend on other factors (CPU/RAM) beyond storage type.

Verdict: Strong option if you want a mainstream brand, good WordPress support and NVMe capability. For large media sites or heavy dynamic apps you may need higher tiers.

3. HostArmada & Verpex – NVMe Specialists

In a review of “Best NVMe Hosting Providers of 2026”, HostArmada and Verpex are both mentioned for delivering high-performance NVMe storage with robust features.
Strengths:

  • Focused on NVMe storage across shared, reseller, VPS tiers.
  • Daily backups, strong uptime claims, performance oriented.
    Weaknesses:
  • Possibly higher cost than basic SSD plans.
  • May require more technical fluency for best results (configuration, caching etc).

Verdict: Ideal for users who already expect medium to high traffic, or run resource-heavy sites (media, e-commerce, apps) and want NVMe performance from the start.

4. Other Notable Mentions

  • The service directory “Web Hosting Services with SSD NVMe” lists many providers across 200+ companies, showing this is now a mainstream offering.
  • When selecting any host, ensure the storage medium is truly NVMe, not just “SSD” labelled but slower hardware underneath.

Decision Guide: Which Provider for Which Use Case

Use CaseRecommended ProviderWhy
Budget NVMe hosting for small/medium siteHostingerBest cost-to-performance with NVMe support
WordPress, trusted brand, moderate growthBluehostGood WP integration + NVMe options
High-performance / media-rich siteHostArmada / VerpexSpecialist NVMe, strong resources
Enterprise / very large trafficMay need dedicated NVMe + custom infrastructureCustom solution beyond basic shared/VPS

Pro Tip for Choosing Your Plan

  • Confirm the storage is NVMe (look for “NVMe SSD”, “PCIe NVMe”, etc).
  • Ask for or look up I/O / latency benchmarks if available (some review sites show faster load times with NVMe).
  • Compare CPU & RAM — NVMe storage helps only if other resources are adequate.
  • Check the upgrade path — ensure you can move to higher tiers as needed without painful migration.
  • Confirm renewal pricing and whether NVMe features persist at higher cost or downgrade after promo period.

Final Checklist & Decision Framework (2026 Edition)

Start With Your Use Case, Not the Buzzword

“NVMe” sounds impressive — but it must match your project scale.
Before you pick a plan, answer these:

  • Is your website static, or does it handle thousands of database queries (WordPress, WooCommerce, portfolio)?

  • Do you store large files — images, videos, maps, or backups?

  • Are your visitors global or local?

Your workload determines whether you need shared SSD, NVMe VPS, or cloud infrastructure.

✅ Rule of thumb:

Always buy one level higher than your current need if you plan to scale. A slightly over-provisioned NVMe plan costs less than a migration later.

Technical Minimums to Demand in 2026

CategoryMinimumRecommended (for performance-sensitive sites)
Storage TypeNVMe SSD (PCIe 3.0)NVMe 4.0 or 5.0 with dedicated I/O
CPU & RAM2 vCPU / 4 GB RAM4 vCPU / 8 GB RAM+
Bandwidth100 GB / month minUnmetered or ≥ 1 TB with CDN
Uptime SLA99.9 %99.99 % with status monitoring
PHP / HTTPPHP 8.2 +, HTTP/3Latest stable versions
BackupsWeeklyDaily + off-site snapshot
CDN & CachingOptionalBuilt-in + LiteSpeed / Redis
SSL / SecurityLet’s Encrypt + WAFEdge WAF + 2FA + bot protection

If a host hides these details, that’s a red flag — transparency defines reliability.

Long-Term Hosting Health Plan

Hosting is not “buy-and-forget.”
To keep performance high and prevent hidden costs:

Every Month

  • Benchmark page speed (GTmetrix, PageSpeed Insights).

  • Check uptime via UptimeRobot.

  • Clean unused media, plugins, and cache.

Every Quarter

  • Review storage and bandwidth usage; upgrade if > 80 % capacity.

  • Verify backup integrity (restore to a test subdomain).

  • Check CDN hit ratio and image optimization efficiency.

Every Year

  • Re-evaluate hosting pricing vs. performance.

  • Verify you’re still on NVMe infrastructure — hosts sometimes downgrade hardware silently.

  • Renew SSL, update PHP, and audit all plugins/themes.

Red Flags to Watch Before Buying

  1. “Unlimited SSD storage” claims — there’s always a hidden limit.

  2. No mention of PCIe or NVMe version — could be SATA SSD marketed as “NVMe-style.”

  3. Low CPU or RAM caps — NVMe speed wasted if compute power throttled.

  4. No off-site backups — one breach can erase everything.

  5. No scalability path — forces painful migrations when traffic grows.

If any two of these appear, skip that host.

Performance Optimization Pairings

To extract full speed from NVMe:

  • Use LiteSpeed Cache or WP Rocket for server-side caching.

  • Activate Cloudflare/BunnyCDN for global delivery.

  • Convert images to WebP/AVIF before upload.

  • Use a plugin like Perfmatters to delay JS and control lazy-loading.

  • Implement object caching (Redis/Memcached).

These tools ensure your hosting hardware’s power translates into real-world performance.

Cost vs. ROI: The Smart Approach

Premium NVMe hosting (like Verpex / Kinsta) may cost 2–3 × shared SSD plans — but load time improvements often raise conversions, reduce bounce rate, and improve Google ranking.

For a content or affiliate site:

Every 0.5 s faster page load can increase revenue 5–10 %.

So don’t treat hosting as a cost — treat it as the engine that drives ROI.

Quick Decision Matrix

NeedBest ChoiceRationale
Low-budget personal siteHostinger NVMe SharedCheapest entry to NVMe hardware
Mid-tier WP blog or small e-commerceBluehost VPS NVMeReliable brand + scalable
Heavy traffic / media siteHostArmada NVMe VPSPower + daily backups
Developer / cloud scalingVerpex Cloud NVMeFlexible resource allocation
Managed WordPress luxuryKinsta / WPX NVMe Edge1-click scaling, global CDN

Final Takeaway

In 2026, the Best Hosting with SSD Storage and NVMe Drives is no longer a luxury — it’s the baseline requirement for serious websites that care about speed, uptime, and SEO.
To summarize:

  • Confirm true NVMe hardware (PCIe 4.0 +).

  • Check total resource balance — CPU, RAM, bandwidth, caching.

  • Demand automated backups + CDN integration.

  • Monitor performance monthly and upgrade early.

Choose a host that’s transparent, scalable, and genuinely invested in infrastructure — not just marketing buzzwords.

Do this right, and your site will load blazingly fast, stay reliable under load, and rank higher — turning your hosting into a long-term competitive advantage.

Best Hosting Plan for a Travel Blog with Heavy Images and Map Features

0

The Real Challenge Behind Finding the Best Hosting Plan for a Travel Blog

A travel blog isn’t just another WordPress site — especially when you’re searching for the Best Hosting Plan for a Travel Blog that can handle visuals and maps.
It’s a media-heavy platform that handles hundreds of high-resolution images, embedded Google Maps or Mapbox frames, maybe even video snippets and interactive location guides.
Each page doesn’t only deliver text—it streams large assets that eat storage, CPU power, and bandwidth.

While basic shared hosting can technically “run” your blog, it struggles under this load:

  • Image-rich posts slow down dramatically.
  • Map scripts take forever to render.
  • Global readers experience delays because servers are limited to one region.

In short, standard hosting makes your beautiful travel stories load like dial-up nostalgia — which is why you must choose the Best Hosting Plan for a Travel Blog that ensures both speed and stability.

How Hosting Affects Speed, SEO, and Engagement

Google’s Core Web Vitals treat site speed, stability, and responsiveness as ranking factors.
If your photo-filled destination pages take 10 seconds to load, your bounce rate will skyrocket, and your site’s authority will sink.

The same applies to interactive maps. They rely on JavaScript, API calls, and tile requests.
If your server lags, the map widget freezes or fails to load, frustrating readers trying to find a location.

A well-optimized hosting plan helps you:

  1. Deliver high-quality visuals without compression loss.
  2. Serve images fast via CDN caching.
  3. Load maps smoothly using modern server protocols (HTTP/2 or HTTP/3).
  4. Keep uptime close to 100 %, which signals reliability to search engines.

In short, the right hosting = faster site = higher rank.

The Hidden Cost of “Cheap” Shared Hosting

Most beginners start with entry-level shared plans.
They look inexpensive — but the “cost” reveals itself later:

  • Limited storage (10–30 GB) fills up after a few trips.
  • Bandwidth throttling slows global visitors.
  • No dedicated caching or CDN.
  • High CPU usage penalties if you upload too many images at once.

Eventually, you’ll hit your provider’s “resource usage” limit and get suspension warnings.
That’s why professional travel bloggers treat hosting as an investment, not an expense.

Core Hosting Requirements for a Heavy Media Travel Blog

Before you even compare brands, define your minimum specs:

RequirementWhy It Matters
SSD or NVMe Storage (≥ 50 GB)Handles thousands of photos quickly
High or Unmetered BandwidthPrevents slowdowns during traffic spikes
4 GB+ RAM & Multi-Core CPUSupports map scripts and caching plugins
CDN IntegrationDelivers images from global edge servers
Server Locations Near AudienceFaster access for international readers
Daily Backups + SSLKeeps data safe and builds trust

Without these, no plugin or optimization trick can save your site.

The Travel Blogger’s Advantage

Unlike generic bloggers, travel creators have an SEO edge: rich visual content earns backlinks and social shares — if pages load fast.
Hosting is the silent engine powering that advantage.
It decides whether your Iceland photo diary opens instantly or spins a loading icon.

Choosing the Best Hosting Plan for a Travel Blog (by Type)

1. Shared Hosting – The Beginner’s Trap

Shared hosting is the entry point for most bloggers.
You share one physical server with hundreds of other websites.
It’s affordable (often under $5/month), but comes with serious performance limits — especially for a travel blog filled with high-resolution images and interactive maps.

Pros:

  • Low initial cost

  • Simple setup

  • Ideal for small blogs or testing stages

Cons:

  • Limited CPU, RAM, and I/O speed

  • Resource throttling during traffic spikes

  • Sluggish performance with photo galleries or JavaScript-heavy map pages

  • Often missing built-in CDN or caching

If your travel site is new and has only 10–20 posts, shared hosting may work temporarily.
But once you start uploading 200+ images and your readers visit from multiple continents, shared plans will choke your bandwidth.

✅ Verdict: Best only for early-stage bloggers testing content and layout.

2. VPS Hosting – Balanced Power for Growing Travel Blogs

A Virtual Private Server (VPS) allocates you a dedicated slice of CPU, RAM, and storage, isolated from other users.
That isolation means faster performance, stable uptime, and the ability to handle resource-intensive operations like image optimization or map rendering.

Pros:

  • Dedicated resources ensure consistent performance

  • Scalable — upgrade RAM or storage as your site grows

  • Root access for full server control (install custom caching, image compression tools)

  • Better security isolation

Cons:

  • Slightly higher cost ($15–$40/month)

  • Requires some technical management

For a travel blog with heavy visuals and embedded maps, VPS hosting offers the perfect balance — often featured in the Best Hosting Plan for a Travel Blog guides due to its scalability and control.

✅ Verdict: Ideal for mid-tier or rapidly growing travel blogs that expect traffic spikes during peak travel seasons.

3. Cloud Hosting – The Best Option for Image-Heavy, Map-Integrated Sites

Cloud hosting distributes your website data across multiple servers worldwide.
If one server experiences heavy load, another takes over automatically.
This global architecture makes cloud hosting the Best Hosting Plan for a Travel Blog targeting international readers.

Key Advantages:

  • Scalability: Add more storage, CPU, or bandwidth instantly.

  • Speed: Data is served from the nearest server location to each visitor.

  • Reliability: 99.99% uptime with automatic failover.

  • Performance with CDNs: Cloud hosts integrate easily with Cloudflare, Bunny.net, or Amazon CloudFront.

Providers like Hostinger Cloud, SiteGround Cloud, and DigitalOcean App Platform are excellent fits for this setup.

Ideal For: Bloggers using WordPress + plugins like Elementor, WP Google Maps, or GeoDirectory — which need stable server performance.

✅ Verdict: The top choice for professional travel bloggers with global traffic and heavy media.

4. Managed WordPress Hosting – For Speed and Zero Maintenance

If you use WordPress (the best CMS for travel blogs), a Managed WordPress host like Kinsta, WPX, or Rocket.net takes care of everything — speed optimization, updates, caching, and security.

Pros:

  • Lightning-fast load times (LiteSpeed or Nginx servers)

  • Pre-installed CDN and image compression

  • Daily backups + malware scanning

  • Excellent for non-technical users

Cons:

  • More expensive ($25–$60/month)

  • Limited flexibility for advanced map integrations unless allowed via plugins

For most travel bloggers earning from ads or affiliate marketing, managed WordPress hosting provides zero-stress performance — you focus on content while the host handles technical stuff.

✅ Verdict: Best for creators who prioritize content creation over server management.

5. Dedicated Hosting – For High-Traffic, Media-Rich Portfolios

Dedicated hosting gives you an entire physical server for your website — no resource sharing at all.
This setup is overkill for most individual travel blogs, but essential for agencies or media networks hosting multiple travel sites or a photo/video archive.

Pros:

  • Maximum performance and control

  • Unlimited storage and processing power

  • Custom configurations for maps, caching, and backup automation

Cons:

  • Expensive ($100–$300/month)

  • Requires advanced server administration skills

✅ Verdict: Only necessary when your blog evolves into a large-scale platform or travel publication.

Essential Hosting Features for Image-Heavy Travel Blogs

1. SSD or NVMe Storage — The Non-Negotiable Speed Booster

Forget traditional hard drives (HDD).
A travel blog that loads hundreds of high-resolution JPEGs or WebPs absolutely needs SSD or NVMe storage.

Why it matters:

  • SSDs are up to 10× faster in reading and writing data.

  • NVMe drives (the newer generation) further cut load time for dynamic content like interactive maps.

  • Faster I/O = faster page rendering = higher Google PageSpeed score.

✅ Target spec: at least 50–100 GB SSD/NVMe storage for early-stage blogs; scale beyond 200 GB as your photo library grows.

2. Unmetered Bandwidth & Global CDN Integration

Every photo and map tile you serve consumes bandwidth.
A single photo-heavy article can hit 50–100 MB of transfer.
Multiply that by thousands of visitors, and you’ll see why “unlimited” bandwidth is essential.

Pair that with a Content Delivery Network (CDN) such as Cloudflare, BunnyCDN, or CloudFront.
A CDN stores your static files (images, CSS, map scripts) on edge servers worldwide, so readers in the U.S., Europe, or Asia all get local-speed delivery.

✅ Best setup:

  • Host near your primary audience.

  • Enable CDN caching for /wp-content/uploads/.

  • Use lazy-loading + next-gen image formats (WebP, AVIF).

3. RAM and CPU Power — Handling Map Scripts and Caching

Interactive maps from Google Maps, Leaflet, or Mapbox run on JavaScript and API calls.
Each map widget consumes processing cycles.

Under-powered servers choke when rendering multiple maps or large galleries.

✅ Minimum spec:

  • 4 GB RAM + 2 vCPUs for mid-size blogs.

  • Upgrade to 8 GB RAM + 4 vCPUs once traffic exceeds 50 k monthly visitors.

  • Ensure hosting supports HTTP/2 or HTTP/3 for parallel requests (multiple map tiles loading simultaneously).

4. Advanced Caching & Server Optimization

Caching is your secret weapon for speed.
Choose a host offering:

  • LiteSpeed Cache or NGINX FastCGI cache

  • Object cache (Redis or Memcached)

  • Browser caching headers for static assets

Combine server-level caching with a WordPress plugin (e.g., LiteSpeed Cache, WP Rocket) to keep time-to-first-byte under 500 ms — a crucial SEO metric.

✅ Bonus: Enable GZIP or Brotli compression on your server; it reduces page weight by 20–30 %.

5. PHP 8.x + HTTP/3 Support

Modern map plugins and image-optimization tools (like Imagify or Smush Pro) require PHP 8.x or newer.
Ensure your host keeps its stack updated and supports HTTP/3 (QUIC protocol) for ultra-fast HTTPS connections.

Outdated PHP or HTTP 1.1 servers can literally double your load time.

6. Daily Backups and Disaster Recovery

A travel blog’s image collection is irreplaceable.
Accidental deletion, plugin conflict, or malware could wipe months of work.

Look for:

  • Daily automated backups retained 7–30 days.

  • One-click restore from cPanel or dashboard.

  • Optional off-site backups to Google Drive, Dropbox, or S3.

✅ Pro tip: schedule a weekly off-site backup just for your /uploads/ and /mail/ directories — they hold your photos and contact-form data.

7. Free SSL Certificate + Strong Security Layer

Google marks non-HTTPS sites as insecure — deadly for credibility.
Choose a host that includes free SSL via Let’s Encrypt and 24/7 malware scanning.

Also check for:

  • Automatic updates for WordPress core and plugins.

  • Firewall (WAF) to block brute-force attacks.

  • Bot protection to prevent hotlinking of your images.

8. Support for External Storage and Map APIs

Some travel blogs embed thousands of images or custom map tiles.
Rather than storing all that locally, connect external storage:

  • Amazon S3 or DigitalOcean Spaces for bulk media.

  • Google Maps or Mapbox API integration via plugin (requires outbound HTTPS and enough PHP memory).

A good host must not restrict external API calls or cron jobs — otherwise, map refreshes and API updates will fail.

9. Uptime Guarantee and 24/7 Support

Downtime directly costs you SEO and credibility.
Go for at least 99.9 % uptime with transparent status reporting.
And ensure you have live chat or ticket support — because travel blogs often rely on seasonal traffic, and an outage during peak season hurts more than any ad fee.

10. Server Location Strategy

If your target audience is global, pick a host offering multi-region data centers or pair with a CDN.
If you mainly target the U.S. or Europe, choose a server close to that region for faster first-byte delivery.

Example of a Balanced Spec for Travel Blogs

FeatureMinimum SpecIdeal Spec
Storage50 GB SSD200 GB NVMe or hybrid + object storage
BandwidthUnmeteredUnmetered + CDN
RAM4 GB8–16 GB
vCPU24–8
PHP8.2+8.3 + HTTP/3 support
BackupsDailyDaily + off-site
Uptime99.9 %99.99 %

Best Hosting Providers for Travel Blogs (2025 Edition)

1. Hostinger Cloud – Best Value for Performance & Scalability

Hostinger

If you’re looking for speed, scalability, and affordability in one package, Hostinger Cloud Hosting is hard to beat.

Why it fits travel blogs:

  • NVMe SSD storage with unmetered bandwidth

  • Global CDN and multiple data centers

  • 99.99% uptime and LiteSpeed cache (perfect for image-heavy sites)

  • Free SSL, daily backups, and staging environment

Technical Highlights:

  • PHP 8.3 + HTTP/3 ready

  • 300+ websites per account

  • Cloudflare integration in one click

  • 3–6 GB RAM depending on plan

Pricing: Starts at around $9.99/month, renews at ~$24.99/month.

✅ Ideal For: Growing travel bloggers who want a fast, scalable host without high cost.

2. SiteGround – Best for Map-Heavy WordPress Sites

SiteGround

SiteGround’s Cloud and Managed WordPress plans offer unmatched reliability for WordPress users handling plugins like Google Maps, Mapbox, and GeoDirectory.

Why it fits travel blogs:

  • Proprietary SG Optimizer plugin = powerful caching + image compression

  • Built-in CDN via Cloudflare

  • Free email hosting + SSL

  • Automatic daily backups + AI security

Technical Highlights:

  • Powered by Google Cloud infrastructure

  • 99.99% uptime

  • HTTP/3 + PHP 8.3 support

  • 10–40 GB SSD + 4–8 GB RAM on GrowBig or GoGeek

Pricing: $14.99/month starting (renewal ~$24.99).

✅ Ideal For: WordPress-based travel blogs using interactive map features and galleries.

3. A2 Hosting – Best for Custom Control and Speed

A2 Hosting is built for developers and performance lovers. Its Turbo Boost and Turbo Max plans use NVMe SSDs and LiteSpeed servers.

Why it fits travel blogs:

  • 20× faster speed with Turbo servers

  • Unlimited SSD storage and data transfer

  • Free Cloudflare CDN integration

  • 99.9% uptime with 24/7 “Guru Crew” support

Technical Highlights:

  • Full control for custom caching and CDN

  • cPanel + SSH access for power users

  • Pre-optimized for WordPress and WooCommerce

Pricing: $6.99–$14.99/month introductory.

✅ Ideal For: Technical users who want to fine-tune caching, CDN, and performance.

4. Kinsta – Best Premium Managed Hosting

Kinsta

If you want a zero-maintenance, premium experience, Kinsta is the gold standard.
It runs on Google Cloud’s C2 servers with Cloudflare CDN integration.

Why it fits travel blogs:

  • Blazing-fast load times (under 1s globally)

  • Built-in CDN + image optimization

  • Automatic daily backups + malware protection

  • Excellent for media-heavy WordPress sites

Technical Highlights:

  • Nginx + Redis + PHP 8.3

  • HTTP/3 support

  • 35+ global data centers

Pricing: Starts at $30/month (renewable monthly).

✅ Ideal For: Professional travel bloggers, agencies, or monetized websites prioritizing SEO and uptime.

5. Cloudways – Best Scalable Cloud Hosting

Cloudways

Cloudways offers managed cloud hosting on DigitalOcean, AWS, or Google Cloud — giving full flexibility with performance tuning.

Why it fits travel blogs:

  • Pay-as-you-go pricing model

  • 24/7 support and instant scaling

  • Advanced caching: Varnish, Redis, and Breeze plugin

  • Integration with Cloudflare Enterprise CDN

Technical Highlights:

  • NVMe SSD storage

  • PHP 8.x + HTTP/3 support

  • Free migration & SSL

Pricing:

  • Starts at $11/month (DigitalOcean)

  • Scales based on RAM and bandwidth usage

✅ Ideal For: Bloggers expecting high global traffic and needing elastic scaling.

6. WPX Hosting – Fastest Managed WordPress Host

WPX consistently ranks among the fastest managed WordPress hosts (tested by independent speed benchmarks).

Why it fits travel blogs:

  • Built-in high-speed CDN across 30+ global edge locations

  • Free unlimited site migrations

  • Free daily backups

  • Expert 24/7 support (average response < 30 sec)

Technical Highlights:

  • LiteSpeed web servers

  • Free malware cleanup

  • 99.95% uptime guarantee

Pricing: Starts at $24.99/month.

✅ Ideal For: Travel bloggers earning income through ads, affiliates, or brand sponsorships — who can’t afford downtime.

Performance Comparison Table

If you want sustained performance and scalability, this setup clearly ranks among the Best Hosting Plans for a Travel Blog in 2025.

ProviderStorageCDNRAMUptimeMonthly CostBest For
Hostinger CloudNVMe 100GB✅6GB99.99%$9.99Budget + scalability
SiteGroundSSD 40GB✅4–8GB99.99%$14.99Map-heavy WordPress
A2 HostingUnlimited SSD✅4–8GB99.9%$6.99Technical users
KinstaSSD 25GB✅Managed99.99%$30Premium performance
CloudwaysNVMe 80GB✅4–16GB99.99%$11Scalable cloud setup
WPX HostingSSD 15GB+✅Managed99.95%$24.99Professional creators

The Complete Hosting Plan Checklist for Travel Bloggers

Define Your Hosting Goals Before You Buy

Every great travel blog starts with a clear mission:

  • Are you publishing personal travel diaries or building a professional media brand?

  • Do you expect 5 k visitors a month — or 500 k?

  • Will your content be mostly photos, or interactive maps and videos?

Your answers determine your hosting tier.
Rule of thumb:

Choose a host that supports twice your current traffic and storage needs — so growth never forces an emergency migration.

The Perfect Hosting Blueprint (From Launch to Growth)

StageTraffic LevelRecommended HostingKey Actions
Launch< 10 k monthlyShared or basic CloudUse CDN from Day 1, enable image compression
Growth10 k – 100 kVPS / Cloud (Hostinger Cloud / A2 Turbo)Add object storage for images, enable caching plugins
Established100 k – 500 kCloudways / SiteGround CloudImplement full CDN + Redis cache, daily off-site backups
Professional500 k +Kinsta / WPX / Dedicated CloudUse staging servers, advanced analytics, 24/7 monitoring

✅ Pro Tip: Never rely on one server location. Pair your host with a global CDN to serve content closer to readers.

Ongoing Maintenance Routine

A travel blog evolves constantly — new trips, new galleries, new plugins.
Here’s your maintenance rhythm:

FrequencyTask
WeeklyRun plugin updates, clear cache, check image optimization reports
MonthlyTest page speed on GTmetrix / PageSpeed Insights
QuarterlyReview storage + bandwidth usage; upgrade if you’re at 80 % capacity
Bi-AnnualAudit CDN setup, renew SSL certificates, validate map APIs
YearlyEvaluate hosting cost vs. performance, consider new data center if audience shifts geographically

Security & Backup Essentials

Security equals continuity.
Without automated backups, one bad plugin update can destroy your archive of memories.

Checklist:

  • ✅ Daily automated backups (kept 7 – 30 days)

  • ✅ Off-site backup (Google Drive / S3 / Bunny Storage)

  • ✅ Two-factor authentication for cPanel + WordPress

  • ✅ Malware scanning + automatic patching

  • ✅ Hotlink protection to stop others stealing your photos

  • ✅ Secure access (SSH / SFTP only — never plain FTP)

???? Pro Tip: Keep a copy of your /uploads/ folder separately. That’s your visual history.

Optimize Image & Map Delivery

Even premium hosting can’t fix poorly optimized content.
Follow this simple optimization formula:

  1. Use next-gen formats → WebP or AVIF.

  2. Compress before upload → TinyPNG / ShortPixel.

  3. Enable lazy-loading for below-the-fold images.

  4. Cache map tiles locally or via CDN.

  5. Serve scaled images (never 4000 px width for a 600 px frame).

These tweaks alone can reduce page size by 60–70 %, which means faster load, better SEO, and happier readers.

Performance & SEO Monitoring Tools

To ensure your hosting stays optimal:

ToolPurpose
Google PageSpeed InsightsCore Web Vitals monitoring
GTmetrix / PingdomReal-world load speed from different regions
UptimeRobotAlerts if your site goes down
Cloudflare AnalyticsBandwidth and CDN hit ratio
Google Search ConsoleIndex coverage and mobile usability

✅ Action: Set up automated reports so you catch performance drops early.

Red Flags That It’s Time to Upgrade

  • Your average page load time exceeds 3 seconds

  • You frequently hit resource limits (CPU / I/O / RAM)

  • Backup restores take hours

  • Email delivery becomes unreliable

  • Your host throttles traffic during peaks

If any two happen together, upgrade immediately — or migrate to a more scalable plan like Cloudways or Kinsta before high season.

Cost Planning & ROI

Quality hosting is not a cost — it’s a growth engine.
A faster, more reliable travel blog:

  • Boosts ad revenue via higher impressions

  • Increases affiliate conversions

  • Builds brand authority through SEO

Annual hosting budget guideline:

Aim to invest 5 – 10 % of total site revenue in hosting & CDN — it pays itself back through speed and uptime.

Quick Decision Framework (Summary Table)

PriorityIf You Need …Go With …
Best budget optionSpeed + affordabilityHostinger Cloud / A2 Hosting
Premium WordPress experienceHands-off managementKinsta / WPX Hosting
Scalability + controlCloud flexibilityCloudways / SiteGround Cloud
Heavy media & map focusStorage + CDNCloud + Object Storage + BunnyCDN

Final Thoughts – Build on Speed and Reliability

Your travel blog isn’t just a website; it’s a digital portfolio of experiences.
If your host can’t deliver those memories instantly, readers will scroll away — and Google will notice.

To summarize, choosing the Best Hosting Plan for a Travel Blog means finding one that can:

  • Handle large images efficiently,

  • Load maps smoothly worldwide,

  • Scale without downtime, and

  • Keep your stories secure and backed up for years.

Invest once, optimize continuously, and your travel blog will stay as fast, vibrant, and reliable as the adventures you share.

How to Migrate cPanel to cPanel Hosting Without Losing Email Accounts.

0

Why Email Loss Happens During Migration

When you move a website from one cPanel host to another, the process of How to Migrate cPanel to cPanel Hosting often confuses users, most users focus on files and databases — but overlook the email accounts and stored messages.
Each cPanel account contains separate directories for:

  • Website files (/home/user/public_html/)

  • Databases (/home/user/mysql/)

  • Email data (/home/user/mail/)

If you only transfer the web and database data, the mail directories don’t follow automatically — resulting in empty inboxes or lost credentials on the new server.

Another common issue is DNS propagation delay.
After migration, your domain’s MX records (which control mail routing) may still point to the old server for several hours.
If both servers are not synchronized, emails received during that window can vanish into limbo.

The Goal of a Proper Migration: How to Migrate cPanel to cPanel Hosting Without Email Loss

The Goal of a Proper cPanel-to-cPanel Migration

A successful migration means:
✅ All website files, databases, and email accounts are transferred intact.
✅ All old emails appear in the same inboxes on the new host.
✅ Users can log in using the same usernames and passwords.
✅ Incoming mail continues to flow without interruption during DNS propagation.

This requires a structured, step-by-step process instead of manually copying files.

Tools and Access You’ll Need

Before you start the migration, make sure you have: These are the essential resources required if you’re following any step-by-step guide on How to Migrate cPanel to cPanel Hosting effectively.

  • Full cPanel access on both the old and new servers (not just FTP).

  • Optionally, WHM (WebHost Manager) access if you’re transferring multiple cPanel accounts.

  • A reliable internet connection or SSH access for faster file transfer.

  • At least double the space on the destination server to handle temporary copies.

Recommended tools:

  • cPanel Transfer Tool (for WHM users).

  • Full cPanel Backup / Restore (for single accounts).

  • rsync or scp (for manual command-line transfers).

Key Directories to Transfer

If you prefer a manual migration, these are the directories that hold your critical data:

Data TypeDirectory PathDescription
Website Files/home/user/public_html/All web content
Databases/home/user/mysql/MySQL databases
Email Accounts/home/user/etc/domain.com/Mail account configurations
Email Messages/home/user/mail/domain.com/All mailbox data (Inbox, Sent, etc.)

When migrating email, both etc (accounts & passwords) and mail (actual messages) folders must be copied.

Best Time to Perform the Migration

Choose an off-peak time when few emails are being exchanged — usually late night or weekends.
That way, even if DNS takes a few hours to propagate, the risk of missing important messages remains minimal.

Create a Full Backup of the Source cPanel Account

Create a Full Backup of the Source cPanel Account

Inside your old cPanel, go to Backup → Full Backup → Download a Full Account Backup — this is the first critical step in How to Migrate cPanel to cPanel Hosting successfully. Choose destination = Home Directory and click “Generate Backup.”
This archive (backup-MM-DD-YYYY.tar.gz) includes:

  • Website files
  • Databases
  • Email accounts and messages
  • DNS settings

Once the backup completes, download it via File Manager or SFTP for safekeeping.

2. Verify Email Integrity Before Moving

Check a few mailboxes in webmail or an IMAP client to confirm:

  • No corrupted or missing messages
  • Folder structure ( Inbox / Sent / Drafts / Spam ) looks correct
  • Account login credentials work
    If any user can’t log in now, fix it before migrating — it won’t magically resolve later.

3. Prepare the Destination Server

On the new host:

  • Make sure the same domain exists under your account.
  • Create matching email accounts with the exact same usernames and passwords.
  • Ensure there’s enough storage for all mailboxes ( check quota limits ).
  • Update software versions (PHP, MySQL) if the site will also move — it prevents compatibility issues.

4. Test Connectivity

Confirm that both servers are accessible via:

  • FTP or SFTP (using port 21 or 22)
  • Webmail ( for login tests )
  • Ping / Traceroute (to verify IP reachability)

If firewalls block SSH or ports, whitelist each server’s IP temporarily.

5. Optional – Compress Mail Data Manually

If you prefer to move just the mail folder instead of a full backup:

tar -czf mail-backup.tar.gz /home/username/mail/
tar -czf etc-backup.tar.gz /home/username/etc/

Then download both archives to transfer later. They hold all messages and account definitions.

6. Double-Check DNS and TTL

Before changing anything, note your current DNS records — MX, A, CNAME, TXT (for SPF / DKIM / DMARC).
Store them in a text file.
Ensure TTL is already reduced (to ≈ 300 seconds) so that new records propagate fast after cut-over.

7. Validate Backup Integrity

After download, test the archive:

tar -tzf backup-MM-DD-YYYY.tar.gz | head

If you see file listings without errors, the backup is healthy.
Corrupted archives ( often due to interrupted downloads ) must be re-generated.

Restore via Full cPanel Backup (Recommended) – Core Step in How to Migrate cPanel to cPanel Hosting

If you created a full backup earlier, this is the fastest, safest method.
On the new host, log in to WHM → Backup → Restore a Full Backup/cpmove File, then:

  1. Upload the backup-MM-DD-YYYY.tar.gz file to /home/ of the new server.
  2. In WHM, select that file and click Restore.
  3. WHM recreates the domain, users, databases, mail accounts, and messages automatically.

✅ Result: Everything—including email passwords and messages—comes across intact.
If you don’t have WHM access (shared hosting), use cPanel → Restore or ask your host’s support to restore it for you.

Manual Transfer of Only Mail Data

If you want to move just email (not the full site), this section explains a partial approach to How to Migrate cPanel to cPanel Hosting safely.

a. Copy mail directories from old server

scp -r /home/olduser/mail/DOMAIN.COM newuser@NEW_SERVER_IP:/home/newuser/mail/
scp -r /home/olduser/etc/DOMAIN.COM newuser@NEW_SERVER_IP:/home/newuser/etc/

These two folders store messages (mail/) and account definitions (etc/).

b. Fix ownership & permissions
On the new server:

chown -R newuser:newuser /home/newuser/mail/
chown -R newuser:newuser /home/newuser/etc/

Without proper ownership, accounts may appear empty in Webmail.

c. Restart the mail service

service exim restart
service dovecot restart

This reloads mailbox indexes so the messages appear instantly.

Verify Email Accounts

After restoration, open cPanel → Email Accounts and ensure every account is listed.
Then test each via:

  • Webmail (Roundcube/Horde) → confirm old emails show up.
  • Mail clients (Outlook, Thunderbird) → check login credentials and folder sync.

If some folders are missing, run “Rebuild IMAP cache” or refresh Roundcube indexes.

Move Website & Databases (Optional)

If you’re also moving the website, copy /public_html/ and corresponding MySQL databases the same way.
Use phpMyAdmin or mysqldump for export/import.
This ensures both the site and email system function identically on the new host.

DNS & MX Record Updates

Once you confirm everything works on the new server, update DNS so mail and website traffic point there:

RecordPurposePoints To
AMain websiteNew server IP
MXEmail routingmail.yourdomain.com (new server)
SPF / DKIM / DMARCAuthenticationNew host’s values

Propagation usually takes 1–6 hours if TTL was reduced earlier.

Cross-Check During Propagation

For 24 hours after DNS changes:

  • Keep both servers live.
  • Check which IP your domain resolves to using
    nslookup yourdomain.com or dig MX yourdomain.com.
  • Watch both inboxes—if new emails arrive on the old server, forward them manually to ensure none are lost.

Cleanup After Migration

When all mail now arrives on the new host:

  • Remove the old server only after 72 hours of stable delivery.
  • Delete temporary backups to free disk space.
  • Re-enable normal TTL values (e.g., 3600 seconds) in DNS for better caching.

Post-Migration Testing & Troubleshooting

1. Confirm DNS and MX Record Propagation

After changing your MX records to point toward the new server, propagation can take up to 6–24 hours (depending on TTL).
Use these quick checks:

ToolCommand / URLPurpose
dig MX yourdomain.comTerminal / Command PromptShows current mail routing
nslookup yourdomain.comWindows / LinuxConfirms new A-record IP
mxtoolbox.comWeb toolTests MX & SMTP response

✅ Success indicator: MX record now resolves to the new server’s hostname/IP and “SMTP test” passes.

2. Test Sending & Receiving Emails

Perform these tests immediately after DNS switches:

  1. Internal test – Send mail from one of your domain accounts to another (e.g., info@ → sales@).

  2. External test – Send mail from Gmail/Outlook to your domain, and reply back.

  3. Round-trip latency – Note if delivery delays exceed 5–10 seconds; that can reveal DNS or SPF issues.

If external emails bounce with “550” or “Relaying denied,” re-check:

  • MX record points to correct hostname

  • Domain exists in /etc/localdomains on the server

  • Mail service (Exim, Dovecot) is running

3. Verify Mailbox Integrity

Open Webmail → Roundcube or another client and check:

  • Inbox, Sent, Drafts, Junk all contain the expected messages.

  • Folders sync properly over IMAP (no duplicates or empty folders).

  • New emails appear automatically without refreshing.

If some old messages are missing, confirm that both /mail/ and /etc/ folders were transferred and ownerships are correct:

chown -R username:username /home/username/mail/
chown -R username:username /home/username/etc/

4. Test Authentication on Devices

Make sure every user can log in from their devices with the same credentials as before:

  • Incoming (IMAP/POP3) → mail.yourdomain.com

  • Outgoing (SMTP) → mail.yourdomain.com

  • Ports → IMAP 993 (SSL) / SMTP 465 or 587 (TLS)

If clients show certificate warnings, regenerate an SSL for “mail.yourdomain.com” inside cPanel → SSL/TLS Status → Run AutoSSL.

5. Verify SPF, DKIM and DMARC

Authentication records ensure your outgoing emails don’t land in spam.
Check inside Email Deliverability in cPanel:

RecordPurposeExample
SPFSender validationv=spf1 +a +mx include:yourhost.com -all
DKIMMessage signingGenerated automatically in cPanel
DMARCPolicy & reportingv=DMARC1; p=none; rua=mailto:reports@yourdomain.com

Then test deliverability using mail-tester.com — aim for a score ≥ 9/10.

6. Check Logs for Errors

If emails fail or disappear, inspect server logs:

tail -f /var/log/exim_mainlog
tail -f /var/log/maillog

Common problems:

  • “Mailbox quota exceeded” → increase mailbox size in cPanel.

  • “Authentication failed” → password mismatch between /etc/ files.

  • “Temporary lookup failure” → DNS cache still using old MX record.

7. Monitor for 48 Hours

Keep both old and new servers running concurrently for two days.
During this period:

  • Check both servers’ mail queues (exim -bp) to ensure no stuck messages.

  • Watch traffic gradually shift 100% to the new host.

  • Once confirmed, suspend the old account — don’t delete immediately.

8. Optional: Set Up Mail Forwarding or Catch-All

To be extra safe, add a temporary catch-all forwarder (e.g., *@yourdomain.com → admin@yourdomain.com`) so any stray mail delivered to the old server is captured.

Long-Term Maintenance & Backup Strategy

1. Implement Automated Backups (Non-Negotiable)

Email data is one of the most valuable (and fragile) assets on a cPanel account.
To prevent accidental loss, enable daily automatic backups for both your website and mail directories.

Steps:

  • In cPanel → Backup Wizard → Backup Settings, enable daily and weekly full backups.
  • Choose storage destination:
    • Local: /home/username/backups/
    • Remote: Amazon S3, Google Drive, or another offsite location via JetBackup or Acronis.
  • Keep at least 7–14 days of backups rolling in rotation.

???? Pro Tip: Use incremental backups instead of full ones to save bandwidth and time.

2. Schedule Offsite Email Backups

Even if your host does daily full backups, store a second copy externally.
You can automate this with:

rsync -avz /home/username/mail/ user@remote-server:/backups/mail/

Or use Imapsync on a schedule to clone mailboxes to another IMAP account weekly:

imapsync --host1 mail.yourdomain.com --user1 user@domain.com \
         --host2 backup.mailserver.com --user2 user@backup.com

This ensures even if the host fails, your emails exist elsewhere.

3. Monitor Disk Usage and Quotas

Large mailboxes fill up fast — exceeding quotas causes new emails to bounce silently.

Regularly check:

  • cPanel → Email Disk Usage → sort by “Mailbox Size”
  • Identify heavy accounts and:
    • Archive older messages
    • Auto-delete Spam/Junk folders
    • Enable mailbox compression

If usage grows too fast, increase quota or move to a higher plan.

4. Keep Security Tight

Your email system is a common attack surface. Protect it by:

  • Enforcing strong passwords or enabling 2FA in Webmail.
  • Using SSL/TLS for IMAP/SMTP connections only (never plain ports 110/25).
  • Setting fail2ban or cPHulk protection against brute-force login attempts.
  • Regenerating DKIM/SPF/DMARC keys every 6–12 months to keep deliverability optimal.

???? Tip: Regularly test on MXToolbox for blacklist or open-relay issues.

5. Use Monitoring and Alerts

Set up automated monitoring:

  • UptimeRobot or HetrixTools → check IMAP/SMTP availability.
  • MXRoute monitor or Email Status page → verify mail queue health.
  • Email delivery reports in WHM → track failed or delayed messages.

These alerts catch issues early before they affect clients or subscribers.

6. Archive Old Mailboxes Smartly

For businesses or podcasts storing years of audio-related correspondence:

  • Move inactive users’ emails to an Archive folder under /home/username/mail/archive/.
  • Compress and store them monthly:
    tar -czf archive-Sept2025.tar.gz /home/username/mail/archive/
    
  • Upload archives to long-term cold storage like AWS Glacier or Google Drive.

This keeps your active hosting light while preserving historical data securely.

7. Revalidate DNS Records Periodically

Every 3–6 months:

  • Re-check your MX, SPF, DKIM, and DMARC values.
  • If you switch servers or change IPs, regenerate these immediately.
  • Use tools like dig, nslookup, or Google Postmaster Tools to confirm alignment.

A single outdated DNS record can silently cause delivery failures.

8. Maintain Email Client Configuration

If multiple users access email via Outlook or mobile apps:

  • Document server settings (IMAP/SMTP hostnames, ports, SSL info).
  • Save them in an internal “Email Setup Guide” so reconfiguration is easy after password resets or migrations.

9. Enable Account-Level Forwarders or Catch-All as Failsafe

Create a catch-all or admin forwarder (e.g., *@domain.com → admin@domain.com).
This prevents emails from bouncing if users delete or rename mailboxes accidentally.

10. Perform Quarterly Restoration Tests

Backups are worthless unless verified. Every few months:

  1. Download a backup archive.
  2. Restore it to a test subdomain or secondary cPanel.
  3. Verify emails and folders open correctly.

This ensures your recovery process actually works when needed.

Conclusion: Build a “Never-Lose-Mail” Ecosystem

A flawless migration is only the beginning — understanding How to Migrate cPanel to cPanel Hosting the right way ensures your emails and data remain fully intact. Real stability comes from:

  • Redundant backups
  • Tight security
  • Continuous monitoring
  • Proactive audits

Think of your mail server as a living system — not something you “set and forget.”
With these safeguards, you’ll never again lose a single message, even during future migrations or host changes.

Final Checklist & Summary

✅ Phase 1: Pre-Migration Planning

StepTaskWhy It Matters
1Lower DNS TTL to 300 secondsMakes MX/A record updates propagate faster
2Back up full cPanel accountEnsures files, databases, and emails are saved
3Verify email account healthConfirms no corrupted mailboxes before transfer
4Record current DNS/MX/SPF/DKIM valuesNeeded to reapply on new server
5Check new host compatibilityEnsure cPanel version, PHP, MySQL, and storage are adequate

✅ Phase 2: Data Transfer

StepTaskNotes
1Use Full cPanel Backup & Restore (preferred)Restores all data including mail
2Or manually copy /mail/ and /etc/ directoriesKeeps accounts & messages intact
3Verify file ownership and permissionschown -R user:user /home/user/mail/
4Restart Exim & Dovecot after restoreReloads email services
5Recreate any missing email accountsUse same usernames & passwords

✅ Phase 3: DNS Update & Propagation

StepTaskNotes
1Update A and MX records to new IPRoute traffic to new host
2Keep both servers active for 48–72 hrsCaptures late DNS updates
3Monitor propagation via dig / mxtoolbox.comVerify MX points to new host
4Forward stray messages from old server manuallyPrevent mail loss

✅ Phase 4: Post-Migration Testing

StepTestSuccess Indicator
1Send & receive emails (internal/external)All accounts deliver instantly
2Check Webmail & IMAP syncAll folders + old emails visible
3Confirm SPF, DKIM, DMARCPasses on mail-tester.com
4Check Exim logs for errorsNo “authentication failed” or “quota exceeded”
5SSL for mail.domain.comAutoSSL active, no warnings

✅ Phase 5: Long-Term Maintenance

StepTaskFrequency
1Automated full backups (local + offsite)Daily
2Disk usage & quota checkMonthly
3DNS record verificationEvery 3 months
4Restore-test a backupQuarterly
5Security updates (SPF/DKIM keys, 2FA)Bi-annually

Common Pitfalls to Avoid

  • ❌ Forgetting to lower DNS TTL before migration

  • ❌ Moving mail/ without etc/ (accounts vanish)

  • ❌ Not matching passwords → users can’t log in

  • ❌ Deleting old server too early → incoming mail lost

  • ❌ Ignoring SPF/DKIM setup → emails go to spam

Quick Command Reference

TaskCommand
Copy mail foldersscp -r /home/olduser/mail /home/newuser/
Copy account configsscp -r /home/olduser/etc /home/newuser/
Fix ownershipchown -R newuser:newuser /home/newuser/mail /home/newuser/etc
Restart mail servicesservice exim restart && service dovecot restart
Check MX routingdig MX yourdomain.com

Final Thoughts

A smooth process of How to Migrate cPanel to cPanel Hosting is all about preparation, synchronization, and validation.
If you:

  • plan ahead (TTL + backups),

  • transfer both email folders and configurations,

  • verify delivery and authentication,

  • and maintain ongoing backups,

then you’ll never lose a single message — even during major host changes.

Think of this checklist as your permanent blueprint for zero-loss migrations.

Managed Host vs Unmanaged Host Pros Cons

0

When building or running a website, your hosting choice can make or break your success. From speed and uptime to security and technical support, everything depends on the type of hosting you select. Among the most debated options are managed hosting and unmanaged hosting — often discussed under the topic Managed Host vs Unmanaged Host Pros Cons.

Choosing between these two is not simply about price—it’s about control, convenience, performance, and responsibility. A beginner blogger with little technical knowledge may need a totally different setup than a developer managing multiple client projects.

In this article, we’ll break down the differences, advantages, disadvantages, and real-world use cases of both managed and unmanaged hosting. By the end, you’ll know exactly which option suits your needs and how to make a smooth switch if required.

Managed Host vs Unmanaged Host: Overview of Web Hosting

Before diving deep into managed vs unmanaged hosting, let’s clarify what web hosting actually means.

Why Web Hosting is Important for Your Business

Web hosting is a service that makes your website accessible on the internet. When you buy hosting, you’re essentially renting space on a server where your website’s files, databases, and applications are stored. Visitors type your domain name, and the hosting provider delivers your content to their browsers.

There are different hosting types available:

  • Shared Hosting – multiple websites share the same server resources.

  • VPS (Virtual Private Server) Hosting – websites get dedicated virtual resources within a shared environment.

  • Dedicated Hosting – one physical server dedicated to a single website.

  • Cloud Hosting – resources distributed across multiple servers, offering scalability and reliability.

Within these categories, you’ll often encounter the terms managed hosting and unmanaged hosting. These aren’t separate server types, but rather service levels—they determine how much responsibility you take on and how much the hosting provider handles for you.

What Is Managed Hosting?

In the Managed Host vs Unmanaged Host debate, managed hosting is a type of web hosting where the service provider takes care of all the technical tasks related to running your website. Instead of worrying about updates, security patches, server monitoring, or backups, you let the hosting company handle it for you.

Think of it as having a personal IT team working behind the scenes to ensure your website runs smoothly. This is especially useful if you don’t have advanced technical knowledge or simply want to focus on your core business rather than server management.

Some common services included in managed hosting:

  • Automatic Updates: Operating system, server software, and CMS updates handled by the host.

  • Server Monitoring: 24/7 monitoring for downtime, crashes, or unusual activity.

  • Security Management: Firewalls, malware scanning, SSL certificates, and intrusion prevention.

  • Performance Optimization: Caching, CDN setup, and server-side tweaks to boost speed.

  • Backup & Recovery: Regular backups and disaster recovery solutions in case of data loss.

  • Expert Support: Access to knowledgeable tech teams ready to solve problems quickly.

Managed hosting is often used with WordPress hosting, VPS, cloud servers, or even dedicated servers, depending on your budget and needs.

Pros of Managed Hosting

Web Hosting

Choosing managed hosting comes with a wide range of benefits, especially if convenience and security are your top priorities. Let’s break them down:

1. Ease of Use

With managed hosting, you don’t need to be a server expert. The provider sets up and maintains everything, from installation to monitoring. This allows you to focus on content creation, marketing, and business growth instead of troubleshooting technical issues.

2. Enhanced Security

Cyberattacks are becoming increasingly common, and websites are prime targets. Managed hosts usually provide enterprise-grade security, including firewalls, malware detection, DDoS protection, and SSL management. This is a huge advantage if your business handles sensitive data like customer details or online payments.

3. Better Website Performance

Speed and uptime are critical for SEO and user experience. Managed hosting often includes performance tuning such as caching, CDN integration, and server-side optimization. As a result, your website loads faster and can handle traffic spikes more effectively.

4. Automated Backups

Accidents happen—files get deleted, updates crash websites, or hackers manage to break in. With managed hosting, daily or weekly backups are automatically created and stored securely. You can restore your site in minutes without losing valuable data.

5. Expert Technical Support

Perhaps the biggest benefit is dedicated support from specialists who know the platform inside out. Whether it’s WordPress, Magento, or custom applications, managed hosting providers usually have experts ready to help 24/7. This reduces downtime and stress when things go wrong.

6. Time Savings

Every hour spent fixing server issues is an hour not spent on marketing, sales, or growth. Managed hosting saves valuable time, letting you concentrate on business strategy rather than IT headaches. These points clearly highlight the Managed Host vs Unmanaged Host Pros Cons comparison in favor of managed hosting.

7. Scalability

If your website traffic grows, scaling resources is seamless. Most managed hosting providers offer easy upgrades without downtime, ensuring your site can handle higher loads.

Cons of Managed Hosting

While managed hosting offers incredible convenience, it’s not perfect. There are some drawbacks you should consider before signing up.

1. Higher Cost

The biggest downside is price. Managed hosting is significantly more expensive than unmanaged options because you’re paying for expertise, tools, and around-the-clock support. For example, a managed VPS can cost 2–4 times more than an unmanaged VPS with the same server resources.

2. Less Control for Advanced Users

If you’re a developer or system administrator, managed hosting can sometimes feel restrictive. Providers often limit server-level access to maintain stability and prevent misconfigurations. This means you might not be able to install custom software or tweak server settings freely.

3. Potential Vendor Lock-In

Some managed hosts bundle their services with proprietary tools, making it harder to switch providers later. Migrating to another host might require extra steps, costs, or even rebuilding parts of your environment.

4. Overkill for Simple Sites

If you’re running a small personal blog or a static portfolio site, paying for managed hosting may be unnecessary. The additional services (daily backups, premium security, performance tuning) might be more than you actually need.

5. Limited Flexibility

Managed hosting usually follows a structured environment. If you want full customization or plan to run unique applications, the restrictions might slow you down compared to unmanaged hosting.

What Is Unmanaged Hosting?

When evaluating Managed Host vs Unmanaged Host, unmanaged hosting is the opposite of managed hosting. Here, the hosting provider gives you the raw server environment—and you are responsible for everything else.

Think of it as renting an empty apartment. You get the keys, but it’s up to you to furnish, decorate, and maintain it.

With unmanaged hosting, you’ll need to:

  • Install the operating system and software (e.g., Apache, Nginx, MySQL, PHP).

  • Configure security settings like firewalls and SSL.

  • Handle software and OS updates.

  • Monitor performance and uptime.

  • Troubleshoot errors and downtime yourself.

In simple terms, unmanaged hosting is best for tech-savvy users who know how to maintain servers or are willing to learn.

Unmanaged hosting is typically available in VPS and dedicated server plans. It’s cheaper and more flexible, but it demands significant technical knowledge and time investment.

Pros of Unmanaged Hosting

Unmanaged hosting appeals to users who want full control, lower costs, and complete flexibility. Here are the main benefits:

1. Lower Cost

Unmanaged hosting is significantly cheaper than managed hosting. Since the provider only gives you server resources without maintenance, you save money. For startups, developers, or small projects with limited budgets, this can be a big advantage.

For example, an unmanaged VPS may cost as little as $5–10/month, compared to $30–100/month for managed VPS.

2. Full Control and Customization

You have complete access to your server. Want to install a custom web server stack? Configure unique firewall rules? Run experimental apps? With unmanaged hosting, the server is yours to control. This is ideal for developers who want to build highly customized environments.

3. Great for Learning

If you’re an aspiring system administrator or developer, unmanaged hosting gives you hands-on experience with real servers. You’ll learn about Linux commands, networking, security, and troubleshooting—skills that are extremely valuable in the IT world.

4. No Service Restrictions

Unlike managed hosting (where providers may restrict certain plugins, scripts, or server changes), unmanaged hosting puts no limits on what you can do. You can choose your own software versions, programming languages, or frameworks without waiting for host approval.

5. Scalability on Your Terms

When traffic grows, you can upgrade resources as you like. You’re not bound by managed service bundles. This gives you flexibility in how you expand your server setup.

Cons of Unmanaged Hosting

While unmanaged hosting offers freedom, it also comes with heavy responsibilities and risks:

1. Steep Learning Curve

If you’re not experienced with server management, you’ll face a tough learning curve. Tasks like configuring firewalls, securing databases, or setting up backups require technical skills. Beginners may find this overwhelming.

2. Time-Consuming

Running a website is already time-consuming, and adding server management on top can drain your productivity. Every update, patch, or error requires manual intervention, which takes valuable time away from your business or projects.

3. Higher Security Risks

Without proactive monitoring, your server may be vulnerable to hacks, malware, or DDoS attacks. A single missed update or weak password can compromise your entire site. Unless you’re skilled at security, unmanaged hosting poses real risks.

4. No Support (or Limited)

Most unmanaged hosting providers only assist with hardware-related issues. Everything else—software installation, errors, or optimization—is your responsibility. If something breaks, you must fix it yourself or hire a sysadmin.

5. Unreliable for Beginners or Businesses

For businesses that rely on uptime, unmanaged hosting can be dangerous. A misconfigured server or delayed response to downtime could lead to lost sales and unhappy customers. Beginners are especially vulnerable to these pitfalls.

Head-to-Head Comparison: Managed Host vs Unmanaged Host Pros Cons

To make the differences crystal clear, here’s a side-by-side comparison:

FeatureManaged HostingUnmanaged Hosting
CostHigher (extra services included)Lower (bare server only)
Ease of UseBeginner-friendly, no technical knowledge requiredRequires advanced technical skills
ControlLimited access (provider sets restrictions for stability/security)Full control over software, configurations, and environment
SecurityProvider handles firewalls, malware scans, SSL, and monitoringUser is fully responsible for securing the server
Support24/7 expert support includedMinimal support (only hardware-related issues)
BackupsAutomatic backups includedMust set up your own backups
PerformanceOptimized by hosting experts for speed and uptimeUser must optimize performance manually
FlexibilityMay be limited due to service policiesHighly flexible, no restrictions
ScalabilityEasy, with managed upgrade optionsPossible, but user must configure and manage scaling
Best ForBusinesses, bloggers, eCommerce sites, non-tech usersDevelopers, sysadmins, tech startups, experimental projects

Users of Managed Hosting

Managed hosting is typically chosen by:

  1. Small Business Owners
    They need reliable hosting for their business websites or online stores but don’t have an in-house IT team. Managed hosting provides peace of mind with professional support.

  2. Bloggers & Content Creators
    Writers, podcasters, and vloggers often prefer managed hosting because they want to focus on creating content, not handling server issues.

  3. E-commerce Stores
    For online shops, uptime and security are critical. Managed hosting ensures transactions run smoothly and that sensitive customer data is protected.

  4. Agencies & Designers
    Marketing agencies or web designers handling multiple client websites often choose managed hosting for its reliability and time-saving benefits.

  5. Non-Technical Users
    Anyone without server knowledge benefits from managed hosting. It removes the technical barrier so they can run a website without stress.

Users of Unmanaged Hosting

Unmanaged hosting is preferred by:

  1. Developers & Programmers
    They want full control to configure servers, experiment with code, and run custom applications.

  2. Tech Startups
    Some startups choose unmanaged hosting to cut costs initially and build highly customized infrastructures.

  3. System Administrators
    IT professionals use unmanaged hosting to fine-tune performance, security, and networking according to business needs.

  4. Advanced Hobbyists
    Tech-savvy hobbyists who enjoy experimenting with Linux servers or learning cloud computing often pick unmanaged hosting.

  5. Companies with IT Teams
    Large organizations with dedicated IT staff may go for unmanaged hosting to maintain control while relying on in-house expertise.

How to Choose the Right Type

Choosing between Managed Host vs Unmanaged Host Pros Cons ultimately depends on three key factors:

  1. Your Technical Skills

    • If you’re not confident in server management, stick with managed hosting.

    • If you’re a developer, sysadmin, or tech-savvy entrepreneur, unmanaged hosting gives you more flexibility.

  2. Your Budget

    • Managed hosting costs more but saves time and reduces risks.

    • Unmanaged hosting is budget-friendly but can cost you more later if downtime or security issues arise.

  3. Your Business Needs

    • For eCommerce, client projects, or mission-critical sites → managed hosting is safer.

    • For experimental projects, staging servers, or learning purposes → unmanaged hosting makes sense.

Pro tip: If you’re unsure, start with managed hosting and move to unmanaged once your skills and team grow.

Switch Between Hosting Plans

Sometimes your needs change, and switching hosting types becomes necessary. Here’s how to handle it:

From Managed to Unmanaged Hosting

  • Best for developers who want more control or to cut costs.

  • Backup your website before migrating.

  • Ensure you have server management knowledge or hire a sysadmin.

From Unmanaged to Managed Hosting

  • Best for businesses scaling up or tired of constant server maintenance.

  • Migration services are often included in managed hosting plans.

  • Managed providers will handle the transition, minimizing downtime.

Switching is not only possible—it’s common. Businesses evolve, and your hosting must evolve with you.

Summary

  • Managed Hosting: Hands-off, secure, beginner-friendly, but more expensive and less flexible.

  • Unmanaged Hosting: Cheap, flexible, great for developers, but requires technical expertise and time.

  • Decision Rule: If you want peace of mind and don’t know server management → choose managed hosting. If you love control, customization, and saving money → unmanaged hosting is the way to go.

So, when summarizing the Managed Host vs Unmanaged Host Pros Cons, the right hosting type still depends on your skills, budget, and project goals.

Frequently Asked Questions (FAQs)

1. Which is better for beginners: managed or unmanaged hosting?

Managed hosting is better for beginners because the provider handles updates, security, backups, and performance.

2. Is unmanaged hosting really cheaper in the long run?

It can be cheaper upfront, but if you factor in downtime, potential hacks, or hiring IT support, the costs may add up.

3. Can I switch from unmanaged to managed hosting later?

Yes, most providers offer migration services to help you switch with minimal downtime.

4. Do all managed hosting plans include backups and security?

Most do, but always check the plan details. Some offer daily backups, while others provide weekly or manual options.

5. Who should use unmanaged hosting?

Developers, sysadmins, and businesses with in-house IT teams who need customization and control.

6. Does managed hosting improve SEO?

Indirectly, yes. Managed hosting improves site speed, uptime, and security—all factors that positively influence SEO.

7. What happens if my unmanaged server crashes?

You’ll be responsible for diagnosing and fixing the issue. With managed hosting, the provider usually restores it for you.

8. Is managed hosting worth the extra cost?

If uptime, security, and peace of mind are critical for your business, then yes—it’s worth every penny.

9. Which hosting type is best for eCommerce?

Managed hosting is recommended for eCommerce stores since it ensures security, uptime, and customer trust.

10. Can I learn server management while using unmanaged hosting?

Yes, but it comes with risks. If you want to learn, start with a test server—not your business website.

Best Hosting with Global Data Centers

0

In today’s digital-first world, the success of any online business or website depends heavily on hosting performance — especially when choosing the Best Hosting with Global Data Centers. Whether you run a personal blog, an eCommerce store, or a SaaS platform, your hosting provider’s data center infrastructure directly impacts speed, uptime, and user experience.

Global data centers play a crucial role in ensuring that your website loads quickly no matter where your visitors are located. Instead of serving content from a single server in one country, hosting providers with multiple international data centers can deliver data from the nearest location to your audience. This drastically reduces latency, enhances SEO rankings, and improves customer satisfaction.

In this article, we’ll explore the best hosting providers with global data centers, evaluate their features, and understand how data centers influence website performance. You’ll also learn how to choose the right provider for your needs, what is typically hosted in a data center, and the leading data center companies in the world.

Let’s dive into the Best Hosting with Global Data Centers and their global footprints.

SiteGround

SiteGround is consistently ranked among the Best Hosting with Global Data Centers for performance and support. One of its strongest advantages is its global presence of data centers strategically placed in the USA, UK, Netherlands, Germany, Spain, Singapore, and Australia.

SiteGround

Key Features of SiteGround:

  • Performance: SiteGround uses Google Cloud infrastructure, ensuring reliability and scalability.

  • Speed Boosting Tools: Free CDN, SuperCacher technology, and SSD storage.

  • Security: Daily backups, free SSL, and AI anti-bot system.

  • Support: 24/7 live chat and phone support with one of the fastest response times in the industry.

For businesses targeting an international audience, SiteGround ensures that no matter where users are located, they get a fast, seamless experience. This is particularly beneficial for eCommerce stores, multi-language websites, and content-heavy platforms.

Bluehost

Bluehost is a household name in the hosting industry, officially recommended by WordPress.org. While its core data centers are primarily in the USA, Bluehost has partnered with CDN providers to deliver content globally.

Bluehost

Why Bluehost Stands Out:

  • WordPress Focused: Bluehost offers one-click WordPress installs, staging environments, and managed WordPress hosting.

  • Uptime & Reliability: Solid infrastructure with 99.9% uptime guarantee.

  • Global Reach with CDN: Through Cloudflare CDN integration, Bluehost extends its hosting beyond the US borders, reducing latency for international traffic.

  • Scalability: From shared hosting to VPS and dedicated servers, Bluehost grows with your website.

If you want an affordable, beginner-friendly host with reliable uptime and decent international reach, Bluehost remains a strong choice.

Hosting.com

Hosting.com has built its reputation on enterprise-level hosting solutions with state-of-the-art data centers in multiple US cities, including Denver, Dallas, and Newark. While not as internationally spread as some other providers, Hosting.com offers advanced infrastructure suitable for large-scale businesses.

Notable Features:

  • Enterprise Hosting: Focus on mission-critical websites and businesses.

  • Data Center Strength: Redundant power systems, 24/7 monitoring, and high-level security.

  • Cloud Hosting Solutions: Private, public, and hybrid cloud infrastructure.

For businesses that require robust compliance, uptime guarantees, and enterprise-grade infrastructure, Hosting.com is a solid option, though it’s more North America–centric than global.

InMotion Hosting

InMotion Hosting has been around for over two decades and is known for blending affordability with professional hosting solutions. Their data centers are located in Los Angeles and Washington D.C., but like Bluehost, they leverage global CDN services to deliver content worldwide.

Key Highlights:

  • Performance: UltraStack caching, SSD storage, and optimized servers.

  • Customer Support: Known for their US-based support team, available 24/7.

  • Hosting Options: Shared, VPS, reseller, and dedicated servers.

  • Global Reach: While data centers are US-based, CDN partnerships provide global performance boosts.

InMotion Hosting is especially good for small businesses, developers, and agencies who need reliable hosting with excellent support.

Hostwinds

Hostwinds is a relatively younger hosting provider, but it has quickly built a strong reputation for flexibility and affordability. Their data centers are located in Seattle, Dallas, and Amsterdam, giving them both U.S. and European coverage.

Why Choose Hostwinds:

  • Customizable Hosting: From shared hosting to enterprise cloud hosting, Hostwinds gives you full flexibility.

  • Uptime & Reliability: 99.99% uptime guarantee with multiple redundant network carriers.

  • Global Reach: With a presence in North America and Europe, Hostwinds ensures faster performance for transatlantic traffic.

  • Affordable Cloud Hosting: They offer cloud servers that scale instantly, making it a solid choice for startups and developers.

For businesses targeting the U.S. and European audiences, Hostwinds is an excellent balance between performance and price.

Hostinger

Hostinger is one of the fastest-growing hosting companies in the world and a leader in affordability combined with international reach. It has data centers in the USA, UK, Netherlands, Singapore, Lithuania, and Brazil.

Hostinger

Key Features:

  • Global Infrastructure: Wide-spread data centers ensure low latency for international users.

  • Speed Optimization: LiteSpeed servers, SSD storage, and integrated caching technology.

  • Beginner-Friendly: Simple dashboard, one-click installs, and intuitive controls.

  • Budget-Friendly: Plans start as low as $2/month, making it one of the cheapest global hosting providers.

Hostinger is particularly strong for startups, bloggers, and businesses expanding internationally on a budget. If affordability and reach are your top priorities, Hostinger clearly ranks high among the Best Hosting with Global Data Centers available today.

DreamHost

DreamHost has been in the hosting industry for over two decades and is officially recommended by WordPress.org. Their main data centers are located in the U.S. (Ashburn, Virginia and Hillsboro, Oregon), but their reliability and performance are globally recognized.

DreamHost

Why DreamHost Works Well:

  • WordPress Excellence: Automatic updates, staging, and free migrations.

  • Scalability: From shared hosting to VPS, cloud, and dedicated servers.

  • Privacy & Transparency: Free WHOIS privacy and a strong focus on user data security.

  • Global Delivery: DreamHost integrates with CDN services like Cloudflare for worldwide performance.

For WordPress site owners who prioritize reliability, customer privacy, and transparency, DreamHost is an excellent pick.

IONOS

IONOS (formerly 1&1) is a European hosting powerhouse with data centers in the U.S., Germany, Spain, and the UK. Known for serving both small businesses and enterprises, IONOS combines scale with affordability.

Key Features:

  • Global Data Centers: Redundant facilities with advanced cooling and energy efficiency.

  • Business Tools: Free domain, SSL, professional email, and integrated marketing tools.

  • Enterprise-Level Security: ISO 27001 certified data centers with top-tier encryption.

  • Scalable Options: From cheap shared hosting to enterprise-grade cloud hosting.

IONOS is a great choice for European businesses targeting international customers who want strong compliance and global presence.

Liquid Web

Liquid Web stands out as one of the premium hosting providers with a strong reputation for managed services. Its data centers are located in Michigan, Arizona, and the Netherlands.

Why Liquid Web Excels:

  • Fully Managed Hosting: Focused on VPS, cloud, and dedicated hosting for businesses.

  • Performance: 100% uptime guarantee with enterprise-level SLA.

  • Security & Support: DDoS protection, PCI compliance, and 24/7 “Heroic Support.”

  • Customization: Tailored hosting plans for agencies, SaaS companies, and eCommerce businesses.

If you’re running a high-traffic, mission-critical website, Liquid Web provides enterprise-grade hosting solutions with exceptional reliability.

ScalaHosting

ScalaHosting is an emerging player but has quickly grown in popularity, thanks to its innovative SPanel hosting control panel and strong global infrastructure. They have data centers in the USA, Europe (Bulgaria), and partnerships with AWS & DigitalOcean for worldwide coverage.

Highlights:

  • SPanel Advantage: A lightweight, faster alternative to cPanel, included for free.

  • Cloud & VPS Hosting: Strong emphasis on managed VPS hosting at affordable rates.

  • Security: Free daily backups, SSL, and advanced malware protection.

  • Global Network: Through AWS and DigitalOcean, users can deploy servers almost anywhere.

ScalaHosting is best suited for developers, small businesses, and tech-savvy entrepreneurs who want VPS-level performance without the high cost.

HostArmada

HostArmada is a newer but fast-growing hosting provider with data centers in the USA, Canada, India, Germany, Singapore, and Australia. It’s built a strong reputation for offering performance-oriented hosting with affordable pricing.

Why HostArmada is a Good Choice:

  • Global Coverage: Multiple worldwide data centers for faster delivery.

  • Speed Optimization: SSD storage, NGINX caching, and Cloudflare integration.

  • Security Features: Free daily backups, malware scans, and firewall protection.

  • Customer Support: 24/7 technical support with a hands-on approach.

HostArmada is particularly attractive for international startups and bloggers looking for affordable hosting with true global reach.

HostGator

HostGator is one of the most recognizable names in the hosting industry. While its main data centers are in the U.S. (Houston and Provo), it leverages CDN services to deliver content globally.

Why HostGator Still Works:

  • Beginner Friendly: Easy-to-use interface and 1-click installs.

  • Scalability: Shared, VPS, and dedicated hosting available.

  • Affordability: Competitive pricing with frequent discounts.

  • Global Content Delivery: While not as widely spread as Hostinger or SiteGround, HostGator uses CDN to ensure fast global load times.

HostGator is ideal for beginners and small businesses that need reliable hosting with room to grow.

What Is Data Center Hosting and Why It Matters When Choosing the Best Hosting with Global Data Centers?

Data center hosting refers to hosting services that rely on specialized facilities designed to house servers, storage, and networking equipment. Instead of running a website from a single server in one location, data center hosting ensures redundancy, scalability, and global performance by using multiple interconnected facilities.

Key Benefits of Data Center Hosting:

  • Speed & Low Latency: Websites load faster when hosted closer to visitors.

  • Redundancy: Data centers use backup power, cooling, and connectivity to minimize downtime.

  • Security: Physical and digital protections safeguard sensitive data.

  • Scalability: Businesses can expand quickly with cloud and dedicated resources.

  • Compliance: Many data centers follow ISO, GDPR, HIPAA, or PCI DSS regulations.

For businesses, choosing a provider with multiple global data centers ensures that customers get fast, secure, and reliable experiences no matter where they’re located.

What Are the Top 10 Data Center Companies?

When we talk about global infrastructure, certain companies dominate the landscape. These giants operate massive facilities worldwide, serving cloud providers, enterprises, and hosting companies alike.

Top 10 Global Data Center Companies:

  1. Equinix – One of the world’s largest data center and colocation providers with facilities across 70+ markets.

  2. Digital Realty – Known for its high-security enterprise data centers across North America, Europe, and Asia-Pacific.

  3. NTT Communications – A Japanese telecom giant with advanced data centers across Asia and beyond.

  4. China Telecom – Major presence in Asia with rapid global expansion.

  5. CyrusOne – U.S.-based company specializing in hyperscale data centers.

  6. Global Switch – Focused on large-scale colocation services across Europe and Asia-Pacific.

  7. CoreSite – U.S.-centric, strong in interconnection services.

  8. Telehouse – Based in London, with global facilities.

  9. Iron Mountain – Known for secure, sustainable data centers worldwide.

  10. IBM Cloud Data Centers – Offering both cloud and dedicated infrastructure globally.

Many hosting providers such as SiteGround, Hostinger, and Liquid Web lease infrastructure or build partnerships with these giants to expand their reach.

How Do I Choose a Data Center Provider?

Selecting the right data center provider requires evaluating several critical factors beyond just price. The wrong choice could lead to poor performance, downtime, or compliance issues.

Criteria for Choosing a Data Center Provider:

  1. Location: The closer the data center is to your target audience, the faster your site will load.

  2. Reliability & Uptime: Look for providers with at least a 99.9% uptime guarantee.

  3. Security: Both physical (guards, CCTV, biometric access) and digital (firewalls, DDoS protection).

  4. Compliance Standards: If you handle sensitive data (health, finance, legal), ensure GDPR, HIPAA, or PCI DSS compliance.

  5. Scalability: Can the provider support your growth from a small site to a global enterprise?

  6. Support: 24/7 customer service is non-negotiable for mission-critical businesses.

  7. Pricing & Contracts: Balance affordability with flexibility; avoid being locked into restrictive plans.

The best provider for you depends on audience geography, business scale, and industry compliance needs.

What Is Typically Hosted in a Data Center?

Data centers host a wide variety of online services, from small websites to enterprise-grade platforms.

Common Uses of Data Centers:

  • Websites & Blogs: Most hosting companies rely on data centers to run millions of websites.

  • eCommerce Platforms: Online stores like Shopify or WooCommerce sites require high performance and reliability.

  • Streaming & Media Services: Platforms like Netflix, YouTube, and Spotify rely on global data centers for seamless content delivery.

  • Cloud Services: SaaS platforms, storage services (like Dropbox or Google Drive), and collaboration tools.

  • Enterprise Applications: Banking, healthcare, and government systems often require secure and redundant hosting.

  • Gaming Servers: Multiplayer games host their servers in data centers to reduce latency worldwide.

In short, almost every digital service you interact with daily is powered by data center hosting.

Which Are the Best Hosting with Global Data Centers and Data Center Hosting Services?

When combining global infrastructure, security, speed, and scalability, a handful of providers consistently rise to the top.

Best Hosting with Global Data Centers:

  • SiteGround: Best for speed and support, with Google Cloud-powered infrastructure.

  • Hostinger: Affordable choice with wide global presence.

  • Liquid Web: Premium option for mission-critical businesses.

  • ScalaHosting: Innovative VPS hosting with AWS/DigitalOcean integrations.

  • IONOS: Strong for European businesses with global expansion.

  • DreamHost: Great for WordPress users who want privacy and reliability.

If you want affordable global coverage, Hostinger and SiteGround stand out. For enterprise-grade needs, Liquid Web and IONOS are excellent. And for developer flexibility, ScalaHosting and Hostwinds provide customizable VPS solutions.

Conclusion

Choosing the Best Hosting with Global Data Centers is no longer just about price or brand name — it’s about ensuring your website runs fast, stays secure, and reaches audiences everywhere without delay.

If your business is targeting customers across continents, a hosting provider with a distributed network of data centers is essential. Not only does it improve SEO rankings by reducing page load time, but it also ensures that visitors have a consistent experience regardless of whether they are in New York, London, Sydney, or Singapore.

Here’s the bottom line:

  • For affordability and global reach → Hostinger and SiteGround are hard to beat.

  • For mission-critical businesses → Liquid Web and IONOS provide enterprise-grade reliability.

  • For flexibility and developer control → ScalaHosting and Hostwinds deliver strong VPS solutions.

  • For WordPress excellence → DreamHost and Bluehost remain solid choices.

???? Your hosting provider is the foundation of your online presence. Don’t compromise on performance or uptime. Invest in a global hosting service today and give your website the infrastructure it needs to scale successfully.

FAQs About Hosting with Global Data Centers

1. Why do global data centers matter for hosting?

Global data centers reduce latency by serving content from the nearest server to your visitors. This improves website speed, SEO, and user experience.

2. Which hosting provider has the most global data centers?

Providers like Hostinger and SiteGround stand out with multiple international data centers. Additionally, companies like IONOS and Liquid Web partner with major data center operators to expand global reach.

3. Is CDN the same as having global data centers?

Not exactly. A CDN (Content Delivery Network) caches and distributes website files across multiple servers worldwide, while data centers host your actual website infrastructure. Many hosting providers use both for optimal performance.

4. What type of businesses need global hosting the most?

eCommerce stores, SaaS platforms, international blogs, gaming servers, and enterprises with global users benefit the most from global hosting.

5. Are global hosting providers more expensive?

Not necessarily. Some providers like Hostinger and HostArmada offer affordable plans with international data centers, while premium providers like Liquid Web charge higher for managed enterprise solutions.

6. How do I know which data center location to choose?

Always pick the data center closest to your primary audience. If you serve global customers, use a provider with multiple centers or enable CDN integration.

7. What is the difference between shared hosting and VPS in data centers?

  • Shared Hosting: Multiple websites share the same server resources, cheaper but less powerful.

  • VPS Hosting: Dedicated virtual resources within a data center, offering better speed, security, and scalability.

8. Can I switch my website to another data center later?

Yes. Most hosting providers allow migrations between data centers or offer tools to easily move your site closer to your target audience.

9. Which provider offers the Best Hosting with Global Data Centers for WordPress sites?

SiteGround, DreamHost, and Bluehost are excellent WordPress-friendly hosts with strong global performance.

10. How does data center hosting affect SEO?

Search engines consider site speed and uptime as ranking factors. Global data centers help improve both, resulting in better SEO performance.