Home Blog Page 6

Best Managed WooCommerce Hosting 2025 for Small Business Startups

0

Starting an online store as a small business is exciting — but the technical foundation you choose will determine whether your eCommerce journey runs smoothly or collapses under pressure.
In 2025, competition in online retail is fiercer than ever. Customers expect lightning-fast load times, flawless checkout processes, and zero downtime. Unfortunately, many startups underestimate the importance of choosing the right hosting.

If you’re using WooCommerce, the popular eCommerce plugin for WordPress, your website isn’t just a collection of static pages — it’s a dynamic web application handling inventory, payments, user sessions, and personalized recommendations. That means your hosting needs to do far more than just “store files.”

This is where managed WooCommerce hosting becomes essential — especially for small business startups with limited technical expertise and big ambitions.

The Difference Between Regular Hosting and Managed WooCommerce Hosting

Let’s start with the basics:

  • Regular Hosting (shared or cheap WordPress hosting) is designed for blogs or informational sites where caching works well, and there’s minimal server processing.

  • Managed WooCommerce Hosting, on the other hand, is purpose-built for online stores — optimized for product catalogs, shopping carts, user logins, and real-time inventory updates.

When you sell products online, every second counts. A delay during checkout can mean a lost sale. A slow product page can crush your conversion rate. Managed WooCommerce hosting ensures your server is tuned for this specific workload — fast database queries, reliable backups, secure transactions, and stable performance even during sales surges.

Why Small Business Startups Should Avoid Cheap Shared Hosting

It’s tempting to start with a $2.99 shared plan, especially when your budget is tight. But here’s the reality:

  • Shared servers divide CPU and memory between hundreds of accounts.

  • WooCommerce’s dynamic pages (cart, checkout, account) cannot be cached effectively.

  • Even a small spike in traffic — say 50 users checking out simultaneously — can overload your site.

The result? Cart freezes, payment errors, and angry customers.

A small business can’t afford such experiences. Reputation is everything in your early months — and unreliable hosting can kill momentum faster than bad marketing.

What “Managed” Really Means

“Managed” doesn’t just mean convenience — it’s a strategic advantage.

With managed WooCommerce hosting, your provider:
✅ Handles software updates (WordPress, WooCommerce, PHP, etc.)
✅ Provides automated daily backups
✅ Optimizes caching and CDN for eCommerce workloads
✅ Includes built-in SSL and advanced security layers
✅ Monitors uptime and performance 24/7

That means you focus on your products and customers, not technical maintenance.

Most startups don’t have in-house IT teams — so choosing managed hosting gives you expert-level technical support and proactive problem prevention, not just a server.

Why 2025 Is the Year to Take Hosting Seriously

Search engines now factor page speed and reliability heavily into rankings.
Consumers expect fast-loading, mobile-optimized stores. And with global payment and shipping integrations, you can’t afford outdated infrastructure.

Modern managed WooCommerce hosts now provide cloud-powered performance, auto-scaling resources, and smart caching technology — things small businesses could never afford five years ago.

In short: hosting is no longer a cost — it’s a growth multiplier.

Key Features to Look for in Managed WooCommerce Hosting

Choosing the right WooCommerce hosting isn’t about flashy marketing or low prices — it’s about picking a platform that can sustain your business growth, protect customer data, and maximize performance.
Below are the core features you must evaluate before committing to any hosting provider in 2025.Optimized WooCommerce Performance

1. Optimized WooCommerce Performance

WooCommerce hosting isn’t just about space and bandwidth — it’s about how efficiently the server handles eCommerce operations.
Your hosting should include:

  • SSD or NVMe storage: Faster product and order loading.

  • PHP 8.2+ compatibility: Improved speed and security.

  • LiteSpeed, Nginx, or HTTP/3 servers: For quick dynamic page delivery.

  • WooCommerce caching rules: Checkout, cart, and account pages must remain dynamic while product and homepage sections stay cached.

This combination ensures your store loads in under 2 seconds — the golden standard for online conversions.

2. Built-In Scalability for Growth

Your store might start with 10 products — but as you expand to hundreds or thousands, your traffic and database load will increase exponentially.
That’s why your host must allow you to scale seamlessly.

Look for:

  • Elastic scaling: Ability to add CPU/RAM instantly during traffic surges (sales, launches).

  • Auto-upgrade options: Move from Starter to Business or Cloud tiers without downtime.

  • High concurrent user handling: At least 6–10 PHP workers for stores expecting more than 1,000 visitors daily.

Cloud-based managed hosts like Kinsta, Nexcess, and Cloudways already include these scaling capabilities — a must for serious small businesses.

3. Security That Protects Every Transaction

Every WooCommerce store handles sensitive data — customer details, payments, shipping addresses.
Security isn’t optional; it’s a trust factor.

Your managed host should include:

  • Free SSL certificate (auto-renewing).

  • Web Application Firewall (WAF) to block malicious bots and hacks.

  • Daily malware scanning & cleanup.

  • Two-Factor Authentication (2FA) for admin logins.

  • PCI compliance or compatibility with Stripe, PayPal, and other secure gateways.

A single security incident can destroy your startup’s reputation — don’t compromise here.

4. Automatic Backups & Staging Environments

Imagine updating WooCommerce or a plugin — and your checkout breaks.
A good managed host offers:

  • Daily automatic backups stored offsite.

  • One-click restore points.

  • Staging site environment — where you can test new plugins, designs, or updates before pushing changes live.

For small teams without developers, staging environments are a lifesaver.

5. Integrated CDN and Global Reach

A Content Delivery Network (CDN) ensures your store loads fast worldwide.
Modern managed hosts integrate CDNs directly, distributing your product images and scripts across multiple data centers.

Top choices like WP Engine and Rocket.net use enterprise-grade CDN layers (Cloudflare, Fastly) so customers in the USA, Europe, and Asia all experience consistent speed.

6. Expert WooCommerce Support

When something goes wrong with checkout, caching, or orders — you need real WooCommerce experts, not generic support agents.
Choose hosts offering:

  • 24/7 live chat with <60-second response time.

  • WordPress + WooCommerce certified support staff.

  • Migration assistance.

Small businesses can’t afford trial-and-error downtime — expert support keeps you operational and confident.

Top Managed WooCommerce Hosting Providers in 2025

Now that you understand why managed WooCommerce hosting matters and what features to look for, it’s time to compare the leading hosting providers that meet those criteria in 2025. These picks balance performance, startup budgets, WooCommerce support, and growth paths.

1. SiteGround – Best Overall for WooCommerce
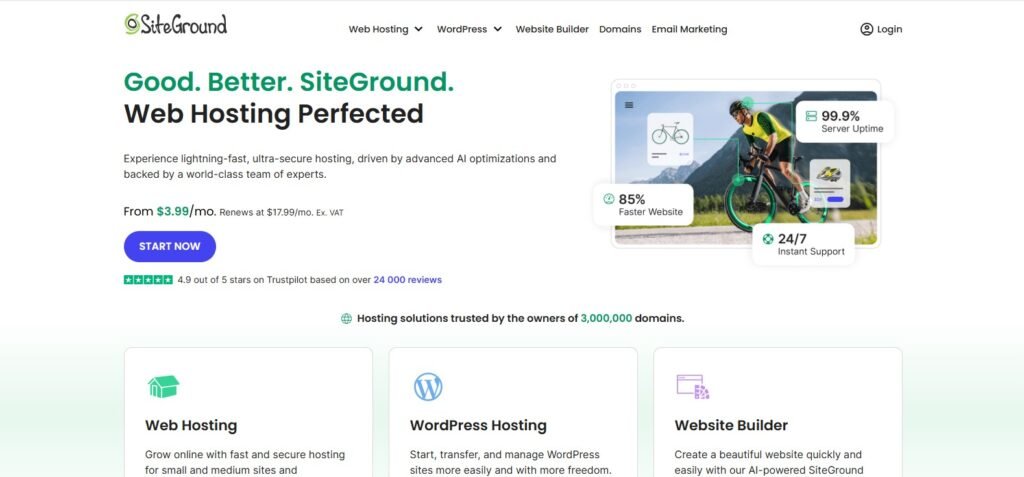
Based on recent reviews, SiteGround is consistently at the top for WooCommerce-specific hosting. For example, WPBeginner cites SiteGround for its WooCommerce plans built on Google Cloud, with free CDN, strong caching, and eCommerce support. 
Why: Pre-installed WooCommerce, Storefront theme, automated updates, daily backups, and AI anti-bot/checkout protection.
Best for: Small businesses that want a tried-and-trusted host with good performance and data center reach.
Consideration: It’s not the cheapest entry option—still higher than ultra-budget hosts.

2. Hostinger – Best for Budget-Friendly Managed WooCommerce
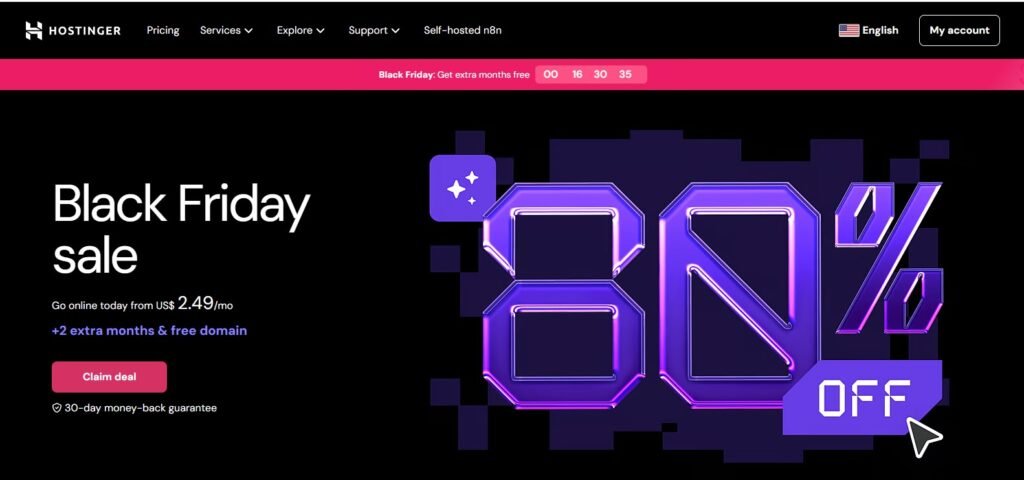
Hostinger is called out by experts as a strong value for WooCommerce hosting in 2025. For example, the Omnisend list highlights Hostinger for beginners: includes object caching, CDN, automatic updates.
Why: Pre-configured WooCommerce hosting plans, lower cost, decent performance.
Best for: Startups with tighter budgets launching their first store.
Consideration: As you scale significantly, you may need to upgrade sooner to keep performance high.

3. Nexcess (by Liquid Web) – Best for Growth & Performance
Nexcess is highlighted by reviews for its WooCommerce-specific hosting with auto-scaling, built-in features like abandoned cart recovery and high concurrency.
Why: Designed for eCommerce scale, features optimized for WooCommerce stores.
Best for: Startups that expect to grow quickly or have traffic spikes (sales/promos).
Consideration: Cost will be higher than entry-level, so budget accordingly.

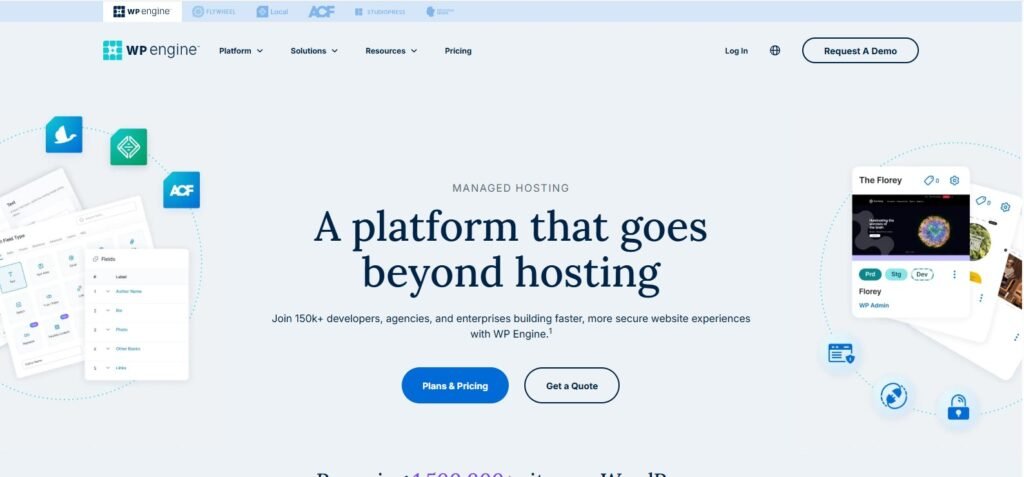
4. WP Engine – Premium Managed WooCommerce Hosting
WP Engine appears on lists of fastest managed WooCommerce hosts in 2025. For example, AppMySite cites it for enterprise-grade WooCommerce infrastructure with dedicated performance features.
Why: Top-tier performance, global infrastructure, deep WooCommerce support.
Best for: Small businesses with big ambitions, or brands who need high reliability from day one.
Consideration: Greater cost—may be overkill for very small or lean-budget startups.

5. Bluehost – Starter WooCommerce Hosting with Brand Recognition
Bluehost is frequently mentioned for WooCommerce hosting suitability. ISITWP lists Bluehost’s WooCommerce hosting with load times ~689 ms and uptime ~99.99%. 
Why: Widely recognized, user-friendly, strong for beginners.
Best for: Small business owners looking for simplicity and brand trust.
Consideration: For higher-growth stores, you’ll still want to monitor performance closely.

???? Quick Comparison Table

HostEstimated Start Price*StrengthBest For
SiteGroundModerateBalanced performance & supportReliable first store
HostingerLowBest budget valueLean startup with small inventory
NexcessHighereCommerce-optimized scalingFast-growing store
WP EnginePremiumEnterprise performanceHigh-traffic or ambitious store
BluehostEntry to moderateEasy to use, brand-trustedBeginner small business store

* Actual pricing depends on term length, promotions, and renewal rates—always verify current plan costs.

✅ How to Match Provider to Your Needs

  • If you’re just starting, have a small product catalog, and limited budget → Hostinger or Bluehost.

  • If you expect steady growth and want a robust WooCommerce foundation right away → SiteGround or Nexcess.

  • If you anticipate high traffic, many products, global reach, or frequent promos → WP Engine.

  • Always check: WooCommerce-specific features (checkout optimisation, cart support), scalability path, backups, and support.

How to Choose, Set Up and Optimize Your Managed WooCommerce Hosting

Now that you’ve seen the best providers, let’s turn insight into action. This section gives you a step-by-step strategy to select the right plan, set it up efficiently, and fine-tune performance for your small-business store.

1. Define Your Store’s Profile Before Buying

Before comparing prices, define your technical and business needs:

  • Product count: 10 products or 1,000 SKUs require different databases.

  • Traffic expectation: anticipate monthly visits and seasonal spikes.

  • Features planned: coupons, subscriptions, memberships, digital downloads.

  • Target market: regional vs global (shapes CDN and data-center choice).

This self-assessment prevents over- or under-buying. Remember: speed and uptime equal trust; trust equals sales.

2. Match Your Profile to a Hosting Tier

Store StageExample TrafficHosting TierTypical Providers
Launch Phase< 10 orders / dayEntry Managed (Hostinger, Bluehost)Low-cost starter
Growth Phase10–100 orders / dayMid Cloud / Managed (SiteGround, Nexcess)Balanced
Scale Phase100 + orders / dayCloud or Dedicated (WP Engine, Rocket.net)High performance

Avoid the cheapest plan if you expect growth; upgrading under pressure often causes downtime.

3. Validate the Plan Before Committing

Before purchase, open live chat and ask:
✅ “How many PHP workers does this plan allow?” (More workers = better checkout concurrency)
✅ “Is Redis or Memcached enabled?”
✅ “Are backups off-server or local?”
✅ “Do you include CDN and SSL free?”
✅ “What is the renewal rate?”

A reliable provider answers instantly and transparently. A vague one usually means hidden limits.

4. Migrate or Install WooCommerce Properly

If you’re starting fresh, most hosts provide a one-click WooCommerce installer.
If migrating:
1️⃣ Take full backups of files + database.
2️⃣ Request white-glove migration — many premium hosts offer it free.
3️⃣ Set up a staging environment first.
4️⃣ Test critical flows (cart → checkout → payment → confirmation).
5️⃣ Point your domain only after tests pass.

Proper migration protects your SEO rankings and existing customer data.

5. Optimize for Speed and Conversion

Once live, optimize continuously:

  • Activate CDN and minify CSS/JS files.

  • Convert images to WebP format.

  • Use caching plugins (e.g., LiteSpeed Cache, WP Rocket) aligned with your host’s stack.

  • Enable object cache for database-intensive queries.

  • Limit plugins — each adds overhead.

  • Measure load time with GTmetrix and PageSpeed Insights monthly.

Even minor tweaks can raise conversion rates 5–15 %.

6. Set Up Security and Maintenance Automation

  • Enable auto updates for WordPress core + WooCommerce.

  • Schedule daily off-site backups.

  • Install a firewall plugin or use the host’s built-in WAF.

  • Force HTTPS and secure cookies.

  • Add Two-Factor Authentication for admin users.

Security automation means peace of mind — your store keeps running even while you sleep.

7. Monitor and Scale Proactively

As orders increase, monitor:

  • Server load (> 70 % → consider upgrade).

  • PHP worker utilization.

  • Database size and query time.

  • Page speed for logged-in users.

Ask your host to recommend plan adjustments before issues arise. Scaling early is cheaper than recovering after a crash.

Long-Term Strategy and Maintenance Checklist for Sustainable Growth

Choosing great managed WooCommerce hosting is only the start.
To keep your store profitable, you need a sustainable hosting and maintenance strategy that scales with your revenue, product catalog, and audience.
This final section shows how to protect uptime, performance, and security as your small business matures into a growing brand.

1. Monitor Store Performance Monthly

Even the best host can’t guarantee consistent speed if your store grows unchecked.
Make it a habit to monitor key metrics every month:

MetricIdeal RangeWhy It Matters
Page Load Time< 2 secondsDirectly impacts conversion & SEO
Server Uptime≥ 99.9 %Downtime = lost sales
CPU / RAM Utilization< 70 %Signals when to upgrade
Database SizeUnder 1 GB (start)Avoids slow queries
Error LogsZero critical errorsPrevents checkout failures

Use tools such as UptimeRobot, Query Monitor, or your host’s dashboard to detect early performance strain.

2. Plan Scalable Growth

As traffic grows, sudden surges can break small plans.
Be proactive — review your host’s upgrade paths quarterly.

  • Scale vertically: Add more CPU/RAM on your existing server.

  • Scale horizontally: Use Cloud or CDN distribution if you expand globally.

  • Ask for autoscaling: Some hosts (like Kinsta or Nexcess) scale instantly during traffic spikes, protecting uptime.

A smooth upgrade before your next promotion or sale day ensures no customer faces a frozen checkout screen.

3. Keep Security Tight & Audited

Cyber-threats evolve faster than plugins.
Adopt a layered defense:

✅ Enable daily malware scans and auto-patches.
✅ Use WAF (Web Application Firewall) + bot protection.
✅ Schedule quarterly security audits (many hosts provide them).
✅ Maintain off-site encrypted backups for disaster recovery.

A secure store builds trust — and Google now rewards HTTPS stability and low risk ratings in rankings.

4. Review Plugins and Themes Regularly

Over time, WooCommerce startups often bloat with plugins: analytics, coupon systems, SEO helpers, sliders, etc.
Every extra plugin increases load and potential conflict.

  • Audit your plugins quarterly.

  • Remove or replace outdated ones.

  • Keep premium plugins licensed and updated.

  • Switch to lightweight themes built for WooCommerce speed.

Your hosting can only perform as well as your codebase allows.

5. Stay Current with WooCommerce and Hosting Trends

WooCommerce evolves rapidly — new caching methods, AI product recommendations, and mobile checkout optimizations appear each year.
Managed hosts also roll out new features like object-cache layers, HTTP/3 upgrades, and edge CDNs.

Set reminders to read your host’s newsletters or changelogs monthly.
Adopting innovations early often means faster performance at no extra cost.

6. Build a Maintenance Routine

A disciplined routine keeps your infrastructure healthy:

Weekly: Check updates, scan malware, verify backups.
Monthly: Review performance metrics & order logs.
Quarterly: Audit security, plugins, and hosting resources.
Annually: Re-evaluate plan vs. business goals and consider upgrades.

Document every change — treat your WooCommerce site like a digital asset, not a hobby project.

7. Future-Proof Through Smart Partnerships

When your orders climb into the hundreds per day, partner with your host’s account manager or support team.
Ask about dedicated servers, staging pipelines, or CDN optimization.
Great hosts act as technology partners, advising when and how to scale efficiently.

Final Thoughts

The right managed WooCommerce hosting turns your startup into a sustainable eCommerce machine.
By maintaining proactive monitoring, regular optimization, and strong security habits, you create a platform that grows with you — fast, reliable, and trusted by customers.

Your hosting isn’t just where your website lives — it’s the engine of your business growth.
Invest wisely, maintain consistently, and 2025 could be the year your WooCommerce store becomes the success story others try to copy. ????
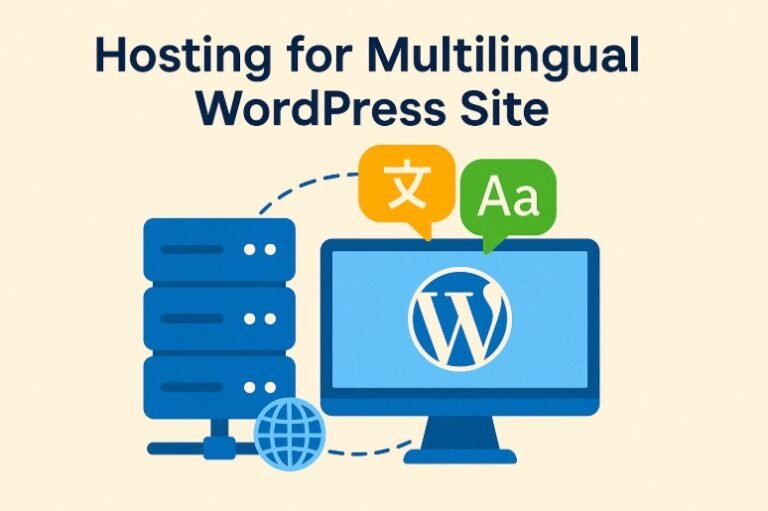
Hosting for Multilingual WordPress Site

0

In today’s digital-first world, a website is often the first point of contact between a business and its potential customers. But here’s the challenge: the internet is global, yet language remains a barrier. While English dominates online, studies show that people are far more likely to engage and convert when content is presented in their native language.

This is where a multilingual WordPress Site becomes a game-changer. With the right hosting setup and tools, you can serve content in multiple languages, expand your reach, and deliver a truly personalized experience to users across different regions.

In this guide, we’ll walk through everything you need to know about multilingual WordPress sites—from what they are and why you need one, to step-by-step methods for creating one using plugins like WPML, Weglot, and Polylang, as well as manual approaches without plugins. We’ll also cover which parts of your site you should translate, advantages of going multilingual, and practical tips to ensure smooth hosting.

What Is a Multilingual WordPress Website?

A multilingual WordPress website is a site that displays content in more than one language. Visitors can select their preferred language—either manually through a language switcher or automatically based on their browser’s language settings.

Key features of a multilingual site include:

  • Multiple language versions of posts, pages, menus, and widgets.

  • Localized SEO elements (meta titles, descriptions, and alt text).

  • URL structures optimized for language variations (e.g., /en/, /fr/, /es/).

  • Smooth navigation between languages with consistent design and functionality.

For example, a U.S.-based eCommerce brand may want its site available in English, Spanish, and French to target North America and Europe. Instead of creating separate websites, WordPress allows you to manage everything under one domain—making it easier to maintain content and branding.

Why You Need a Multilingual WordPress Website

Going multilingual is no longer optional for businesses that want to grow globally—it’s a necessity. Let’s break down the main reasons:Why You Need a Multilingual WordPress Website

1. Reach a Wider Audience

Over 75% of internet users prefer to buy products in their native language. By offering localized content, you instantly make your brand more accessible to millions of potential customers worldwide.

2. Improve User Experience

Imagine landing on a site where you don’t understand the text. Frustration sets in quickly. A multilingual site solves this by giving users the comfort of browsing in a familiar language.

3. Boost SEO Rankings Internationally

Google and other search engines rank localized content separately. This means if your site is available in French, Spanish, and German, you could rank in each market’s local search results.

4. Build Trust and Credibility

A site that “speaks” to people in their native language shows cultural respect. This builds trust—an essential factor in lead generation and sales conversion.

5. Increase Conversions and Sales

Studies show that users are more likely to complete a purchase if information is available in their native tongue. For eCommerce businesses, this directly translates into revenue growth.

How to Make a Multilingual WordPress Site

Creating a multilingual site isn’t as complicated as it sounds. There are several approaches, each with its pros and cons:

  1. Using Translation Plugins – Tools like WPML, Weglot, and Polylang simplify the process by handling translations, language switchers, and SEO optimizations.

  2. Manual Setup Without Plugins – You can create separate subdomains or directories for each language and manually add translated content. This requires more effort but gives full control.

  3. Automatic Machine Translation – Some plugins or APIs provide instant translations via AI. While fast, this method often lacks the accuracy and nuance of human translation.

The method you choose depends on your budget, time, and target audience. For most WordPress site owners, starting with a plugin is the fastest and most effective solution.

How to Make a Multilingual WordPress Site Using the WPML Plugin

WPML (WordPress Multilingual Plugin) is one of the most popular solutions for building multilingual websites. It’s robust, SEO-friendly, and trusted by thousands of businesses worldwide.

Step 1: Install and Activate WPML

  • Purchase a WPML license from the official WPML website.

  • Download the plugin and upload it to your WordPress dashboard (Plugins > Add New > Upload Plugin).

  • Activate WPML after installation.

Step 2: Configure Basic Settings

When you first activate WPML, a setup wizard will appear.

  • Choose the site’s default language (e.g., English).

  • Select additional languages you want to add (e.g., Spanish, French, German).

  • Enable or disable automatic browser language detection.

Step 3: Add Language Switcher

WPML allows you to add a language switcher in the:

  • Main menu

  • Footer

  • Sidebar as a widget

  • Floating widget

You can customize the appearance, flag icons, and dropdown style.

Step 4: Translate Content

  • Go to Pages > All Pages (or Posts > All Posts).

  • Next to each page, you’ll see “+” icons for each language. Click it to add translations.

  • You can either use manual translations or integrate with WPML’s professional translation service marketplace.

Step 5: Translate Menus and Widgets

  • Navigate to Appearance > Menus and translate menu items.

  • For widgets, go to Appearance > Widgets and add translations accordingly.

Step 6: SEO Optimization

WPML works with Yoast SEO and Rank Math. Each translated page has its own meta title, description, and URL structure—allowing Google to index each language separately.

???? Why choose WPML?

  • Best for large websites and eCommerce stores.

  • Offers professional translation integrations.

  • Provides strong SEO capabilities for multilingual sites.

How to Make a Multilingual WordPress Site Using the Weglot Plugin

Weglot is a cloud-based translation plugin that’s extremely user-friendly. Unlike WPML, it doesn’t require manual setup of every translation—it automatically translates your site and lets you refine text from an online dashboard.

Step 1: Install Weglot

  • Go to your WordPress dashboard.

  • Navigate to Plugins > Add New and search for Weglot Translate.

  • Install and activate the plugin.

Step 2: Create a Weglot Account

  • Sign up on Weglot’s website.

  • Copy the API key provided in your account dashboard.

  • Paste the key into the Weglot settings on WordPress.

Step 3: Choose Languages

  • Set your original site language (e.g., English).

  • Select the languages to translate into (e.g., French, German, Spanish).

  • Save settings.

Step 4: Automatic Translations

Weglot will instantly create translated versions of your entire website, including:

  • Posts and pages

  • Menus

  • Widgets

  • Dynamic content (like forms, checkout pages, etc.)

Step 5: Customize Translations

  • Log in to your Weglot dashboard.

  • Use the Visual Editor to make edits directly on your site.

  • Invite professional translators if needed.

Step 6: SEO Benefits

Weglot automatically creates SEO-friendly subdirectories (e.g., yoursite.com/fr/, yoursite.com/de/).

  • Each language has its own unique URLs.

  • Meta descriptions and alt tags are also translated.

???? Why choose Weglot?

  • Best for beginners and non-technical users.

  • Fast setup with no complex configurations.

  • Automatic updates keep all translations in sync.

How to Make a Multilingual WordPress Site Using the Polylang Plugin

Polylang is another popular choice. It’s lightweight, free (with premium add-ons), and integrates well with most themes. Unlike Weglot, it doesn’t provide automatic translations but gives you full control over manual translation.

Step 1: Install Polylang

  • Go to Plugins > Add New.

  • Search for Polylang.

  • Install and activate.

Step 2: Configure Languages

  • Navigate to Languages > Languages.

  • Add all the languages you want for your website.

  • Assign a flag and language code (e.g., EN, FR, DE).

Step 3: Assign Translations

  • For every post or page, Polylang adds a language selector in the editor.

  • You create a separate version of each page for each language.

Step 4: Translate Menus and Widgets

  • Go to Appearance > Menus and create different menus for each language.

  • Assign them accordingly in the Polylang settings.

Step 5: Language Switcher

Polylang lets you add a language switcher in:

  • Navigation menu

  • Widget area

  • Shortcode

Step 6: SEO Compatibility

Polylang works with SEO plugins like Yoast and Rank Math. Each translation has its own URL slug and meta information.

???? Why choose Polylang?

  • Best for budget-friendly users.

  • Great if you prefer manual translations over automated ones.

  • Lightweight and performance-friendly.

How to Make a Multilingual WordPress Site Without a Plugin

While plugins make things easier, some website owners prefer building a multilingual site manually. This gives more control and avoids reliance on third-party tools. However, it requires more effort and technical knowledge.

Option 1: Create Subdomains or Subdirectories

  • Subdomains: fr.yoursite.com, es.yoursite.com

  • Subdirectories: yoursite.com/fr/, yoursite.com/es/

This method involves:

  1. Setting up subdomains or subdirectories via your hosting provider.

  2. Installing WordPress separately for each language.

  3. Manually creating and publishing content in the target language.

???? Pros: Maximum control, independence from plugins, strong SEO for each language site.
???? Cons: More maintenance—updating content across multiple WordPress installs.

Option 2: Use a Multisite WordPress Network

  • Enable WordPress Multisite to run multiple sites from one installation.

  • Assign each site a language. For example:

    • Site 1: English

    • Site 2: Spanish

    • Site 3: German

???? Pros: Centralized management, scalability, each language site independent.
???? Cons: Higher complexity, requires technical setup, harder for beginners.

Option 3: Manual HTML Translation

For very small websites (e.g., static landing pages), you can create separate HTML versions of your site in each language. While not scalable, it’s an option for simple projects.

⚠️ Key Note: Without plugins, SEO management becomes harder. You’ll need to handle hreflang tags, sitemap updates, and translations manually.

How to Make Your Website Multilingual – Video Tutorial

Not everyone prefers reading step-by-step instructions. For many users, video tutorials provide a faster and clearer way to learn.

Here’s how you can integrate video tutorials into your site:

  1. Create or embed a tutorial – Record a screen-share video showing how to use plugins like WPML, Weglot, or Polylang.

  2. Host on YouTube or Vimeo – These platforms allow embedding and improve discoverability.

  3. Embed in WordPress – Use the Gutenberg video block or paste the video link directly into the editor.

  4. Add transcripts and captions – Improves accessibility and SEO.

???? Example placement: Add a “How to Make Your WordPress Site Multilingual – Step-by-Step Tutorial” video in your blog post. This keeps users engaged and increases on-page time, which is an SEO signal.

What Website Content Should You Translate

Going multilingual isn’t just about translating blog posts—it requires a holistic approach. Translating the right elements ensures a consistent user experience.

Here’s a checklist of what to translate:

1. Core Website Content

  • Homepage

  • About Us page

  • Contact page

  • Product or service descriptions

  • Blog posts and landing pages

2. Navigation and User Interface

  • Menu items

  • Buttons and call-to-actions (CTAs)

  • Widgets and footers

  • Forms (contact forms, sign-up forms, checkout forms)

3. SEO Elements

  • Meta titles and meta descriptions

  • Alt text for images

  • URL slugs (localized keywords improve rankings)

  • H1, H2, and H3 headings

4. Transactional Content

  • Emails (order confirmations, newsletters, customer support messages)

  • Error messages (404 pages, form errors, login alerts)

  • Privacy policy, terms & conditions, cookie policies

5. Media and Multimedia

  • Images with embedded text

  • Videos with subtitles or voice-overs

  • Infographics with translated labels

???? Pro Tip: Always use native speakers or professional translators for critical content (like product descriptions, legal pages, and marketing copy). Machine translations can miss cultural nuance and reduce trust.

Advantages of a Multilingual WordPress Site

Running a multilingual WordPress site isn’t just about being “fancy” or ticking a global box. It offers real, measurable benefits for businesses, bloggers, eCommerce stores, and organizations. Let’s break down the biggest advantages.

1. Expand Your Global Reach

The internet connects people across borders, but language often limits access. A multilingual site allows you to:

  • Reach international customers who prefer browsing in their native language.

  • Tap into new markets without launching separate websites.

  • Build stronger connections with diverse audiences.

???? Example: An English-only site may attract U.S. visitors, but adding Spanish could open doors to both Latin America and Spain, instantly multiplying your potential audience.

2. Improve User Experience and Engagement

Visitors feel more comfortable and engaged when they can:

  • Read content in their own language.

  • Navigate menus, buttons, and forms without confusion.

  • Interact with a website that respects their cultural context.

Better user experience means:

  • Lower bounce rates (users don’t leave immediately).

  • Higher on-site time (Google loves this signal).

  • Better conversions (more sign-ups, downloads, purchases).

3. Boost SEO in Multiple Languages

A multilingual WordPress site has huge SEO advantages:

  • Localized keywords: Rank for different search terms in different markets.

  • Geo-targeting: Google indexes each language separately, letting you appear in regional search results.

  • Hreflang tags: When properly set, they tell Google which page to show in each region.

  • Increased backlinks: Foreign-language sites may link to your translated content, growing your domain authority.

???? Result: A single website can dominate rankings across multiple countries.

4. Build Trust and Credibility

Language isn’t just about communication—it’s about connection and trust. When you speak to someone in their native tongue, it signals respect and inclusivity.

  • Customers see you as professional and reliable.

  • Global users are more willing to share personal data (emails, payment details).

  • It reduces misunderstandings in critical areas like product features or policies.

???? Trust = Conversions. A multilingual site directly influences brand credibility.

5. Increase Sales and Conversions

At the end of the day, the goal of most websites is action—whether that’s making a purchase, filling a form, or subscribing. Research shows:

  • 72% of consumers are more likely to buy a product if the information is in their language.

  • 56% of users say language is more important than price when making a purchase decision.

By offering localized content, you’re not just “attracting” customers—you’re closing more deals.

6. Gain a Competitive Advantage

Many businesses still stick to English-only websites, even when targeting global audiences. By going multilingual, you:

  • Differentiate yourself from competitors.

  • Capture markets they’ve ignored.

  • Position your brand as forward-thinking and globally accessible.

???? Think of it this way: If two companies offer the same product, but only one speaks the customer’s language, guess which one gets the sale?

7. Stronger Cultural Connection

Beyond technical SEO and sales metrics, multilingual sites allow you to:

  • Localize messaging (adjust tone, idioms, and cultural references).

  • Use culturally relevant images and symbols.

  • Make users feel like the website was built just for them.

This kind of connection drives loyalty and long-term engagement.

8. Future-Proof Your Website

As your business grows, so will your audience. Starting with a multilingual strategy now means you’re:

  • Preparing for international expansion.

  • Avoiding costly redesigns later.

  • Building a scalable structure that can easily add more languages.

Conclusion: Hosting for Multilingual WordPress Site

Building a multilingual WordPress site is no longer a luxury—it’s a strategic necessity for anyone looking to expand their reach, boost credibility, and increase conversions. Whether you’re running a personal blog, a business website, or a full-scale eCommerce store, speaking to your audience in their native language builds trust and sets you apart from competitors.

In this guide, we’ve covered:

  • ✅ What a multilingual WordPress site is and why you need one.

  • ✅ Different ways to create one—using plugins like WPML, Weglot, Polylang, or going plugin-free with subdomains or multisite.

  • ✅ How to integrate video tutorials and decide what content to translate.

  • ✅ The key advantages: global reach, SEO benefits, cultural trust, and higher sales.

  • ✅ Practical FAQs to clear doubts and give actionable insights.

At its core, a multilingual site isn’t just about translation—it’s about connection. It’s about showing your audience that you value them enough to speak their language and meet them where they are.

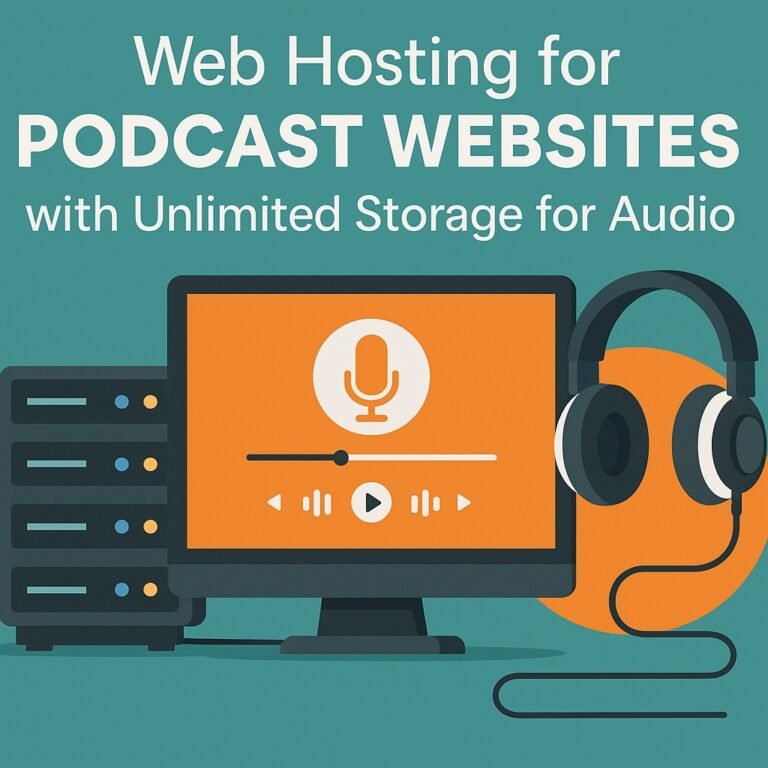
Web Hosting for Podcast Websites with Unlimited Storage for Audio

0

Launching a podcast website isn’t just about uploading episodes — it’s about building a long-term platform that can grow as your audience expands. Unlike blogs or image-based sites, podcasts depend heavily on high-quality audio files, which consume a large amount of storage and bandwidth.

Each episode might range between 50 MB to 200 MB, and when you multiply that by dozens or even hundreds of episodes, storage demand skyrockets. If your web host imposes strict limits, you’ll quickly run into problems — either paying extra for space, compressing files (and losing audio quality), or deleting older episodes.

That’s why unlimited storage for audio becomes a crucial factor for podcasters who want both freedom and scalability. It ensures you can keep every episode live and accessible to new listeners without worrying about data caps or performance drops.

How Unlimited Storage and Bandwidth Benefit Podcasters

Unlimited storage doesn’t only mean “infinite space” — it also indicates a host that understands the data demands of streaming and downloads.

Here’s how it benefits your podcast website:

  1. Higher listener satisfaction: Fast delivery and uninterrupted streaming improve user experience.
  2. SEO advantages: Search engines reward websites that load quickly and remain stable under heavy traffic.
  3. Long-term scalability: You can archive old episodes while continuously adding new ones without reconfiguring your hosting.
  4. Reduced cost-per-episode: Instead of paying per GB or per-month for extra files, you pay a flat hosting fee.

However, the phrase “unlimited” is often marketing language — in practice, hosts impose fair-use policies or soft limits. That’s why, before purchasing, always check the Terms of Service to see how “unlimited” actually works.

Typical Pitfalls with Standard Hosting Plans

True Multilingual Websites

Many creators start by uploading podcast episodes to the same hosting they use for their WordPress blog. At first, it seems convenient — but soon, limitations appear:

  • Storage caps: Basic plans usually offer only 10 GB – 50 GB.
  • Bandwidth throttling: If hundreds of listeners stream simultaneously, your site may slow down or even crash.
  • Lack of media optimization: General web hosts aren’t tuned for large-file delivery or streaming protocols.
  • No analytics integration: You can’t easily track downloads, listener locations, or episode performance.

As a result, your audience experience suffers, and your growth potential stalls.

To truly scale a podcast brand, you need hosting optimized for media performance, reliability, and unlimited audio storage — not just any generic shared hosting.

Unlimited Storage vs. “Practically Unlimited” — What It Really Means

When hosting companies advertise “unlimited storage,” they usually mean no preset cap on disk usage — but that doesn’t mean infinite space. Most use a fair use policy, which restricts extremely large file hosting (like raw archives or backup dumps).

For podcasters, this is critical. You want a host that allows consistent audio uploads without throttling or hidden restrictions. Before choosing, check for these terms in the fine print:

  • “Unlimited storage for web files only” → acceptable.
  • “Not for media streaming or file distribution” → red flag ????.
  • “Subject to resource usage limits (CPU/I/O)” → manageable but worth monitoring.

✅ Ideal hosts for podcast storage (examples):

  • Hostinger Business / Cloud plans: affordable, high bandwidth, fast SSD servers.
  • DreamHost Shared Unlimited: truly no cap on files or bandwidth, suitable for long-term podcasts.
  • A2 Hosting Turbo Boost: optimized for media delivery and WordPress sites with caching support.

The key takeaway — “unlimited” is fine as long as it includes audio files in its fair-use policy.

Bandwidth, Downloads & Delivery Speed

Bandwidth determines how many listeners can stream or download your podcast simultaneously. If your hosting can’t handle it, you’ll face slow loading or episode cutoffs.

To calculate minimum needs:
If 1 episode = 100 MB and you expect 10,000 monthly downloads → that’s 1 TB bandwidth per month already. So even “mid-tier” plans can hit limits quickly.

That’s why podcasters should pick hosts offering:

  • Unmetered bandwidth (no fixed GB limit).
  • Optimized caching layers for media (reduces repeated downloads).
  • Solid-state drives (SSD) for faster delivery.

Also verify if your host uses HTTP/2 or LiteSpeed technology — both drastically improve speed for audio-heavy sites.

CDN, Caching & Geo-Distribution for Global Listeners

Your podcast isn’t limited by geography — but your hosting server is. If your host’s data center is in the U.S., international listeners (Europe, Asia) may experience buffering.

That’s where a Content Delivery Network (CDN) steps in.
A CDN replicates your audio files across multiple global nodes so every listener gets the episode from the nearest server — improving both speed and SEO rankings.

Best CDN options for podcasts:

  • Cloudflare CDN: free, simple integration with WordPress.
  • Bunny.net: inexpensive and fast global distribution.
  • Amazon CloudFront: enterprise-level CDN for very large audiences.

CDN also reduces bandwidth pressure on your origin server, keeping your hosting plan within limits.

Integrations: RSS Feeds, Embed Players, and Podcast Directories

Your hosting environment must make it easy to publish and distribute your episodes automatically.
Look for hosts that support:

  1. WordPress podcast plugins like Seriously Simple Podcasting or PowerPress.
  2. Automatic RSS feed generation — this feed is how Apple Podcasts, Spotify, and Google Podcasts discover new episodes.
  3. Embed player support — so visitors can play directly on your site.
  4. Easy directory submission tools — allowing your show to appear across platforms effortlessly.

Without these integrations, you’ll spend hours managing technical distribution manually — a huge time waste for creators.

Shared, VPS, Cloud, and Dedicated Hosting Options

Best Practice 1: Choose Hosting Built for High-Load and Authenticated Traffic

Every podcaster’s journey starts somewhere small — but not every hosting type fits every stage of growth. Understanding the difference between shared, VPS, cloud, and dedicated hosting can save you time, frustration, and money.

1. Shared Hosting (Beginner Level)
This is the most affordable option (typically $3–$10/month). Your website shares the same server resources with dozens of other users.
✅ Best for: new podcasters with fewer than 20 episodes and low traffic.
❌ Not ideal for: heavy audio traffic or multiple podcast series.
Over time, limited CPU power and storage restrictions will slow your site as your library expands.

2. VPS Hosting (Intermediate Level)
Virtual Private Servers (VPS) offer more control and dedicated resources.
✅ Best for: medium-sized podcasts with consistent listeners (10K–50K monthly downloads).
❌ Downside: requires some technical setup (root access, OS management).
Pricing starts around $20–$40/month, depending on storage and bandwidth.

3. Cloud Hosting (Scalable Solution)
Cloud hosting (like Hostinger Cloud, SiteGround Cloud, or AWS Lightsail) uses distributed servers to handle load spikes efficiently.
✅ Best for: growing podcasts, multiple hosts, or video+audio content.
✅ Scalable: pay only for what you use — perfect for unpredictable traffic spikes after a viral episode.
❌ Slightly more expensive (usually $30–$70/month).

4. Dedicated Hosting (Enterprise Level)
A full physical server just for your podcast brand — offering unlimited customization, highest performance, and reliability.
✅ Best for: podcast networks, agencies, or commercial media publishers.
❌ Overkill for beginners — costs $100–$300/month or more.

Podcast-Specific Hosting Platforms Offering Unlimited Audio Storage

If you don’t want to handle technical setup or server management, podcast-specific hosts can be smarter choices. These are purpose-built for audio creators and often include analytics, distribution, and monetization tools.

Top examples include:

PlatformStorageKey FeaturesPrice Range
Podbean Unlimited PlusUnlimitedBandwidth + Monetization + Analytics$14–$29/month
BuzzsproutLimited free, paid tiersEpisode scheduling, analytics$12–$24/month
Transistor.fmUnlimited podcasts per accountTeam management, private feeds$19–$49/month
Captivate.fmUnlimited uploadsMarketing suite + dynamic ad insertion$17–$44/month

These platforms typically store your audio files on optimized media servers — meaning you don’t have to worry about technical details like bandwidth, CDN, or caching. However, you often lose full website control compared to self-hosting WordPress on a regular host.

Platform vs. Generic Web Host: Which Is Better?

Let’s pressure-test both options:

CriteriaPodcast-Specific HostGeneric Web Host (e.g., DreamHost, Hostinger)
Ease of setupSimple, plug & playRequires WordPress setup
Audio optimizationBuilt-in CDN, auto compressionManual integration needed
AnalyticsIntegrated listener statsUse plugins or third-party tools
CustomizationLimited website controlFull site freedom
Cost$10–$30/month$5–$25/month (plus plugin costs)

✅ Best hybrid approach:
Use a generic web host for your website (WordPress) and a podcast host (Podbean / Transistor) for your audio files — then embed the episodes on your site.
This gives you both creative control and media reliability.

Budget Considerations and Scaling From “Easy Start” to “High Volume”

Your hosting needs evolve as your audience grows:

StageMonthly ListenersRecommended HostingApprox. Cost
Beginner< 10KShared or Podbean Basic$5–$15
Intermediate10K–50KVPS or Transistor.fm$20–$40
Professional50K–200KCloud Hosting + CDN$50–$100
Enterprise200K+Dedicated or AWS CloudFront$100+

???? Tip: Always plan 2–3 steps ahead. Migrating hosts repeatedly can cause feed disruptions and SEO ranking loss.

SEO Implications of Hosting Choice for a Podcast Website

Your hosting provider directly influences your search engine visibility. Google’s algorithm increasingly prioritizes site speed, uptime, mobile performance, and security — all of which are hosting-dependent.

A slow or unstable podcast site doesn’t just frustrate listeners; it also hurts rankings on Google, Apple Podcasts, and Spotify directories (which indirectly use web speed for indexing).

✅ Key SEO-friendly hosting factors:

  • 99.9% uptime or higher

  • Fast Time-to-First-Byte (TTFB) under 500ms

  • HTTP/2 or LiteSpeed support

  • Integrated SSL (HTTPS)

  • CDN availability

If your host fails to meet these, your website could slip behind competitors even if your content quality is strong.

Site Speed, Mobile Friendliness & Secure Delivery (HTTPS)

Audio-heavy websites can become sluggish if not optimized properly. Every MB matters when loading pages on mobile.

To maintain fast and secure delivery:

  1. Enable browser caching — store static elements like thumbnails and player scripts locally.

  2. Use a lightweight WordPress theme optimized for Core Web Vitals (e.g., Astra, GeneratePress).

  3. Compress thumbnails & artwork (JPG or WebP) to minimize load times.

  4. Use HTTPS with free SSL (Let’s Encrypt) — ensures trustworthiness and better Google ranking.

  5. Host audio externally (via CDN or podcast host) and embed episodes instead of self-hosting them directly.

If you store every audio file locally, your site’s loading time and database queries will skyrocket — killing your SEO performance.

Structured Data for Podcasts, Sitemaps & Schema Markup

Google now recognizes Podcast schema — a structured data format that helps search engines understand your episodes and display them in rich results (with play buttons or episode lists).

You can implement this easily using:

  • Podcast Schema Plugin for WordPress

  • Yoast SEO’s Podcast Support (premium version)

  • Or manually add PodcastEpisode JSON-LD markup

Include details like:

  • Episode title, duration, and description

  • Publish date

  • Audio URL

  • Thumbnail or cover art

Also, generate a podcast sitemap (via PowerPress or Rank Math) to help Google index all episodes efficiently.

Hosting Continuity, Backups & Migration Planning

Podcasts are long-term projects — and losing your audio archive would be devastating. That’s why hosting continuity and backups are non-negotiable.

Here’s what to ensure before committing to a host:

  • Daily backups: Full-site and file backups at least once per day.

  • Offsite redundancy: Backup copies stored on a separate server (e.g., Google Drive or AWS S3).

  • One-click restoration: Ability to recover site instantly if a plugin or update breaks it.

  • Migration assistance: Free site migration support helps move smoothly from old host to new without losing SEO or subscribers.

If your host lacks automated backup, install a plugin like UpdraftPlus or JetBackup — they’re life-savers during migration.

Bonus Tip – Audio File Delivery Optimization

Even with unlimited storage, how you deliver your audio matters:

  • Serve MP3 files via HTTP/2 for multiplexing and faster load.

  • Enable GZIP compression on your server for metadata and scripts.

  • Use lazy-loading for embedded players (so page loads first, audio loads after).

These micro-optimizations can cut page load times by 30-50%, which directly boosts user retention and search ranking.

How to Migrate Your Existing Podcast Site to Unlimited Storage Hosting

Migrating a podcast website isn’t like moving a simple blog.
You’re dealing with large audio files, active RSS feeds, subscriber links, and SEO-indexed pages — so one small mistake can cause listeners to lose access to your show.

Follow this step-by-step migration framework:

  1. Take full backups of both your WordPress files and your database. (Use UpdraftPlus or All-in-One WP Migration.)

  2. Export all RSS feeds — these contain episode metadata, timestamps, and platform connections.

  3. Choose your new unlimited-storage host (like DreamHost Unlimited, Hostinger Cloud, or Podbean Unlimited Plus).

  4. Install WordPress on the new host and restore your backup.

  5. Verify permalinks and media paths. Old episode URLs must remain identical; otherwise, you’ll lose your ranking.

  6. Update DNS records — point your domain to the new host’s nameservers. (DNS propagation may take up to 24 hours.)

  7. Monitor 404 errors using Google Search Console to catch any broken links early.

???? Pro tip: keep your old hosting active for 3–5 days after migration. This ensures listeners accessing older cached feeds still receive your episodes without downtime.

Redirects, RSS Feed Continuity & Keeping Download Stats

Your RSS feed is your podcast’s lifeline — Apple Podcasts, Spotify, and Google all pull new episodes from it.
When migrating, preserving that feed is non-negotiable.

Here’s how to maintain continuity:

  • Keep the same feed URL (e.g., https://yourdomain.com/feed/podcast).

  • If the feed path changes, set a 301 redirect from the old to the new feed.

  • Use a “Redirect” plugin in WordPress or configure .htaccess for Apache servers.

  • After migration, test your feed using Podba.se Validator.

To retain your historical download statistics, export them from your old host (Podbean, Buzzsprout, etc.) and import to your new platform.
If that’s unavailable, start tracking fresh data via Google Analytics 4 or Chartable.

Monitoring Growth, Analytics & Cost Traps

Once your site is stable, focus on data-driven management.
Podcasters often ignore analytics after launch — a costly mistake.

Key metrics to track:

  • Total monthly downloads per episode

  • Average listener retention time

  • Device & geography breakdown (mobile vs desktop)

  • New vs returning listeners

  • Bandwidth usage spikes

Tools like Chartable, Podtrac, and Google Analytics 4 can visualize these patterns.

Also, regularly audit your hosting invoices — some providers silently charge for overages when traffic spikes.
Set up automatic alerts for bandwidth and storage thresholds to avoid surprise costs.

Best Practices for Archiving Older Episodes & Metadata Hygiene

Over time, your library will expand to hundreds of episodes. Without proper structure, it becomes chaotic.

✅ Best long-term practices:

  1. Archive older seasons into categorized folders (Season 1, Season 2, etc.) for easier management.

  2. Retain episode metadata (titles, descriptions, tags) inside a spreadsheet or CMS backup.

  3. Use consistent naming like podcast-episode-001.mp3 instead of random file names.

  4. Embed ID3 tags in all MP3 files — these help podcast players show artwork and details correctly.

  5. Compress older files using 128 kbps bitrate (saves space without major quality loss).

  6. Use long-term cloud backups (Google Drive, Dropbox, or AWS S3) apart from your web host.

This ensures even if your hosting ever fails, your full audio archive remains intact and easily recoverable.

10 Practical Tips for Choosing and Using Unlimited Storage Hosting for Podcasts

Even if a hosting company promises “unlimited,” not all of them are built equally. These 10 rules will help you make the smartest possible decision — balancing performance, scalability, and long-term cost efficiency.

  1. Always read the fine print.
    Verify that “unlimited storage” includes media files (many exclude audio/video from that policy).

  2. Prioritize uptime and speed.
    Go for hosts with 99.9%+ uptime and low latency servers. Google rewards fast, stable websites.

  3. Use SSD-powered hosting.
    SSDs handle thousands of concurrent downloads far better than HDD-based servers.

  4. Integrate a CDN early.
    Cloudflare or Bunny.net dramatically reduce buffering and increase international reach.

  5. Keep audio separate from website data.
    Host WordPress + visuals on your main server, but offload MP3s to a podcast host or CDN.

  6. Automate your backups.
    Daily, incremental backups (both site and media) ensure zero data loss even during migration.

  7. Implement caching & compression.
    Tools like WP Rocket or LiteSpeed Cache keep your website blazing fast despite heavy content.

  8. Maintain feed consistency.
    Never change your podcast RSS URL once public. Use 301 redirects if absolutely necessary.

  9. Track analytics religiously.
    Regularly review episode downloads, retention rates, and storage consumption.

  10. Plan 12 months ahead.
    Don’t just buy for today’s needs — anticipate double your current audience and storage demand.

Checklist: What to Ask Before Choosing a Host

When shortlisting hosts for your podcast website, ask these 7 strategic questions:

  1. Do you allow unlimited audio storage and streaming under your fair-use terms?

  2. What’s your average response time and server uptime record?

  3. Is CDN included, or will I integrate my own?

  4. How do you handle traffic spikes during viral episodes?

  5. Are automatic backups and restores included?

  6. Can you migrate my site without RSS feed disruption?

  7. What’s the renewal cost after the first year?

If a host can answer all seven confidently, it’s a solid candidate for long-term podcasting.

My Recommendation: When to Use Generic Hosting vs. Podcast-Specific Hosting

Let’s simplify your decision:

ScenarioRecommended Hosting TypeExample Providers
You want full website control (WordPress, blog, SEO)Generic Web Host + CDNDreamHost Unlimited, Hostinger Cloud, A2 Turbo
You want zero technical work, just publish episodesPodcast Hosting PlatformPodbean, Transistor.fm, Captivate.fm
You want hybrid control (WordPress + embedded podcast)Self-host WordPress + External Audio HostWP Engine + Podbean
You plan to scale to millions of downloadsCloud or DedicatedAWS Lightsail, Kinsta, Cloudways

???? Pro Tip:
If you’re monetizing or planning to run ads, choose a hybrid approach — it gives you analytics freedom and website control for sponsor integrations.

Final Thoughts & Next Steps

Launching a podcast is easy — building a scalable, listener-friendly, and SEO-optimized home for it isn’t.
Your hosting choice will determine not only your site’s reliability but also your brand reputation and growth ceiling.

To summarize:

  • Go for a trusted host with clear policies on audio storage.

  • Combine it with CDN + caching for speed.

  • Keep automated backups and a clean RSS feed.

  • Review performance and bandwidth every 3–6 months.

The goal isn’t just to store episodes — it’s to create a permanent, frictionless platform that supports your voice for years to come.

Hosting Simplified: What You Need to Ask Before Buying Shared Hosting

0

If you’re new to web hosting, shared hosting often looks like a dream deal — cheap, beginner-friendly, and ready to launch in minutes. But behind those low prices can hide critical performance bottlenecks, security gaps, or support limitations that you only discover after your website slows down or goes offline.

In 2025, shared hosting remains the most popular hosting option for beginners, small business owners, and bloggers. Yet, the difference between a smooth, reliable experience and a constant headache comes down to asking the right questions before you buy.

This article simplifies shared hosting — explaining how it works, what it can and cannot do, and the 10+ essential questions you should ask any hosting provider before clicking “buy now.”

Whether you’re launching a personal blog, a small eCommerce shop, or a startup website, this guide will help you choose smartly — with no regrets later.

What Is Shared Hosting (And Why It’s Popular)

Shared hosting is like renting an apartment in a big building. You share the same physical server (the “building”) with dozens or hundreds of other websites (“tenants”). Each site gets its own directory and limited resources — CPU, RAM, and bandwidth — but relies on the same infrastructure.

Why It’s Popular:

  • Low Cost: Plans start as low as $2–$5/month.
  • Easy Setup: Perfect for beginners — one-click WordPress installs, cPanel access, and automated tools.
  • Managed Maintenance: The host manages server updates, security patches, and backups.
  • Scalable Start: A simple launch pad for new projects or small sites.

But Here’s the Catch:

You share resources. If another site on the same server gets heavy traffic or faces malware, your site may slow down or even go offline. That’s why choosing the right host — and asking the right questions — is essential.

Before You Buy Shared Hosting, Ask These Questions

Let’s go step by step through what every smart buyer should ask before purchasing shared hosting in 2025.

Migration to a Server with Plesk

1. What Is the Actual Cost — Now and on Renewal?

Shared hosting prices look attractive at first glance — “$1.99/month!” — but that’s often the introductory price for the first year. Renewal rates can double or triple.

Ask these questions:

  • What’s the renewal price after the first term?
  • Is the promotional rate valid for monthly, annual, or 3-year terms?
  • Are SSL, backups, or emails included — or charged separately?

Pro Tip: Always calculate your three-year total cost, not just the first-year teaser.

2. What Resources Am I Actually Getting?

The term “unlimited bandwidth and storage” is often misleading. Shared hosting has limits, even if not advertised clearly.

Ask your host:

  • How much CPU and RAM do I get?
  • Are there limits on inodes (file counts) or simultaneous connections?
  • What happens if my website exceeds those limits — do you throttle or suspend it?

Why it matters:
If your site grows and starts consuming more resources, you could experience downtime or throttling without warning. Always know your real resource caps.

3. What’s Your Uptime Guarantee — and Is It Verified?

In hosting, “uptime” means how often your site stays online. Anything below 99.9% uptime translates to several hours of downtime each month.

Ask:

  • What’s your uptime guarantee in writing?
  • Do you offer service credits for downtime?
  • Do you have real-time uptime monitoring tools or third-party validation (like UptimeRobot reports)?

Pro Tip: Top-tier hosts like SiteGround, A2 Hosting, and WPX maintain 99.99%+ uptime backed by independent monitoring.

4. How Fast Are Your Servers — and Where Are They Located?

Speed matters — not just for user experience but for SEO and conversions.

Ask:

  • Where are your data centers located?
  • Do you use SSD or NVMe storage?
  • Do you offer built-in caching or CDN integration (like Cloudflare)?
  • What’s your average server response time (TTFB)?

If most of your visitors come from the U.S., choose a server in North America. For a global audience, pick a host offering free CDN for distributed delivery.

5. What Kind of Support Do You Provide?

When something breaks, support can make or break your hosting experience.

Ask:

  • Is your support available 24/7?
  • Do you offer live chat, phone, or ticket-based assistance?
  • Are your support agents in-house or outsourced?

Pro Tip: Test support before buying — send a pre-sales chat asking a technical question. The response quality tells you everything about their post-purchase support.

6. What’s the Backup Policy?

Backup

Backups are your safety net — but many cheap shared hosts don’t back up automatically, or charge extra for restoration.

Ask:

  • How often do you back up — daily, weekly, or monthly?
  • Are backups stored offsite or on the same server?
  • Is restoration free or paid?

A good host provides daily backups with one-click restore options. Never rely solely on manual backups.

7. What Security Measures Are Included?

Shared hosting environments are vulnerable — if one website gets infected, it can potentially affect others on the same server.

Ask:

  • Do you provide free SSL certificates?
  • Is there malware scanning or removal included?
  • Do you have a Web Application Firewall (WAF) or brute-force protection?
  • How often do you patch or update your servers?

Bonus Tip:
Choose a host with daily malware scanning and auto SSL renewal — essential for beginners.

8. How Easy Is It to Migrate or Upgrade Later?

Your website will grow. Maybe you’ll start with a simple blog, then expand into an online store or portfolio.

Ask:

  • Can I migrate to VPS or cloud hosting easily?
  • Is migration handled automatically or manually?
  • Are there fees for upgrading or transferring domains?

A future-proof host allows seamless upgrades without downtime or configuration nightmares.

9. Do You Offer a Staging Environment or Testing Option?

A staging site is a clone of your website where you can test design updates, plugin changes, or code edits before making them live.

Ask:

  • Is staging included even on shared plans?
  • Can I push changes from staging to live easily?

While not all shared hosts include this, premium ones like SiteGround or Hostinger’s Business plan do — and it’s worth it for avoiding downtime during updates.

10. What’s the Refund Policy and Guarantee?

Every good hosting provider should offer a clear money-back guarantee.

Ask:

  • What is your refund period — 30, 45, or 97 days?
  • Are there exceptions (like domain registration or setup fees)?
  • How long does it take to process refunds?

Pro-grade hosts like DreamHost offer 97-day money-back guarantees, showing real confidence in their service.

Technical Questions Most Buyers Forget to Ask

Beyond the basics, smart buyers dig deeper into technical details. Here’s what to ask next:

11. What Software Stack Do You Use?

Check if the host supports modern, fast, and secure software:

  • PHP 8.2+
  • LiteSpeed or NGINX servers
  • HTTP/3 support
  • GZIP/Brotli compression
  • MariaDB or MySQL 8+

This ensures your site is compatible with the latest WordPress or custom scripts.

12. What Email Options Are Included?

Some hosts charge separately for domain-based email.

Ask:

  • How many email accounts are included?
  • Is there storage limitation per mailbox?
  • Do you support IMAP/SMTP?

If email isn’t included, factor that into your total cost.

13. How Many Websites Can I Host?

If you plan to manage multiple projects or domains, confirm if your plan supports more than one website.
Some “Basic” plans limit you to 1 site only, while slightly higher tiers allow unlimited domains.

Bonus: Signs of a Trustworthy Shared Hosting Provider

Look for these indicators before committing:
✅ Transparent pricing page (no hidden “addons”)
✅ Real reviews from verified customers
✅ Detailed documentation and knowledge base
✅ 24/7 live chat or email with human agents
✅ Partnerships with WordPress.org or Cloudflare
✅ Security certifications and compliance badges

Common Mistakes People Make When Buying Shared Hosting

  1. Choosing based on price alone.
    Cheap hosting often comes with hidden trade-offs — limited CPU, poor support, and renewal shocks.
  2. Ignoring server location.
    A U.S.-based host might load slowly for visitors in Asia or Europe.
  3. Overlooking backups and SSL.
    If these aren’t included, you’ll end up paying extra later.
  4. Skipping terms and conditions.
    Many hosts quietly limit “unlimited” resources in fine print.
  5. Not planning for growth.
    A small blog may fit on shared hosting now, but always choose a host that lets you scale up easily.

Recommended Shared Hosting Providers (2025 Edition)

HostStarting PriceFree SSLBackup FrequencyCDNNotable Features
SiteGround$4.99/mo✅Daily✅AI anti-bot, 99.99% uptime
Hostinger$2.99/mo✅Weekly✅LiteSpeed + 24/7 support
A2 Hosting$5.99/mo✅Daily✅Turbo servers, free migration
Bluehost$3.95/mo✅Auto✅Official WordPress partner
DreamHost$3.95/mo✅Daily✅97-day refund, transparent pricing

All five are reputable, beginner-friendly, and WordPress-compatible.

Checklist: Before You Buy Shared Hosting

✅ Compare first-year vs renewal pricing
✅ Confirm free SSL and daily backups
✅ Check server uptime and performance benchmarks
✅ Verify data center location (near audience)
✅ Test pre-sales support responsiveness
✅ Review refund policy and migration options
✅ Choose a host with malware scanning or WAF

FAQs

Q1. Is shared hosting good for WordPress?
Yes, if optimized. Many hosts provide managed WordPress shared plans with one-click installs and caching.

Q2. Can shared hosting handle high traffic?
Not long-term. Once you exceed 30K–50K monthly visits, consider upgrading to VPS or cloud hosting.

Q3. How secure is shared hosting?
It’s secure enough for small sites, provided your host includes malware scanning, WAF, and SSL.

Q4. Should I choose monthly or yearly billing?
Yearly plans are cheaper overall, but always check refund terms before committing.

Q5. Can I upgrade later without downtime?
Yes — good hosts allow one-click upgrades to higher tiers or VPS seamlessly.

Conclusion

Buying shared hosting isn’t just about finding the cheapest plan — it’s about choosing a foundation for your website’s growth, performance, and security.

Before you click purchase, take 10 minutes to ask the questions in this guide. Understand what you’re really getting — and what’s missing.

The best shared hosting provider gives you:

  • Transparent pricing
  • Strong uptime and speed
  • Free SSL and reliable backups
  • Scalable upgrade paths
  • 24/7 responsive support

In short: simplicity, speed, and stability. Choose a host that helps your website grow — not one you’ll outgrow in six months.

Because in 2025, hosting isn’t about servers — it’s about trust.

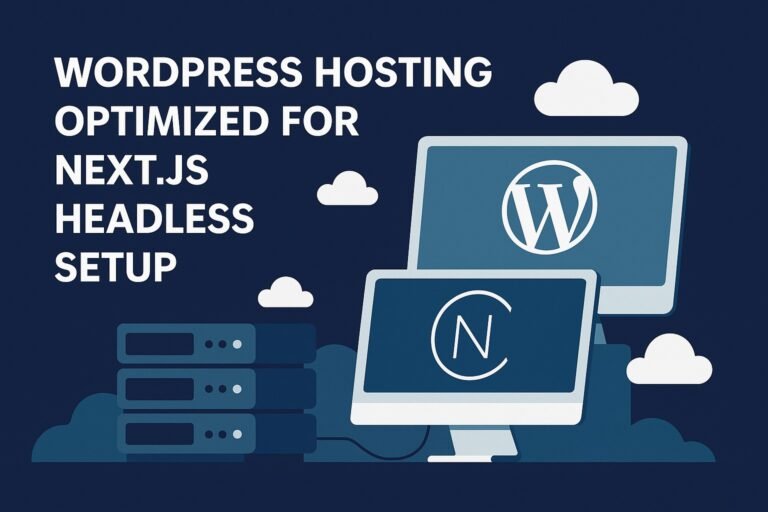
WordPress Hosting Optimized for Next.js Headless Setup

0

For more than a decade, WordPress has been the backbone of the web — powering over 40 % of all sites online. Its familiar dashboard, enormous plugin library, and flexible themes made it the go-to CMS for everyone from bloggers to enterprise publishers.

But as digital experiences evolved, traditional WordPress — where the backend and frontend are tightly coupled — started to show its age.
Modern users expect instant load times, app-like interactivity, and cross-platform publishing. Yet every request in a classic WordPress site requires PHP rendering, database queries, and template processing before showing a single pixel.

As JavaScript frameworks like React and Next.js began redefining the web, developers started asking:

“What if WordPress handled content, but not rendering?”

That question led to headless WordPress, a decoupled model where WordPress remains the content engine, and frameworks like Next.js take over presentation.

Understanding the Headless Model

In a headless architecture, WordPress acts purely as a content repository. Editors and marketers still enjoy the WordPress dashboard — adding posts, media, and custom fields — but the theme layer (PHP templates) is bypassed.

Instead, data is exposed through REST API or GraphQL endpoints.
The frontend — in this case, Next.js — fetches that data and renders it dynamically, either server-side (SSR) or statically (SSG).

This approach unlocks three major advantages:

  1. Performance:
    Pages are pre-rendered, cached, and served from CDNs instead of waiting on PHP each time.

  2. Scalability:
    The frontend can be deployed globally via edge networks while the backend scales independently.

  3. Freedom of Design:
    Developers can build pixel-perfect UIs with React components instead of wrangling with WordPress theme PHP files.

Why Next.js Became the Default Frontend for Headless WordPress

Next.js, developed by Vercel, provides everything a modern frontend needs: server-side rendering, static generation, routing, and image optimization — all out of the box.

Its ability to incrementally regenerate pages (ISR) means new WordPress content appears almost instantly without rebuilding the entire site.
That’s a huge leap over traditional JAMstack approaches, where every update required a full redeploy.

Pairing Next.js with WordPress delivers:

  • Instant-loading, SEO-friendly pages.

  • React-powered dynamic components (animations, filters, carousels).

  • Real-time content publishing via webhooks.

  • Complete control over data fetching and caching strategies.

But there’s a catch: this dual-system setup needs specialized hosting.
You’re no longer running just PHP and MySQL — you’re orchestrating APIs, Node.js processes, build pipelines, and CDNs.

That’s where optimized WordPress hosting for headless environments enters the picture.

Why Standard Hosting Fails for Headless Setups

Most shared or budget WordPress hosts are tuned for one thing — delivering rendered PHP pages.
They rarely optimize for REST API throughput, Node.js builds, or GraphQL performance.

Common issues include:

  • Slow API responses due to database bottlenecks.

  • Lack of Node.js runtime for Next.js server-side rendering.

  • Poor caching layers that ignore API routes.

  • Limited bandwidth or CPU throttling during frontend rebuilds.

When your frontend depends on real-time API calls, every millisecond counts. If the WordPress host lags, your entire Next.js site feels broken.

That’s why in 2025, developers are migrating to modern managed WordPress hosts that support:

  • PHP 8.2+, NGINX/LiteSpeed servers.

  • Redis or Memcached object caching.

  • Node.js support for build hooks.

  • Integrated CDNs and staging environments.

The Perfect Duo: WordPress + Next.js in 2025

Together, these two technologies deliver the best of both worlds:

ElementWordPressNext.js
Core RoleContent managementFrontend rendering
LanguagePHP / MySQLReact / Node.js
Data AccessREST API / GraphQLFetch / SSR / ISR
Hosting NeedsPHP-optimizedNode-optimized
Ideal OutputStructured contentInteractive interface

The synergy is clear — but only if your hosting environment can support the entire workflow without bottlenecks.

The Hosting Architecture and Core Technical Requirements

In a headless WordPress + Next.js environment, your hosting stack must handle two very different workloads — PHP-based content management on one side, and Node.js-based rendering on the other. If either side lags or miscommunicates, you’ll face latency, deployment failures, or inconsistent page updates.

This section breaks down the core hosting architecture, critical technologies, and infrastructure optimizations required to make the duo run flawlessly.

1. Dual-Layer Architecture Overview

At a high level, the hosting environment is split into two coordinated layers:

  1. Backend Layer (WordPress CMS):
    Runs PHP 8.2+, MySQL/MariaDB, and serves data through REST API / GraphQL endpoints.
  2. Frontend Layer (Next.js Runtime):
    Built on Node.js 18+, performs server-side rendering (SSR) or static site generation (SSG), then serves output via a CDN or edge network.

These two communicate continuously: WordPress pushes or exposes content, while Next.js pulls it during builds or revalidation cycles.
Your hosting must therefore ensure low latency, secure API access, and coordinated caching between both.

2. Backend — WordPress Optimization Essentials

Because your WordPress instance becomes an API provider, backend performance directly shapes the user experience.

a. Modern PHP Environment

Use PHP 8.2 or higher for faster execution and lower CPU usage. Pair it with OPcache to cache compiled scripts in memory, reducing processing overhead on each request.

b. NGINX or LiteSpeed Web Server

Traditional Apache setups work, but NGINX or LiteSpeed deliver superior concurrency. They handle thousands of API requests efficiently, ideal when multiple Next.js pages request data simultaneously.

c. Database Tuning

WordPress queries can quickly pile up. Use:

  • MariaDB 10.6+ / MySQL 8 with query caching enabled.
  • Redis or Memcached object caching to speed up repeat requests.
  • Periodic database optimization (removing transients and revisions).

d. Caching API Responses

Most content in a headless setup doesn’t change every second.
Implement layered caching:

  • Page-level caching for popular endpoints.
  • Object caching for database queries.
  • Edge caching through your CDN.

This dramatically reduces WordPress load while Next.js fetches content.

e. Secure API Endpoints

Since APIs are public-facing, secure them with:

  • HTTPS + HSTS.
  • API tokens / JWT authentication.
  • Rate-limiting via your WAF or NGINX rules.

Security isn’t optional — one exposed endpoint can lead to data leaks or brute-force attacks.

3. Frontend — Next.js Hosting Considerations

The Next.js side handles rendering, routing, and performance optimization for end users. Its hosting requirements differ from PHP environments.

a. Node.js Runtime

Ensure your host supports Node.js 18 or later. This is essential for SSR, ISR (Incremental Static Regeneration), and API routes.

b. Build Automation & CI/CD

Integrate Git-based deployment (GitHub / GitLab) and CI/CD pipelines. Each time you push new code or WordPress triggers a webhook, the frontend rebuilds automatically.

c. CDN and Edge Delivery

Next.js works best when served from a global CDN.

  • Platforms like Vercel, Netlify, or Cloudflare Pages automatically deploy builds to edge nodes worldwide.
  • Static pages and assets load instantly from the nearest location.

d. Environment Variables and API Keys

Store your WordPress REST URL and API tokens securely in environment variables. This keeps credentials hidden from client-side code.

e. SSR vs SSG vs ISR

Choose the right rendering mode for each page type:

  • SSG (Static Site Generation): for blog posts or landing pages that rarely change.
  • ISR (Incremental Static Regeneration): for content updated periodically.
  • SSR (Server-Side Rendering): for personalized dashboards or dynamic data.

Balanced rendering keeps your frontend fast without unnecessary rebuilds.

4. The Integration Layer — Connecting WordPress and Next.js

Between these two systems lies the integration layer, the bridge that synchronizes data and deployments.

a. Webhooks

When an editor publishes new content, WordPress sends a webhook to your Next.js host (e.g., Vercel) to trigger a rebuild or revalidation.

b. Authentication

Use OAuth or JWT tokens so only authorized requests can fetch or post content.

c. GraphQL / REST Gateway

Install WPGraphQL or optimize WordPress REST API output. GraphQL reduces payload size and network round-trips, improving build times.

d. Build Logs and Monitoring

Enable logging at both ends. Failed webhooks or slow API calls can break page builds silently if you don’t track them.

5. Network and Latency Optimization

Because your frontend and backend are separate hosts, network latency can become a hidden performance killer.
Follow these best practices:

  • Host both systems in the same region (e.g., us-east-1 or europe-west).
  • Use HTTP/3 and Brotli compression for API calls.
  • Keep responses lightweight — return only required fields.
  • Utilize CDN caching for public API routes.

Reducing round-trip time between Next.js and WordPress can shave 300–500 ms off each page load.

6. DevOps and Automation Support

A modern hosting stack should include:

  • Staging environments for safe testing.
  • Git integration for version control.
  • Automated backups and restore options.
  • Continuous deployment pipelines tied to WordPress publish events.

Automation ensures content editors can publish freely without waiting for manual developer intervention.

7. Security Stack for Headless WordPress

Because your CMS and frontend exist on separate domains, you must secure both perimeters:

  • CMS: Harden wp-admin, limit XML-RPC, use two-factor auth.
  • Frontend: Use Content Security Policy (CSP) headers.
  • Network: Enable firewall rules and DDoS protection via Cloudflare or Sucuri.
  • APIs: Monitor request logs and block suspicious patterns.

Think of this as securing two kingdoms that share an alliance — one breach can compromise both.

8. Why Managed WordPress Hosts Stand Out

Managed providers like WP Engine, Kinsta, and SiteGround Cloud already include most of these optimizations:

  • Built-in Redis / object caching
  • Free CDN integration
  • PHP 8+ with NGINX reverse proxy
  • Daily malware scans and firewall

They also provide REST API monitoring and Node.js build hooks, giving you a turnkey environment without needing to manage infrastructure manually.

Performance Tuning and Caching Strategies for Headless WordPress + Next.js

Once your hosting infrastructure is in place, the real challenge begins — performance tuning.
A WordPress + Next.js headless setup has immense potential for speed, but it must be configured correctly. Without fine-tuned caching layers, your API requests can overwhelm the backend, and your builds can stall or revalidate too slowly.

This section dives deep into how to make your headless environment blazing fast, while keeping it secure, stable, and cost-efficient.

1. The Three-Layer Caching Model

A headless WordPress architecture benefits from a multi-layer caching system, which handles data at different stages of the content delivery chain.

Layer 1: Backend Caching (WordPress Server)

This is where most optimization starts.

  • Object Cache (Redis / Memcached): Caches frequently accessed database queries so repeated REST or GraphQL requests don’t hit MySQL every time.
  • Page Cache (Full Page Cache): Caches rendered REST API responses for public content, such as posts, categories, or menus.
  • Opcode Cache (OPcache): Keeps compiled PHP scripts in memory, reducing PHP execution overhead.

These ensure that when Next.js requests data, WordPress responds in milliseconds, not seconds.

Layer 2: CDN-Level Caching (Global Delivery)

A Content Delivery Network (CDN) such as Cloudflare, BunnyCDN, or Fastly stores static assets (images, scripts, stylesheets) and even API responses at edge nodes around the world.

Benefits:

  • Reduces geographic latency for international visitors.
  • Decreases load on your WordPress origin.
  • Acts as a DDoS and bot-protection layer.

Best practice: Cache public REST endpoints for short intervals (60–120 seconds) using CDN rules. For private or dynamic API calls, bypass CDN caching but still compress data via Brotli or GZIP.

Layer 3: Frontend Rendering Cache (Next.js Layer)

Next.js itself supports multiple caching methods:

  • ISR (Incremental Static Regeneration): Regenerates static pages on-demand when content changes.
  • Static Site Generation (SSG): Pre-renders all content at build time.
  • SSR (Server-Side Rendering): Renders dynamically on request, then caches temporarily for faster repeat views.

Pro Tip: Combine ISR with webhooks — when WordPress content updates, trigger revalidation for only those pages, not the entire site. This keeps build times low while content stays fresh.

2. Optimize API Communication

Your Next.js app depends on WordPress’s API performance. Every millisecond saved per request adds up to major speed gains.

a. Use GraphQL over REST

The WPGraphQL plugin lets your frontend request exactly the data it needs, reducing payload size and network calls.
REST often requires multiple endpoints per page, while GraphQL can fetch everything in one query.

b. Implement Persistent Connections

Enable HTTP Keep-Alive on the server to reuse TCP connections between WordPress and Next.js, cutting handshake overhead.

c. Reduce Payloads

Trim unnecessary metadata or fields from API responses using filters (register_rest_field() hooks).
For instance, you rarely need author bios or comment counts on every query.

d. Compress Everything

Enable Brotli compression on your CDN and GZIP on your origin to shrink API payloads by 60–80%.

e. Use Query Caching

Store frequently fetched GraphQL or REST results in Redis with expiry times (e.g., 5 minutes).
This lets your WordPress backend serve hot data almost instantly.

3. Media & Asset Optimization

High-resolution images and videos are the heaviest components in a design-driven website.
A few strategic tweaks can drastically cut load times.

a. Serve WebP or AVIF Formats

Modern formats provide 30–50% smaller file sizes with no quality loss. Most CDNs now convert automatically at the edge.

b. Implement Lazy Loading

Load media only when visible in the viewport. Both WordPress and Next.js have native lazy-load support.

c. Resize Responsively

Use Next.js’s <Image> component for automatic resizing and responsive delivery. Combine it with WordPress’s built-in srcset for dynamic scaling.

d. Store Media Offsite

Consider using object storage (Amazon S3, Cloudflare R2, or DigitalOcean Spaces). This offloads large files from your main WordPress host and improves API speed.

4. Optimize Next.js Build Performance

Rebuild time can become a hidden performance drain if not configured properly.

a. Use Incremental Static Regeneration (ISR)

Instead of rebuilding the entire site after every update, ISR regenerates only updated pages.
Combine ISR with WordPress webhooks to trigger revalidation precisely when content changes.

b. Parallelize Builds

Use CI/CD tools (GitHub Actions, Vercel, Netlify Build Plugins) to parallelize image processing, static export, and deployment steps.

c. Cache Dependencies

Store your Node.js dependencies (node_modules) in the build cache. This can shave off several minutes per build.

d. Limit API Calls During Build

If your WordPress site has thousands of posts, avoid querying them all during every build. Instead, fetch only recently modified items using the modified_after parameter.

5. Speed Up Database Queries

As your content library grows, database queries can slow down REST responses. Tune it regularly:

  • Remove post revisions and transients with plugins like WP-Optimize.
  • Add proper indexing to wp_postmeta and wp_options tables.
  • Use query monitor to detect slow queries.
  • Schedule automatic database cleanup tasks weekly.

6. Geo-Distributed Hosting Setup

For large-scale projects or international audiences:

  • Host your WordPress backend and Next.js frontend in the same region (to reduce API latency).
  • Use a CDN for cross-continent delivery.
  • Deploy replicas of your backend in multiple regions if necessary, using read replicas for database queries.

This architecture ensures every visitor hits a nearby edge node for assets and API calls, resulting in global sub-second load times.

7. Monitoring & Performance Analytics

Performance tuning isn’t a one-time task — it’s continuous.
Use these tools to monitor, analyze, and fine-tune over time:

ToolPurpose
New Relic / DatadogTrack server performance, API latency
Lighthouse / PageSpeed InsightsFrontend performance metrics

Security, Scalability, and Maintenance in Headless WordPress Hosting

A WordPress + Next.js headless setup isn’t just about speed and modern frameworks — it’s about building a secure, scalable, and maintainable ecosystem that can sustain high traffic and frequent updates without downtime or vulnerability.

Performance tuning (covered in Part 3) boosts speed, but security and scalability keep your system alive when real-world traffic and threats hit your servers.

Let’s break this down.

1. Security: The Dual-Surface Challenge

Create a Full Backup of the Source cPanel Account

Unlike traditional WordPress sites, headless setups expose two separate surfaces —
1️⃣ The WordPress backend (CMS)
2️⃣ The Next.js frontend (build + CDN network)

That means twice the entry points, twice the logs, and twice the responsibility.
So the hosting environment must defend both sides.

a. Backend Security (WordPress CMS)

Since WordPress runs as your API engine, it must be locked down tightly.

Core Practices:

  • Keep WordPress, plugins, and themes updated (automate minor version updates).
  • Use two-factor authentication for all wp-admin accounts.
  • Restrict admin access by IP or VPN.
  • Disable XML-RPC and limit login attempts.
  • Use a WAF (Web Application Firewall) to block malicious requests.
  • Limit API exposure — only whitelist endpoints your frontend actually uses.

Server-Side Hardening:

  • Run PHP 8.2+ with strict permissions (755 for directories, 644 for files).
  • Disable file editing via wp-admin.
  • Restrict wp-json access using authentication middleware.
  • Regularly scan your file system with Imunify360, Sucuri, or your host’s built-in malware scanner.

A modern managed host like Kinsta or WP Engine already implements these measures by default.

b. Frontend Security (Next.js Layer)

Your Next.js frontend, often hosted on Vercel, Netlify, or Cloudflare Pages, must defend against injection and data leaks.

Core Practices:

  • Implement CSP (Content Security Policy) headers to block malicious scripts.
  • Use HTTPS with auto-renewed SSL certificates.
  • Sanitize all API inputs before rendering.
  • Secure environment variables — never expose your API tokens in the browser.
  • Use rate-limiting for frontend API routes.

Bonus Tip:
Integrate security headers in your Next.js config via the headers() function in next.config.js — this gives you full control over CORS, referrer policy, and XSS protection.

c. Network-Level Security

Even with hardened CMS and frontend, you need global defenses:

  • Use a CDN with built-in DDoS protection (Cloudflare, Fastly, or Bunny.net).
  • Enable bot management to stop scraping and brute-force attempts.
  • Encrypt API requests using HTTPS + token-based authentication.
  • Isolate backend and frontend servers using private network connections where possible.

2. Scalability: Preparing for Growth and Traffic Surges

The beauty of a headless setup is its scalability potential.
Because WordPress and Next.js run separately, each layer can scale independently — letting you handle millions of requests without collapsing the system.

a. Horizontal Scaling for WordPress

When traffic spikes, the bottleneck usually lies in the database or API response rate.
Modern WordPress hosts mitigate this using horizontal scaling — multiple PHP containers serving the same database.

Recommended Practices:

  • Use read replicas for heavy API loads.
  • Offload static media to object storage (AWS S3, Cloudflare R2).
  • Employ Redis-based query caching to reduce database hits.
  • Load balance multiple WordPress containers behind an NGINX proxy.

Cloud-based managed hosts (like Cloudways or WP Engine Atlas) already distribute workloads this way.

b. Auto-Scaling for Next.js

Since the Next.js layer handles rendering, spikes happen during rebuilds or SSR requests.

How to scale:

  • Use platforms that support auto-scaling Node.js instances (Vercel, AWS Amplify, Render, or Netlify).
  • Keep static assets cached on a global CDN to offload origin servers.
  • Use ISR (Incremental Static Regeneration) — this ensures only updated pages rebuild under load.

Result:
Even during viral traffic moments, your build times and response rates remain consistent.

c. Database and CDN Scaling

  • Database: Move from single MySQL instance to managed clusters. Use connection pooling.
  • CDN: Employ multi-region POPs (Points of Presence). Cache both static and API responses near end users.
  • Queueing: Introduce job queues (RabbitMQ, BullMQ, or Redis Queue) for webhook-triggered rebuilds to prevent overload.

3. Maintenance Automation

Scalability doesn’t matter if your stack becomes unmanageable.
You need maintenance workflows that keep everything updated without breaking production.

a. Automated Updates and Backups

  • Enable automatic patching for WordPress core.
  • Schedule daily incremental backups for both backend and database.
  • Store backups offsite for at least 7 days.

b. Continuous Integration and Deployment (CI/CD)

  • Use GitHub Actions or Bitbucket Pipelines to automate code pushes.
  • Configure hooks that trigger Next.js rebuilds automatically when content changes.
  • Implement rollback mechanisms — every deployment should have a quick revert option.

c. Error Logging and Alerting

  • Log API failures (500s) separately from frontend build errors.
  • Integrate monitoring tools like New Relic, Datadog, or Sentry.
  • Create alert thresholds — e.g., if API latency exceeds 800ms for 5 minutes, trigger notifications.

4. Choosing the Right Hosting Stack for Scaling

Depending on your traffic and workflow, the ideal stack changes slightly.

Setup TypeWordPress HostFrontend HostCDNSuitable For
Starter / DeveloperSiteGround or HostingerVercel (Free Plan)Cloudflare CDNSmall blogs or portfolios
Professional / AgencyKinsta or CloudwaysVercel Pro / NetlifyBunnyCDNClient projects with 10K–50K visits/month
Enterprise / SaaSWP Engine AtlasAWS Amplify / RenderCloudflare EnterpriseHigh-traffic headless sites

Each combination ensures tight coordination between backend API and frontend rendering, reducing latency and cost at every level.

5. Future-Proofing Your Infrastructure

In 2025 and beyond, developers must prepare for AI-assisted workloads, personalization, and edge rendering — all of which increase hosting demands.

To stay future-proof:

  • Choose hosts supporting HTTP/3 and edge functions (Cloudflare Workers, Vercel Edge).
  • Adopt serverless APIs for microservices.
  • Keep your stack modular — WordPress for content, Next.js for delivery, edge functions for logic.
  • Regularly benchmark TTFB (Time to First Byte) and Lighthouse scores.

Your goal is a self-sustaining ecosystem that scales automatically, protects itself, and keeps content fresh 24/7.

Hosting Providers Optimized for Headless WordPress (2025 Edition)

Here are the most reliable and performance-focused hosts currently supporting WordPress–Next.js hybrid infrastructures.

???? WP Engine — The Atlas Platform (Best Overall for Headless WordPress)

Wpengine

Key Strengths:

  • Dedicated “Atlas” hosting platform built for headless WordPress.

  • Dual runtime: PHP for WordPress + Node.js for front-end rendering.

  • Global CDN powered by Cloudflare Enterprise.

  • Built-in caching and GraphQL optimization.

  • Fully managed infrastructure with 24/7 developer support.

Why It Stands Out:
WP Engine is the only mainstream provider that created an entire product line for headless CMS users.
The Atlas platform combines WordPress hosting and Node.js hosting under one roof — meaning your APIs, builds, and deployments stay inside one network for minimal latency.

Best For:
Agencies, SaaS platforms, and high-traffic content publishers running Next.js or Gatsby frontends.

???? Kinsta — Premium Google Cloud WordPress Hosting

Kinsta

Key Strengths:

  • Built on Google Cloud C2 VMs (ultra-low latency).

  • PHP 8.2+, Redis object caching, free CDN (Cloudflare integration).

  • SSH access + Node.js support for build automation.

  • Automatic scaling and staging environments.

Why It Stands Out:
Kinsta is ideal if you want managed WordPress performance with complete developer freedom. Its isolated containers handle REST API workloads efficiently, and you can integrate CI/CD pipelines easily.

Best For:
Professional developers and creative agencies that need speed, reliability, and zero maintenance.

???? Cloudways — The Modular Cloud Approach

Cloudways

Key Strengths:

  • Choose from AWS, Google Cloud, or DigitalOcean infrastructure.

  • One-click Redis + Varnish caching setup.

  • Supports PHP and Node.js on the same server.

  • Advanced staging and Git deployment tools.

Why It Stands Out:
Cloudways gives you the freedom to customize your stack without managing servers directly.
You can host your WordPress backend and even self-host Next.js builds with minimal complexity.

Best For:
Developers who prefer flexibility and cost control over full automation.

???? SiteGround — Simplified Hybrid Hosting for Smaller Teams

SiteGround

Key Strengths:

  • NGINX + dynamic caching with Cloudflare CDN.

  • API-friendly setup with PHP 8.3 and MySQL 8.

  • Daily backups, staging, and auto-updates.

  • Affordable compared to enterprise hosts.

Why It Stands Out:
SiteGround delivers great value for mid-sized projects experimenting with headless setups. While it doesn’t run Node.js builds directly, you can easily connect it to Vercel or Netlify for frontend deployments.

Best For:
Freelancers, small studios, or personal portfolios testing the headless model.

⚙️ A2 Hosting — Developer-Ready VPS with Node.js Support

Key Strengths:

  • Turbo servers with NVMe SSDs.

  • Full SSH root access.

  • Both PHP and Node.js runtime support.

  • Free SSL, DDoS protection, and Imunify360.

Why It Stands Out:
A2 Hosting’s VPS plans are tailor-made for hands-on developers who want total control of environment variables, builds, and performance tuning.

Best For:
Tech-savvy developers managing multiple projects or staging environments.

???? Summary Table — 2025 Hosting Comparison

ProviderPHP VersionNode.js SupportCDNAPI OptimizationIdeal Use Case
WP Engine (Atlas)8.2+✅ Yes✅ Cloudflare EnterpriseFull REST + GraphQL cachingEnterprise headless CMS
Kinsta8.2+⚙️ Partial✅ CloudflareAPI rate optimization + RedisAgencies & pro devs
Cloudways8.2+✅ Yes✅ Custom CDNCustom API controlFlexible setups
SiteGround8.3❌ (connect externally)✅ Free CloudflareStandard REST endpointsSmall to medium sites
A2 Hosting (VPS)8.2+✅ YesOptionalManual setupDevelopers & testers

Real-World Example — Headless Workflow in Action

Let’s visualize a real deployment workflow using this architecture:

Scenario:

A digital magazine wants to migrate from traditional WordPress to a Next.js-powered headless setup for global readers.

Workflow Setup:

LayerPlatformFunction
Backend CMSKinstaRuns WordPress + WPGraphQL plugin
Frontend RenderingVercelDeploys Next.js app and handles ISR
CI/CD PipelineGitHub ActionsAuto-build triggered via webhooks
CDNCloudflareCaches images + API responses globally
StorageCloudflare R2Hosts media assets
AnalyticsPlausible / Google Analytics 4Tracks engagement
MonitoringNew RelicLogs API latency + build failures

How It Works:

  1. Editor publishes new content in WordPress.

  2. A webhook triggers a Next.js rebuild on Vercel.

  3. ISR regenerates only updated pages (not the whole site).

  4. CDN purges old cache instantly.

  5. New article appears worldwide in <10 seconds — without touching servers.

This hybrid workflow saves 60–70% in server load compared to traditional WordPress hosting while achieving 99.99% uptime and sub-second global load speeds.

3. Common Pitfalls and How to Avoid Them

Even with premium hosting, developers often make mistakes that limit performance or reliability. Avoid these traps:

❌ Using shared hosting for a headless setup
Shared environments throttle APIs, making REST responses painfully slow.

❌ Hosting WordPress and Next.js in different regions
This increases latency between API calls — keep both in the same region.

❌ Ignoring caching strategy alignment
Ensure cache expiration, revalidation, and ISR timings are synchronized.

❌ Skipping environment isolation
Always maintain separate staging, testing, and production environments.

❌ Overusing rebuilds
Trigger revalidation only when necessary. Unoptimized webhooks can flood your servers.

The Final Hosting Readiness Checklist

Before you launch your headless setup, ensure your hosting provider meets these conditions:

✅ Backend (WordPress):

  • PHP 8.2+ and NGINX or LiteSpeed stack

  • Redis or Memcached caching

  • WPGraphQL or REST endpoint optimization

  • Daily backups and security patching

  • HTTPS enforced with free SSL

✅ Frontend (Next.js):

  • Node.js 18+ runtime support or integration

  • ISR / SSG / SSR flexibility

  • Edge caching and build automation

  • CI/CD pipeline integration (GitHub, GitLab, Bitbucket)

  • Environment variable management

✅ CDN & Infrastructure:

  • Global CDN (Cloudflare, Fastly, or BunnyCDN)

  • Brotli compression + HTTP/3 support

  • Web Application Firewall (WAF)

  • DDoS and bot protection

  • Real-time analytics and uptime monitoring

✅ Scalability & Automation:

  • Auto-scaling containers or instances

  • Webhooks for automatic rebuilds

  • Separate staging and production

  • Continuous backups and rollback support

If your provider checks all these boxes — you’re hosting-ready for a modern, resilient WordPress + Next.js ecosystem.

Conclusion — The Future Is Decoupled

The web is evolving fast. By decoupling WordPress and Next.js, you’re future-proofing your entire digital presence.
It’s the perfect blend of content management power and frontend performance — but only when your hosting foundation is built right.

The key to success lies in:

  • Fast, secure API delivery

  • Scalable Node.js rendering

  • Integrated caching and CDN

  • Managed automation for updates and deployments

Choose your hosting provider not by cost — but by alignment with your technical vision.
Because in 2025, web hosting isn’t just storage. It’s architecture.

Best Web Hosting for Designers’ Portfolio Pages with Custom Themes

0

For designers, your portfolio page isn’t just a website—it’s a showcase of your craft, your brand, and your ability to deliver custom, aesthetic work. That means the hosting underpinning your portfolio must do more than “just work”. It must: load fast, support custom themes (so your design vision shines), provide flexibility, and remain reliable. If your hosting is slow, template-locked, or restrictive, it undercuts your own credibility.

In 2025, with designers showcasing full-screen visuals, animations, video backgrounds and interactive components, choosing the right web hosting for portfolio pages with custom themes is critical. The right host gives you the freedom to design, the performance to display, and the stability to trust. The wrong one forces you into generic templates, slow load times, and technical compromises.

This guide will walk you through:

  • Why hosting matters for designer portfolios with custom themes
  • Key hosting features designers must prioritise
  • Questions to ask when picking hosting for custom-theme portfolios
  • Hosting types suited for portfolios
  • Top hosting providers for designers in 2025
  • Common pitfalls and how to avoid them
  • FAQs and a conclusion

Why Hosting Matters for Designers’ Portfolio Pages With Custom Themes

1. Custom theme support = design freedom

When you use a custom theme (or design one from scratch), you demand more from your hosting environment: access to FTP/SSH, theme uploads, plugin flexibility, higher PHP versions, and good server performance. A generic, locked-down host blocks these.

2. Portfolio sites are high-visual-load

Designers often include large images, animations, interactive sliders, full-width layouts and mobile responsiveness. These add load time and I/O demand. Hosting must handle heavy asset-loads and still deliver fast rendering for visitors.

3. Performance impacts credibility

If your portfolio takes 5 + seconds to load, potential clients will leave. Research shows bounce rates rise sharply after 3 seconds. As a designer you’re selling “good experience” — and hosting speed is part of that experience.

4. Custom themes often require newer server features

Themes may use PHP 8.x, newer MySQL/MariaDB versions, modern caching, image optimizations, and theme-specific plugins. If your host uses outdated stacks, some theme features may break or perform poorly.

5. Long-term brand and reliability

Your portfolio should be stable for years. Hosting that restricts you to basic templates or doesn’t scale will force a migration later — distracting you from design work and risking broken links, SEO losses and client trust.

Key Features to Prioritize for Designer Portfolio Hosting

Here’s a breakdown of the features you, as a designer using custom themes, should demand. I’ll explain why each matters for portfolio pages, not just “what” to look for.

1. Theme & plugin flexibility

  • Ability to upload custom WordPress themes or HTML templates.
  • Freedom to install design-related plugins (gallery sliders, animations, custom CSS builders).
  • No forced template restrictions or builder-locks.

2. High performance, fast load times

  • NVMe/SSD storage for fast asset loads.
  • Latest PHP version (8.2+ as of 2025).
  • HTTP/3, Brotli compression for images and animations.
  • Built-in caching (server-side) or compatibility with caching plugins.
  • CDN support to deliver heavy assets globally.

3. Mobile & retina readiness

Since designers often show high-resolution visuals, your host should serve optimized images, and compress/responsive assets so mobile users don’t suffer.

4. Developer tools & staging environment

  • Staging site: You design and test a custom theme version, then push live.
  • SSH/FTP access: For advanced custom theme edits.
  • Version control / backups: So changes can be rolled back.

5. SEO-friendly & uptime guarantee

  • Hosting that maintains 99.9%+ uptime so your live portfolio is always reachable by clients or recruiters.
  • Fast server response time for SEO benefits (page speed plus accessibility).
  • Free SSL certificate to secure your portfolio domain.

6. Scalability & maintainability

  • If you expand into client galleries, case studies, or even mini-ecommerce from your portfolio, your host must scale accordingly.
  • Migration path without redesigning theme due to host constraints.

7. Cost versus value for creative professionals

You’re not just buying hosting — you’re buying a foundation for your brand. The cost should reflect support for visuals, design assets and custom themes rather than just minimal text-blog hosting.

Questions to Ask When Choosing Hosting for a Designer Portfolio

Before you sign up, ask these questions — and insist on specific answers to ensure the host fits your design portfolio needs.

  1. “Can I upload my own custom WordPress theme or HTML template without restrictions?”
  2. “What versions of PHP and MySQL/MariaDB do you support right now, and do you upgrade promptly?”
  3. “Is there a staging site included so I can preview my theme safely before pushing live?”
  4. “What caching layers or CDN support do you include for heavy visual assets and gallery pages?”
  5. “What’s the storage type (SSD/NVMe) and are large images optimized or limited by bandwidth?”
  6. “Do you include free SSL and how is image/asset compression handled for mobile users?”
  7. “What is your uptime SLA and what happens if my site goes offline?”
  8. “How easy is it to scale-up or migrate to a higher-tier plan or dedicated server if I expand my portfolio site?”
  9. “Are there any restrictions on themes or plugins (especially gallery, animation, video background plugins)?”
  10. “What is your renewal pricing, especially for years 2+? Does my cost jump dramatically?”

Getting clear answers helps you pick a host that supports design freedom, not just generic functionality.

Hosting Types for Designer Portfolios (and Which You Need)

Depending on your portfolio size, complexity, traffic and custom theme features — different hosting tiers apply.

A. Shared Hosting (Basic)

Best for: single-page portfolios, modest traffic, minimal animation.
Pros: lowest cost, easy setup.
Cons: limited resources, less ideal for heavy visuals or animations.
If you keep asset sizes small and theme simple, this can work but with performance risk.

B. Managed WordPress Hosting

Best for: portfolios built with WordPress, custom themes, moderate traffic.
Pros: optimized stack for WordPress, staging environment, built-in caching.
Cons: higher cost than shared, still reliant on shared servers (sometimes). Designers benefit from the staging + WP focus.

C. VPS / Cloud Hosting

Best for: high-resolution visuals, heavy animations, multiple portfolio sites, global traffic.
Pros: full control, resource isolation, high performance.
Cons: more technical setup, higher cost.
Ideal if you treat your portfolio as a brand platform and expect growth or traffic spikes.

D. Static-Site / JAMstack Hosting

Best for: fully custom HTML/CSS/JS portfolios, minimal backend, super fast load times.
Pros: blazing speed, low maintenance.
Cons: less CMS flexibility, harder to update if you rely on CMS.
If you build themes from scratch and rarely change content, this is a strong option.

Top Hosting Providers for Designers’ Portfolio Pages in 2025

Here are strong hosting providers recommended for designers, especially those using custom themes. Each ties in design flexibility + solid performance.

1. SiteGround

SiteGround

SiteGround is frequently recommended for portfolio hosting because of its WordPress-optimized hosting, staging tools, and freedom to upload themes.
It ranks high in “cheapest portfolio hosting plans” for aesthetics + performance.

Why it works for designers: Custom theme support, easy staging, reliable performance.
Consideration: Cost is slightly higher than bare-bones shared, but for a design portfolio the value justifies it.

2. Hostinger

Hostinger

Hostinger offers very affordable hosting with good performance, and is often cited as option for creatives on a budget.
Why it works for designers: Low cost allows you to invest budget into theme design rather than hosting overhead.
Consideration: With custom themes and heavy visuals you may need to upgrade to higher resource tiers.

3. Bluehost

Bluehost is often used by freelancers and designers; TechRadar notes its strong performance and support for designers.
Why it works for designers: Reliable hosting with easy WordPress setup, custom-theme friendly.
Consideration: Fee jumps after introductory pricing; design assets need careful optimization.

4. A2 Hosting

A2 Hosting combines performance (Turbo servers) with flexibility — important if your portfolio includes animations or heavy visuals.
Why it works for designers: More advanced stack, SSD/NVMe, strong for custom themes.
Consideration: Slightly more technical; may need higher tier for design-heavy pages.

5. Specialized Static / Digital-Agency Hosting

If you build portfolio using static site generators (e.g., JAMstack) or custom HTML/CSS/JS themes, consider niche hosts or cloud providers optimized for static hosting. While not always covered in mainstream “portfolio hosting” lists, this approach offers ultimate performance and design freedom.

How Designers Can Optimize Their Portfolio Hosting Setup

Beyond choosing hosting, your design portfolio needs tuning so it both looks and performs at top-level:

  • Use optimized image formats (WebP, AVIF) and responsive image breakpoints.
  • Use lazy loading for galleries, above-the-fold priority for hero visuals.
  • Enable a CDN to serve assets globally (especially if you’re targeting international clients).
  • Use custom theme lightness: minimise unused plugins, scripts, CSS.
  • Test performance (Google PageSpeed, WebPageTest) across devices: your creative work is the content, your hosting enables it.
  • Maintain backup & staging environment so you can update themes or add new work without risking downtime.
  • Use proper typography and fonts — custom themes may add web font load; choose hosts that support font-preload and caching.

Common Mistakes Designers Make With Hosting

  • Picking “cheap but locked builder” hosting: Many portfolio building services restrict you to their templates and don’t allow full custom themes.
  • Ignoring performance for aesthetics only: A beautiful design that loads slowly loses clients before they see the design.
  • Using oversized media without optimisation: Hosting plans may struggle with dozens of large hero images or background videos.
  • Overlooking scalability: Designers often expand portfolios to client case studies or blog content; starting on a too-limited plan leads to migration headaches.
  • Neglecting mobile responsiveness and asset load: Custom themes often look great on desktop but lag on mobile if hosting isn’t optimised.

FAQs

Q1. Can I use a website builder instead of traditional hosting for my portfolio?
Yes—builders like Squarespace, Wix or Pixpa are good for many creatives. However, if you’re using custom themes, you’ll likely need full-hosting (WordPress or HTML) for design freedom.

Q2. How much traffic does a designer portfolio usually need to support?
It varies. If you’re just showing your work, typical traffic may be modest. But if you add blog content, case studies or client galleries, you should plan for higher visitor load and choose hosting accordingly.

Q3. Is WordPress mandatory for a designer portfolio?
No. You can use static site generators (JAMstack) or HTML templates. But WordPress gives you flexibility, theme ecosystem and CMS for adding work easily.

Q4. How important is global CDN for a design portfolio?
Very. If your clients are international, using a CDN ensures fast load times worldwide and protects the experience of visiting your showcasing work.

Q5. What is the minimum hosting plan I can start with and still use custom themes?
Look for a plan that allows theme uploads, supports latest PHP, and provides at least SSD storage and a decent resource allocation. Shared hosting may suffice initially, but choose one with easy scalability as your portfolio expands.

Conclusion

As a designer, your portfolio page is your calling card. Choosing the right hosting for a custom theme-driven portfolio page is not just about cost—it’s about creative freedom, performance, and professional credibility.

Select hosting that supports full theme customization, optimises asset delivery, scales with your work, and lets your visuals shine without technical compromise. Providers like SiteGround, Hostinger, Bluehost and A2 Hosting each offer strong options depending on your budget and complexity.

Make hosting a tactical decision: the right host becomes an enabler of your design vision—not a limitation. Build your portfolio with confidence and let your hosting elevate your work.

Web Hosting Plan with Free CDN and Daily Malware Scan

0

In 2025, owning a website is no longer a luxury — it’s an essential asset for every business, creator, and entrepreneur. But speed and security define whether visitors stay, convert, and trust your brand. That’s why modern hosting plans increasingly include two crucial features: a Content Delivery Network (CDN) and daily malware scanning.

A free CDN makes your website load faster across the globe, while daily malware scans protect your business reputation and SEO rankings from security threats. Together, they create the perfect balance of performance and protection — something every serious website needs.

Yet, not all hosting plans that advertise “CDN and malware protection” truly deliver. Some limit features, restrict bandwidth, or perform shallow scans that miss real threats.

This guide breaks down everything you need to know about choosing a web hosting plan with free CDN and daily malware scan, including:

  • What these features do and why they matter
  • How they work together to protect your website
  • What to look for when comparing hosts
  • Which hosting providers lead in 2025
  • Tips to optimize your setup for maximum benefit

Let’s start by understanding the basics.

Understanding the CDN Advantage

A Content Delivery Network (CDN) is a geographically distributed network of servers that stores cached versions of your website’s static files — like images, JavaScript, CSS, and videos — in multiple global locations (called edge servers).

When a user visits your site, the CDN delivers content from the closest server, reducing latency and load time.

Key Benefits of a CDN

  1. Speed and Performance Boost:
    Visitors from different continents experience similar load speeds since content is served locally. A site hosted in Texas can load just as fast in Tokyo.
  2. Bandwidth Optimization:
    CDNs offload traffic from your origin server, reducing hosting bandwidth usage and minimizing downtime risk during traffic spikes.
  3. Better SEO Rankings:
    Google’s algorithm considers site speed a key ranking factor. A fast, responsive site improves both ranking and user experience metrics.
  4. DDoS Protection and Reliability:
    Modern CDNs also act as a security shield, filtering malicious requests before they reach your server.
  5. Improved User Engagement:
    Faster sites reduce bounce rates, boost conversions, and increase engagement duration — critical for eCommerce and blog success.

Why “Free CDN” Is a Big Deal

Premium CDNs like Cloudflare or StackPath can cost $10–50/month separately. A hosting plan that includes a free CDN removes this extra cost, simplifies setup, and ensures your traffic automatically routes through optimized global servers.

Why Daily Malware Scanning Is Non-Negotiable

Now let’s talk about the “security” side of the equation.

What Is Malware Scanning?

Malware scanning involves checking all files, scripts, and databases on your hosting account for harmful code, unauthorized changes, phishing scripts, or injected spam links.

Why It Matters:

  1. Protects User Data:
    Malware can steal form data, credit card info, or passwords — destroying customer trust.
  2. Prevents Blacklisting:
    Google blacklists ~10,000 websites daily for malware. Once blacklisted, your organic traffic can vanish overnight.
  3. Stops SEO Spam:
    Hackers often inject malicious links or redirects to exploit your SEO. Regular scans prevent this invisible sabotage.
  4. Avoids Legal & Compliance Issues:
    Businesses storing customer data may face GDPR or PCI penalties if a breach occurs without proactive security measures.
  5. Peace of Mind:
    Knowing your site is scanned daily for malware means you can focus on growth — not firefighting.

In essence, CDN handles performance, while malware scanning handles protection. The smartest hosting plans now combine both in one optimized ecosystem.

Core Features to Expect in a Modern Hosting Plan

When you’re searching for a hosting plan that truly offers free CDN + daily malware scan, use this feature checklist.

1. Global CDN Integration

  • Real CDN (not just “cache acceleration”)
  • Multiple edge servers (ideally 100+)
  • Automatic asset caching and purging
  • SSL support through CDN layer
  • IPv6, HTTP/3, Brotli compression

2. Daily Malware Scanning

  • Full file-system and database scan
  • Detection of backdoors, injected scripts, and phishing pages
  • Email notifications upon detection
  • Auto-removal or quarantine option
  • Malware signature updates daily

3. Security Stack Beyond Scanning

  • Web Application Firewall (WAF)
  • DDoS protection
  • Bot and brute-force mitigation
  • Two-factor authentication for logins
  • SSL certificate included

4. Performance Infrastructure

  • NVMe SSD storage for ultra-fast I/O
  • PHP 8.2+, HTTP/3 support
  • 99.9% uptime SLA
  • Server-level caching and GZIP compression

5. Transparent Pricing

  • No upsells for CDN bandwidth
  • No hidden fees for malware removal
  • Renewal rates clearly stated

How CDN and Malware Scanning Work Together

These two technologies create a dual-layer defense and performance system.

  1. CDN as the First Line of Defense
    • Filters requests, blocking suspicious or malicious traffic before it reaches the origin server.
    • Reduces attack surface by masking your true server IP.
  2. Malware Scanner as the Second Layer
    • Monitors internal files and databases to catch anything that bypasses the firewall.
    • Alerts you before issues escalate, allowing instant cleanup.

Together, they form an automated shield that ensures fast delivery, real-time protection, and zero downtime — ideal for businesses, bloggers, and online stores.

Top Hosting Providers Offering Free CDN + Daily Malware Scanning (2025)

Below are hosting companies that combine performance, security, and affordability.

1. SiteGround – Best Overall Balance

SiteGround

Highlights:

  • Google Cloud infrastructure
  • Free CDN via Cloudflare integration
  • Daily malware scans using Site Scanner
  • AI-driven anti-bot protection
  • 24/7 priority support

Why it’s great:
SiteGround offers enterprise-grade protection and performance for mid-budget users. Their daily malware scanner proactively detects threats and sends instant alerts.

2. Hostinger – Most Affordable Entry Point

Hostinger

Highlights:

  • Free CDN via Cloudflare
  • Weekly backups, optional daily add-on
  • Advanced malware scanner and firewall
  • LiteSpeed servers for fast caching

Why it’s great:
Perfect for beginners and small websites under $3/month. You still get global CDN coverage and daily malware scans (on premium plans).

3. WPX Hosting – Premium Option for Power Users

WPX Hosting

Highlights:

  • Custom-built CDN (XDN) with 35+ global PoPs
  • Daily malware scanning and instant cleanup
  • 30-second live chat response time
  • Free site migrations

Why it’s great:
For mission-critical websites or high-traffic blogs, WPX combines top-tier security and performance with unmatched support responsiveness.

4. A2 Hosting – Speed + Security Hybrid

Highlights:

  • Free CDN integration (Cloudflare)
  • A2 Optimized Security Stack
  • Daily malware and vulnerability scanning
  • Turbo servers for 20x speed

Why it’s great:
A2 Hosting is for users who want fast, developer-friendly hosting without compromising security. It includes malware scans even on shared plans.

5. DreamHost – Transparent and Secure

DreamHost

Highlights:

  • Free SSL and CDN
  • Built-in daily malware scans
  • WordPress-optimized servers
  • 97-day money-back guarantee

Why it’s great:
DreamHost stands out for simplicity and honesty—no hidden upsells. Great choice for small-to-medium businesses needing reliability.

Performance & Security Comparison Chart (2025)

Hosting ProviderFree CDNMalware ScanBackup FrequencyUptimeBest For
SiteGround✅ Yes (Cloudflare)✅ DailyDaily99.99%All-purpose users
Hostinger✅ Yes (Cloudflare)✅ Daily (on Premium)Weekly99.95%Budget users
WPX Hosting✅ Yes (XDN)✅ Daily Auto-CleanDaily99.99%Professional sites
A2 Hosting✅ Yes✅ DailyDaily99.96%Developers
DreamHost✅ Yes✅ DailyDaily99.98%Transparency seekers

Tips for Maximizing These Features

1. Connect Your CDN Correctly

  • Use your host’s DNS configuration or Cloudflare integration.
  • Enable caching for HTML, JS, CSS, and image files.
  • Clear cache after site updates.

2. Automate Security Reports

  • Turn on email alerts for malware detections.
  • Review weekly security summaries from your host.
  • Use Google Search Console to ensure your site isn’t blacklisted.

3. Keep WordPress & Plugins Updated

Even the best host can’t protect against outdated plugins. Enable auto-updates for minor releases and security patches.

4. Layer More Protection

Pair your host’s malware scan with plugins like Wordfence or iThemes Security for secondary verification.

5. Backup Frequently

Malware scans detect problems, but backups fix them. Ensure daily off-site backups complement your malware protection.

Common Misconceptions

Myth 1: “A CDN makes my site immune to hacks.”
❌ Wrong. A CDN prevents DDoS and speeds delivery but doesn’t block internal threats like plugin vulnerabilities.

Myth 2: “Free malware scans are basic and useless.”
❌ Not true. Many hosts use enterprise-grade tools (like Imunify360) that provide real-time protection even in budget tiers.

Myth 3: “I don’t need CDN if my visitors are local.”
❌ Even local traffic benefits from caching, compression, and DDoS mitigation.

How to Choose the Right Hosting Plan

When deciding, focus on value, not just price.

Ask yourself:

  • Does the CDN have global reach (100+ PoPs)?
  • Are malware scans full-site or partial?
  • Is there automatic cleanup or manual review only?
  • Does the host charge for SSL or backups?
  • How fast is their support in handling security issues?

A great hosting plan blends speed, security, and simplicity.

Security Audit Checklist (Monthly Routine)

TaskPurpose
Verify CDN coverage & cache hit ratioEnsures global speed consistency
Review malware scan reportsDetect hidden infections early
Check SSL certificate validityPrevents browser warnings
Update all CMS & pluginsFixes known vulnerabilities
Test site speed via GTmetrixConfirms CDN optimization
Scan DNS & WHOIS settingsPrevents hijacking
Review backups & restore testsGuarantees recovery readiness

FAQs

Q1. Are free CDNs as reliable as paid ones?
Yes, especially if powered by Cloudflare or host-managed networks. Free tiers usually suffice for small to medium websites.

Q2. Will malware scans slow my site down?
No. Scans typically run during low-traffic hours on separate resources.

Q3. Do these features work for eCommerce stores?
Yes, especially when combined with SSL and PCI-compliant hosting.

Q4. Should I still install a security plugin?
Yes — plugin-level scanning complements host-level scanning for full coverage.

Q5. How do I know if my site is infected?
Look for sudden traffic drops, spam redirects, or warnings from browsers and Google Safe Browsing. Daily scans help catch these early.

Conclusion

A web hosting plan with free CDN and daily malware scan is the new minimum standard for a reliable, secure online presence in 2025.

The CDN accelerates your website globally, ensuring every visitor experiences instant load times. The malware scanner protects your data, brand reputation, and rankings — automatically, every single day.

If you want:

  • Speed → Choose hosting with integrated global CDN.
  • Security → Choose daily malware scans with instant alerts.
  • Simplicity → Choose hosts like SiteGround, Hostinger, or WPX that automate it all.

Remember: hosting isn’t just about “where your files live.” It’s the foundation of your brand’s performance, trust, and long-term growth.

Choose a host that gives you both power and protection — because in 2025, anything less is a risk you can’t afford.

How to Manage Backups and Security on Managed WordPress Hosting

0

Managed WordPress hosting has become the backbone of modern website management. It provides automatic updates, built-in caching, expert support, and performance optimization — freeing creators and businesses from the complexity of server maintenance.

But here’s a hard truth: managed hosting doesn’t mean fully managed protection. Even premium hosts can’t safeguard you from every vulnerability, human error, or plugin conflict. A single exploit or corrupted update can wipe out months of work if you don’t have a proper backup and security strategy in place.

In 2025, with cyber threats, plugin vulnerabilities, and AI-driven attacks increasing, smart website owners treat backups and security as part of their daily workflow, not an afterthought.

This guide dives deep into:

  • Why backup and security management still matter on managed WordPress hosting
  • How to set up automated, layered backups
  • Core security protocols every WordPress site needs
  • Real-world tools and workflows used by pros
  • How to audit, monitor, and recover after a breach

Why Backups and Security Still Matter on Managed WordPress Hosting

Disadvantages of Manual Backup/Restore

Managed hosts like WP Engine, Kinsta, SiteGround, and Cloudways do handle server-level safety — but they can’t protect your site from human mistakes, malicious plugins, or design changes gone wrong.

Here’s why backups and active security matter even on “managed” plans:

  1. You’re still responsible for your data.
    Managed hosting includes automated backups, but you may not control retention periods or storage locations. Some hosts keep only 14–30 days of backups — not enough for long-term insurance.
  2. Security threats evolve faster than hosting patches.
    WordPress powers 40%+ of the web. That makes it a hacker magnet. Even managed hosts can’t instantly block every zero-day vulnerability.
  3. Plugin and theme conflicts happen.
    You might install an update that breaks your checkout page or removes a widget. Without versioned backups, rolling back instantly is impossible.
  4. User errors are inevitable.
    Accidentally deleting a post, resetting a plugin, or overwriting your database can cause massive data loss.

Bottom line:
Managed hosting gives you a shield — but without a personal defense strategy (backups + security workflow), your website is still exposed.

 Building a Rock-Solid Backup Strategy

The Goal of a Proper cPanel-to-cPanel Migration

1. Understand What a “Full” Backup Really Means

A WordPress site consists of multiple components. Missing even one can render your backup useless.
Your backup should include:

  • The WordPress core files (framework and system structure)
  • The database (posts, users, orders, settings, etc.)
  • The wp-content folder (themes, plugins, uploads)
  • The wp-config.php file (site settings and credentials)
  • The .htaccess or nginx.conf file (rewrite and security rules)

Many site owners assume their host handles all this — but some hosts only back up the database or files, not both.

2. Choose a Backup Frequency That Matches Site Activity

Ask: “How much data am I willing to lose if things go wrong?”
That’s your backup frequency rule.

Site TypeRecommended Backup Frequency
E-commerce or Membership SitesHourly or real-time
Active BlogsDaily
Corporate or Informational SitesWeekly
Development or Portfolio SitesWeekly or before major updates

For WooCommerce or LMS sites, a missed order or progress log could cost revenue. For high-volume stores, consider incremental real-time backups, which save only changes instead of duplicating the entire site.

3. Off-Site Storage and Versioning

Never keep your backups only on the same server. If the host fails or is hacked, you lose both.
Use at least one off-site copy — Google Drive, Amazon S3, Dropbox, or remote SFTP.

The 3-2-1 rule applies here:

  • 3 total copies of your data
  • 2 on different storage media
  • 1 off-site

Most reliable backup plugins (like UpdraftPlus, BlogVault, or Jetpack VaultPress) allow automated off-site backups with encryption.

4. Automate but Verify

Automation saves time, but don’t assume it’s working. Set a reminder to test a restore monthly on a staging environment.
This ensures:

  • Your backups aren’t corrupt
  • All files and database tables restore correctly
  • Plugins/themes remain functional

A backup that hasn’t been tested is a backup that doesn’t exist.5. Retention and Rotation

Keep at least 30 days of rolling backups, or more if your business depends on archives (e.g., eCommerce orders).

Most managed hosts let you configure retention manually. For extra resilience, use incremental backups that store changes efficiently, reducing storage costs.

Securing Your Managed WordPress Environment

1. Update Intelligently

Automatic updates are great — until they break something. Use staging environments to test before applying updates to your live site.

  • Enable core auto-updates, but handle plugin/theme updates manually after testing.
  • Always back up before any update cycle.

Some managed hosts (like Kinsta and WP Engine) provide a one-click “safe update” feature that runs visual comparisons post-update.

2. Strengthen Login Protection

Most WordPress breaches start at the login screen. Strengthen yours with:

  • Two-Factor Authentication (2FA) — via Google Authenticator or WP 2FA plugin.
  • Limit Login Attempts Reloaded plugin — blocks brute-force attempts.
  • Disable XML-RPC if not needed (common exploit target).
  • Change the login URL using plugins like WPS Hide Login.

For agencies or multiple admins, enforce password policies using iThemes Security or Wordfence.

3. Use SSL and HTTPS Everywhere

Most managed hosts provide free Let’s Encrypt SSL certificates, but installation doesn’t end there.
Force HTTPS across your site to prevent mixed-content issues and protect session data:
Add this to your .htaccess:

RewriteEngine On  
RewriteCond %{HTTPS} !=on  
RewriteRule ^ https://%{HTTP_HOST}%{REQUEST_URI} [L,R=301]

Check SSL regularly — expired certificates can block customers or destroy SEO rankings.

4. Implement File and Directory Security

  • Set file permissions to 644 and folders to 755.
  • Disable file editing in the admin dashboard:
    define('DISALLOW_FILE_EDIT', true);
    
  • Hide the wp-config.php file from public access:
    <files wp-config.php>
    order allow,deny
    deny from all
    </files>
    
  • Rename or move sensitive folders when possible (advanced users).

5. Enable a Web Application Firewall (WAF)

A WAF filters out malicious traffic before it reaches your site.
Most managed hosts include basic firewall layers, but for added safety, use services like:

  • Sucuri Firewall
  • Cloudflare Pro (WAF-enabled)
  • Wordfence Premium

WAFs block SQL injection, cross-site scripting (XSS), and brute-force bots — before they can exploit your site.

6. Malware Scanning and Integrity Monitoring

Even with a firewall, malicious code can sneak in via vulnerable plugins.
Use automatic scanners such as:

  • Wordfence, iThemes Security, or Sucuri plugin scanners
  • Managed host malware detection (many do daily scans automatically)

These tools detect file changes, injected code, and unauthorized user creation.

Ongoing Maintenance and Auditing

Weekly Tasks

  • Confirm the latest backup exists and is valid.
  • Check for plugin/theme updates.
  • Review login attempts and error logs.
  • Test site speed and SSL certificate status.

Monthly Tasks

  • Test a full restore on staging.
  • Run a malware scan.
  • Review user access and remove inactive accounts.
  • Clean your database using WP-Optimize or Advanced Database Cleaner.

Quarterly Tasks

  • Conduct a full security audit:
    • Review file permissions.
    • Reassess backup strategy.
    • Verify DNS and domain registrar accounts.
    • Run penetration tests or vulnerability scans.
  • Rotate all admin passwords and API keys.

Disaster Recovery: How to Restore Without Panic

Even the most secure sites experience downtime, crashes, or attacks. The key is having a predictable recovery plan.

1. Create a Response Checklist

  • Identify the issue (plugin error, hack, server outage).
  • Switch your site to maintenance mode.
  • Notify users via social media or alternate domain (optional).
  • Restore from the latest known clean backup.
  • Verify all site functionality (checkout, contact forms, etc.).
  • Update security credentials immediately post-restore.

2. Use Staging for Recovery Testing

Never restore directly to production.
Always use your host’s staging environment first to confirm the issue is fixed.

3. Post-Recovery Hardening

After recovery, identify the breach source:

  • Vulnerable plugin? Replace it.
  • Weak password? Enforce 2FA.
  • Outdated theme? Switch to a secure alternative.

Document lessons learned to improve future readiness.

Top Tools for Backups and Security (2025)

CategoryRecommended ToolsHighlights
BackupsUpdraftPlus, BlogVault, Jetpack VaultPressOff-site encrypted storage, automated schedules
Security PluginsWordfence, iThemes Security, SucuriFirewall + malware protection
Malware ScannersCleanTalk, MalCare, AstraReal-time monitoring
Performance & FirewallCloudflare, Sucuri WAFDDoS protection + SSL optimization
Audit LoggingWP Activity LogDetailed record of user actions

Pro Tip: Avoid plugin overlap (e.g., don’t install two firewalls). One solid solution, properly configured, beats stacking five.

Common Mistakes to Avoid

  1. Trusting host backups blindly — always keep a personal backup copy.
  2. Skipping restore testing — you won’t know it’s broken until disaster strikes.
  3. Ignoring plugin reputation — outdated or nulled plugins are the #1 cause of hacks.
  4. Overusing admin privileges — limit admin roles; create editors or shop managers instead.
  5. Not monitoring site health — use uptime monitoring tools like UptimeRobot.
  6. Delaying updates — every delay increases risk exposure.

FAQs

Q1. Does managed WordPress hosting guarantee total security?
No. It reduces risk but doesn’t eliminate vulnerabilities in themes, plugins, or user actions.

Q2. How long should I keep backups?
Keep at least 30 days of rolling backups. For business sites, store quarterly archives for long-term compliance.

Q3. Can backups slow down my site?
Not if you use incremental or off-site backups. Avoid saving backups on the same server.

Q4. What’s the safest plugin combination?
A single backup plugin (UpdraftPlus or BlogVault) + one premium security plugin (Wordfence, Sucuri, or iThemes Security) + Cloudflare for firewall/CDN.

Q5. Should I enable automatic updates for everything?
Enable for minor and core updates, but test plugin and theme updates first in staging.

Conclusion

A managed WordPress host gives you a strong starting point — but security and data protection are your responsibility.

A well-designed backup strategy and layered security system turn potential disasters into minor inconveniences. You’ll sleep better knowing that if your site is hacked, you can restore it in minutes — not days.

In summary:

  • Automate, but verify your backups regularly.
  • Use off-site encrypted storage and multiple restore points.
  • Maintain continuous security monitoring with WAF, SSL, and malware scanning.
  • Document your restore process — and test it quarterly.

By following these steps, you transform your WordPress setup from vulnerable to virtually bulletproof. Because in 2025, uptime and trust aren’t optional — they’re your competitive edge.

Fastest WordPress Hosting for eCommerce

0

When it comes to running a successful eCommerce business, speed is not just a technical detail—it’s a foundation for growth. Every second matters. Research consistently shows that if your store takes too long to load, potential buyers simply leave. A slow website doesn’t only frustrate visitors, it directly eats into sales, conversions, and even long-term brand trust.

Think about it from the customer’s perspective. A shopper browsing through products expects instant responses, seamless navigation, and a checkout process that feels effortless. If your pages lag, their patience runs out, and they are likely to turn to a competitor whose store offers a smoother experience. For eCommerce, this isn’t a minor inconvenience—it’s a deal breaker.

Speed also has a critical impact on visibility. Google and other search engines consider website performance as part of their ranking algorithms. Sites that load faster are more likely to rank higher, attract organic traffic, and win customer attention before slower competitors even get noticed. With Google’s Core Web Vitals emphasizing user experience, a fast-loading store is no longer optional—it’s a necessity for staying competitive.

Finally, hosting plays a central role here. You may have the most beautifully designed store and perfectly optimized products, but without a hosting solution that can deliver speed, your efforts fall short. Especially for WordPress and WooCommerce stores, choosing the fastest hosting provider ensures your site can handle everything from everyday traffic to sudden sales surges without slowing down.

In short, speed is the backbone of eCommerce success. It improves customer satisfaction, boosts conversions, and strengthens SEO. And at the heart of achieving that speed lies one key decision: selecting the right WordPress hosting.

Top WordPress Hosting Providers for Speed and eCommerce

When choosing hosting for your eCommerce site, the options can feel overwhelming. Dozens of companies claim to be the “fastest,” but real-world performance tells a clearer story. Below are some of the most reliable WordPress hosting providers known for delivering speed and stability for WooCommerce stores.Top WordPress Hosting Providers for Speed and eCommerce

Hostinger has built a reputation for being one of the quickest and most affordable solutions on the market. With LiteSpeed servers, built-in caching, and optimized WordPress environments, it offers an impressive balance of performance and cost. For smaller to medium-sized online shops, Hostinger’s plans are often a smart starting point because they combine speed with budget-friendly pricing.

WP Engine is another heavyweight in the managed WordPress hosting space. Designed specifically with WordPress and WooCommerce in mind, WP Engine provides optimized infrastructure that often leads to noticeable improvements in site loading times and even sales performance. Although the pricing sits on the higher side, the investment pays off for businesses that prioritize performance, security, and scalability.

SiteGround is frequently recommended by both WordPress professionals and users who need reliable performance under pressure. Powered by Google Cloud infrastructure, SiteGround’s hosting delivers strong uptime and consistently fast page loads. The company also offers excellent customer support, which is particularly valuable when you’re managing an eCommerce store that simply cannot afford downtime.

For those who prefer flexibility, Cloudways provides cloud-based hosting that allows you to choose from platforms like AWS, Google Cloud, and DigitalOcean. This approach gives store owners the ability to scale resources according to demand while enjoying advanced caching and global data centers. Cloudways is especially popular with growing businesses that anticipate spikes in traffic during promotions or seasonal sales.

Finally, Bluehost remains a widely used option, in part because of its official endorsement from WordPress.org. It combines ease of use with competitive performance, making it a strong choice for store owners who are just getting started but still want a hosting service capable of handling growth. While it may not be as specialized as WP Engine or as customizable as Cloudways, Bluehost provides a solid foundation with dependable speed.

Each of these providers comes with strengths and trade-offs, but what unites them is a commitment to speed—a non-negotiable factor for any serious eCommerce store. Choosing among them ultimately depends on the size of your business, your budget, and how much technical control you want over your hosting environment.

Why Speed Matters in eCommerce Hosting

In the world of eCommerce, speed is more than a convenience—it is directly tied to sales and customer satisfaction. Studies have repeatedly shown that even a one-second delay in page load time can cause a noticeable drop in conversions. Customers today are conditioned to expect instant responses, and when a store lags, they often abandon their carts and search elsewhere. For business owners, this means lost opportunities that may never return.

Search engine performance is another reason speed holds so much weight. Google’s algorithms take into account how quickly a site loads, and its Core Web Vitals focus specifically on the user experience. A faster store tends to rank higher, giving it a competitive edge in organic search. When your competitors are also selling similar products, speed could very well be the deciding factor that pushes your store above theirs in search results.

Customer trust is also shaped by performance. Imagine clicking on an online store only to wait several seconds for the homepage to appear. The immediate impression is that the business is either outdated or unreliable. On the other hand, when pages load instantly and navigation feels effortless, customers feel more confident that they are dealing with a professional, trustworthy brand. This trust directly influences their willingness to make a purchase.

Finally, eCommerce stores face unique challenges that make speed even more critical. Promotions, seasonal events, or viral campaigns can create sudden spikes in traffic. If your hosting cannot handle those surges efficiently, your store risks downtime or painfully slow loading times during the moments that matter most. Fast hosting ensures that your site remains responsive, whether you’re serving a handful of shoppers or thousands browsing at once.

In short, speed is a decisive factor at every stage of the online shopping journey. It impacts visibility, shapes customer impressions, and determines whether browsers turn into buyers. For WordPress and WooCommerce sites, the choice of hosting is one of the most powerful tools available to keep that speed consistently high.

Hosting + Optimization – How to Boost Performance Even Further

Fast hosting lays the foundation for speed, but true performance comes from a combination of hosting power and smart optimization. Even the best hosting provider cannot carry the entire load if your site is bloated with heavy themes, oversized images, or poorly coded plugins. To get the most out of your investment, you need to pair the right server with a streamlined, efficient site.

Hosting Optimization – How to Boost Performance Even Further

One of the simplest ways to improve performance is by choosing a lightweight theme. Themes like Astra, GeneratePress, or Neve are designed with speed in mind and avoid the unnecessary bulk that slows down many premium designs. A sleek, optimized theme ensures that your store looks professional without sacrificing load times.

Images are another crucial factor. High-resolution product photos are essential for showcasing your catalog, but they can also weigh down your site if not properly managed. By compressing images, converting them to next-generation formats like WebP, and enabling lazy loading, you can dramatically cut down on page size while still giving shoppers the visual detail they need.

Behind the scenes, the database also plays a big role in performance. Over time, WordPress databases fill up with revisions, spam comments, and expired transients that can slow down queries. Regularly cleaning and optimizing the database ensures faster responses and a smoother shopping experience. Pairing this with object caching solutions like Redis or Memcached can take performance even further, especially for larger stores with thousands of products.

A Content Delivery Network (CDN) is another must-have tool for global stores. By serving static content—like images, scripts, and stylesheets—from servers closer to your customers, a CDN reduces latency and shortens load times no matter where your shoppers are located. When combined with compression techniques such as GZIP or Brotli, your files become smaller and faster to deliver.

Finally, don’t overlook external scripts. Marketing tools, analytics platforms, and ad networks often add extra weight to your site. While they may be necessary, loading them strategically—such as deferring scripts or enabling asynchronous loading—prevents them from slowing down critical content.

The lesson here is clear: fast hosting provides the horsepower, but optimization fine-tunes the ride. Together, they create an environment where your WooCommerce store can handle heavy traffic, display products quickly, and guide customers through the checkout process without delay. For serious eCommerce businesses, this combination is not optional—it’s the key to sustainable growth.

Plans and Costs for Different Store Sizes

Not every eCommerce business has the same needs, and hosting requirements grow as your store evolves. A small startup store with a few dozen products won’t require the same resources as a busy online retailer processing thousands of daily transactions. Understanding which type of plan matches your stage of growth can help you avoid overspending in the beginning while ensuring you don’t outgrow your hosting too quickly.

For new or small stores, an entry-level managed WordPress hosting plan is often enough. These plans typically provide solid performance at a low monthly cost, making them ideal for businesses just getting started. They can comfortably support a modest catalog and handle a few thousand visitors each month. The advantage of starting here is affordability—most beginner plans fall between $5 and $20 per month—while still offering the essential features like SSL certificates, automatic backups, and basic caching.

As traffic grows and sales increase, mid-sized stores need to move beyond basic shared resources. This is where VPS or cloud-based hosting becomes valuable. With more CPU power, dedicated RAM, and scalable infrastructure, these plans ensure your site can keep up with higher volumes of shoppers. Monthly pricing at this stage generally ranges from $30 to $200, depending on how much flexibility and support you require. The investment is justified because downtime or slow checkout speeds at this level can cost far more than the hosting bill itself.

Large and enterprise-level stores face the greatest challenges. When thousands of customers are browsing simultaneously and product databases are complex, a dedicated server or a high-end managed cloud setup is often the best choice. These plans offer not only maximum speed but also enterprise-level security, advanced caching layers, and the ability to handle enormous traffic spikes. Costs here can run well into several hundred dollars or more per month, but for large-scale eCommerce operations, the return on investment is clear: speed means more conversions, and more conversions mean more revenue.

Ultimately, the right plan depends on your business stage and growth trajectory. Start small if you’re testing the waters, but don’t hesitate to scale up when your traffic and sales demand it. Hosting should be seen as an investment, not an expense—the faster and more reliable your site, the more profitable your business becomes.

 Final Recommendations

Speed is not a luxury for eCommerce stores—it is the foundation upon which success is built. From the first impression a visitor forms when they land on your homepage, to the final click of the checkout button, every second matters. A site that loads quickly feels trustworthy, professional, and effortless to use. In contrast, even the slightest delay can frustrate shoppers, increase cart abandonment, and reduce your overall sales.

Throughout this discussion, one message has been clear: hosting is the heartbeat of performance. While themes, plugins, and optimization strategies all play a role, the choice of hosting provider determines whether your store can consistently deliver speed under pressure. A well-optimized hosting environment ensures not just fast load times but also stability during high-traffic events, strong security to protect customer data, and a foundation that can scale with your business.

For small businesses just starting out, an affordable managed WordPress plan can provide the right balance of cost and performance. As sales grow, upgrading to VPS or cloud-based solutions gives your store the power to keep up with increasing demand. Larger enterprises, meanwhile, benefit from the dedicated resources and advanced infrastructure of premium managed hosts. Whatever stage you are in, the principle remains the same: faster hosting translates into stronger results.

If there is one investment worth prioritizing in your eCommerce journey, it is the decision to choose the fastest, most reliable WordPress hosting you can afford. This single choice has a ripple effect—higher search visibility, happier customers, and ultimately, greater revenue. By pairing strong hosting with smart optimization practices, you give your WooCommerce store the best chance to thrive in a competitive online marketplace.

In the end, speed is more than a technical metric. It is a reflection of your brand’s commitment to excellence. Choose wisely, optimize carefully, and your customers—and your bottom line—will thank you.

Hosting for WooCommerce Stores Under Budget with SSL Included

0

Running a WooCommerce store means more than just setting up WordPress and adding products. Your hosting provider determines how fast your site loads, how secure it is, and how smoothly customers can check out.

In 2025, the eCommerce landscape has become fiercely competitive. Every second counts. A site that loads one second slower can lose up to 20% of conversions, while stores without proper SSL certificates risk losing customer trust altogether.

But here’s the challenge: most entrepreneurs start on a budget. You can’t afford expensive enterprise hosting, yet you can’t risk downtime or poor performance either.

The good news? Several hosting providers now offer WooCommerce-optimized plans under budget with free SSL included. These hosts combine performance, affordability, and built-in eCommerce features—helping you focus on growing your business, not managing servers.

In this article, we’ll break down:

  • Why SSL and optimized hosting matter for WooCommerce
  • What features to prioritize in budget hosting
  • Top affordable WooCommerce hosting providers in 2025
  • Performance, reliability, and scalability comparison
  • Final recommendations for different business stages

Why SSL and Hosting Quality Matter for WooCommerce

Your WooCommerce store handles personal data—names, emails, addresses, and most importantly, payment information. Without SSL (Secure Socket Layer), that data travels unencrypted, making it vulnerable to theft.

SSL certificates encrypt connections between your customer’s browser and your server. Modern browsers even warn users if a site isn’t secure—turning them away before they reach checkout.

Beyond security, SSL also influences SEO and conversions:

  • Google ranks HTTPS websites higher in search results.
  • Trust badges (like the padlock icon) increase buyer confidence.
  • Payment gateways like Stripe and PayPal require SSL-enabled domains.

That’s why hosting with free SSL included isn’t optional—it’s a necessity.

But SSL is only half the story. Hosting quality directly affects:

  • Page load time: WooCommerce relies on dynamic PHP queries and database lookups. Cheap, oversold servers can cripple performance.
  • Cart reliability: Shared hosting without resource isolation can cause checkout failures during traffic spikes.
  • Security: Poorly managed servers increase risk of data breaches and malware.

An ideal WooCommerce host gives you both SSL and optimized performance tools—even on a budget.

Essential Features to Look for in Budget WooCommerce Hosting

Not all “cheap” hosting is equal. Some look affordable but sacrifice features critical for eCommerce stability. Here’s what to check before signing up:

1. Free SSL Certificate

Every good WooCommerce host should include a free SSL (typically via Let’s Encrypt). Paid SSLs aren’t necessary for small stores, but auto-renewal and one-click setup are must-haves.

2. Speed and Caching Optimization

Look for servers with SSD or NVMe storage, LiteSpeed or NGINX caching, and integrated CDN (like Cloudflare). WooCommerce pages (cart, checkout) are database-heavy, so caching layers make a huge difference.

3. PHP and MySQL Versions

Modern PHP (8.2+) and updated MySQL or MariaDB ensure smooth plugin compatibility and faster script execution.

4. Uptime Guarantee

Downtime means lost sales. Choose hosts offering at least 99.9% uptime SLAs.

5. One-Click WooCommerce Installer

Most budget hosts now provide automated WordPress + WooCommerce setups, saving you 30–40 minutes of manual configuration.

6. Security & Backups

Daily or weekly backups, malware scanning, and firewall protection are essential. Some hosts even bundle AI-based threat detection.

7. Scalability

Even if you start small, choose a host that lets you scale to higher plans or cloud tiers without migration headaches.

8. Support Availability

24/7 live chat support is vital. When your checkout fails on a Sunday, you can’t wait till Monday morning for an email response.

Best Budget Hosting Providers for WooCommerce Stores (2025 Edition)

Let’s compare five standout options combining affordability, performance, and free SSL.

1. Hostinger – Best Overall Budget WooCommerce Hosting

Hostinger

Why it stands out:
Hostinger has earned its place as the go-to option for startups and small WooCommerce stores. It offers NVMe SSD servers, free SSL, and optimized LiteSpeed technology at incredibly low prices.

Key Features:

  • Starting price: $2.99/month
  • Free SSL & Cloudflare CDN
  • WooCommerce-optimized installer
  • LiteSpeed cache for fast load times
  • Weekly backups
  • PHP 8.2 and MySQL ready

Performance:
Independent benchmarks show load times under 600 ms for product pages and excellent uptime (99.95%).

Best for:
Entrepreneurs launching their first WooCommerce store or dropshipping site on a tight budget.

2. SiteGround – Most Reliable Support and Security

SiteGround

Why it stands out:
SiteGround combines beginner-friendly tools with enterprise-grade infrastructure. It includes free SSL, managed updates, caching, and daily backups—even on its entry-level plans.

Key Features:

  • Starting price: $4.99/month
  • Free SSL via Let’s Encrypt
  • Daily backups + staging environment
  • Built-in SG Optimizer for performance
  • 24/7 live chat and ticket support

Performance:
SiteGround’s servers use Google Cloud infrastructure, ensuring reliability and low latency. Checkout pages load 20–30% faster than average shared hosts.

Best for:
Users who want peace of mind, reliable support, and excellent uptime while staying within a mid-range budget.

3. A2 Hosting – Fast Performance for Growing Stores

Why it stands out:
A2 Hosting’s “Turbo Boost” servers deliver up to 20x faster speeds than standard shared hosting, making it perfect for WooCommerce stores with moderate traffic.

Key Features:

  • Starting price: $5.99/month
  • Free SSL and site staging
  • Turbo Cache and NVMe drives
  • Auto backups and malware scanning
  • Optimized for WooCommerce + PHP 8.2

Performance:
Tested sites on A2 Hosting show sub-500 ms response times and fast checkout load speeds.

Best for:
Growing eCommerce stores expecting consistent traffic and wanting better-than-shared performance without moving to VPS.

4. Bluehost – Official WooCommerce Partner

Why it stands out:
As one of WordPress.org’s official partners, Bluehost offers dedicated WooCommerce hosting packages with pre-installed store setups and SSL certificates.

Key Features:

  • Starting price: $3.95/month
  • Free SSL and WooCommerce auto-install
  • $100 Google Ads credit
  • Built-in store analytics dashboard
  • 24/7 live support

Performance:
With automatic caching and Cloudflare CDN, Bluehost maintains stable load speeds and reliable uptime for starter eCommerce stores.

Best for:
Beginners who want simplicity, built-in tools, and the reassurance of an official WooCommerce partner.

5. DreamHost – Most Transparent Budget Option

DreamHost

Why it stands out:
DreamHost offers transparent pricing (no hidden renewals) and pre-configured WooCommerce hosting with free SSL and automatic daily backups.

Key Features:

  • Starting price: $3.95/month
  • Free SSL and daily backups
  • SSD storage + unlimited bandwidth
  • 97-day money-back guarantee
  • U.S.-based support team

Performance:
DreamHost’s WooCommerce hosting maintains consistent 99.98% uptime and delivers fast load times with minimal configuration.

Best for:
Store owners who value simplicity, transparent billing, and consistent reliability.

Performance & Value Comparison (2025)

Hosting ProviderStarting PriceFree SSLDaily BackupsUptimeIdeal For
Hostinger$2.99/mo✅ YesWeekly99.95%Beginners
SiteGround$4.99/mo✅ YesDaily99.99%Reliable all-rounder
A2 Hosting$5.99/mo✅ YesAuto99.96%Growing stores
Bluehost$3.95/mo✅ YesAuto99.95%New store owners
DreamHost$3.95/mo✅ YesDaily99.98%Transparent pricing

How to Choose the Right Budget Host for Your WooCommerce Store

If you’re unsure where to start, think in terms of your store’s growth stage:

  • For new stores (<10 products): Go with Hostinger for unbeatable pricing and decent performance.
  • For mid-level stores (10–100 products): Choose SiteGround for its reliability, backups, and excellent support.
  • For growing or traffic-heavy stores: A2 Hosting or DreamHost are best for balance between cost and capability.
  • For simplicity and official support: Bluehost gives you a ready-to-sell WooCommerce setup out of the box.

Always prioritize SSL, caching, backups, and scalability—these are non-negotiable for eCommerce stability.

Tips to Optimize WooCommerce on Budget Hosting

Even the best hosting needs tuning to maximize speed and reliability.

  1. Use a lightweight theme like Astra or GeneratePress.
  2. Install caching plugins (LiteSpeed Cache, WP Rocket).
  3. Compress images using TinyPNG or Imagify.
  4. Set up a CDN for global reach.
  5. Limit plugins—only use essential ones (Yoast, WooCommerce, Pretty Links).
  6. Enable HTTPS everywhere—some browsers block checkout scripts on mixed-content pages.
  7. Backup before updates to avoid plugin-related crashes.

Following these will keep your store fast, secure, and conversion-ready.

FAQs

Q1. Do all WooCommerce hosting plans include SSL?
Not all, but the best ones (like Hostinger, SiteGround, and Bluehost) include free Let’s Encrypt SSL certificates that renew automatically.

Q2. How much should I spend on WooCommerce hosting?
For new stores, expect $3–6/month. For growing traffic, upgrade to $10–15/month for better speed and resources.

Q3. Is cheap hosting safe for online stores?
Yes—if it includes SSL, daily backups, and active support. Avoid hosts that oversell resources or lack uptime guarantees.

Q4. What happens if my store grows too big for shared hosting?
You can migrate seamlessly to a VPS or cloud plan. Most of the above hosts offer one-click upgrades without downtime.

Q5. Can I install WooCommerce manually?
Yes, but most of these hosts provide 1-click installers that handle setup, SSL, and performance tweaks automatically.

Conclusion

Choosing the right hosting for your WooCommerce store under budget is about balance. You don’t need to spend hundreds monthly for speed and security—just pick a host that gives you SSL, backups, caching, and reliable uptime included.

In 2025, the best affordable options are:

  • ???? Hostinger — unbeatable for beginners
  • ???? SiteGround — best mix of reliability and support
  • ???? A2 Hosting — great for speed and growing stores
  • ???? Bluehost — beginner-friendly and official partner
  • ???? DreamHost — transparent and dependable

Your hosting is the foundation of your WooCommerce success. Choose wisely, optimize your store, and let your products do the selling—while your hosting keeps everything fast, secure, and always online.