Home Blog Page 19

Minimal resume template in Canva

0

Last Updated on November 7, 2026
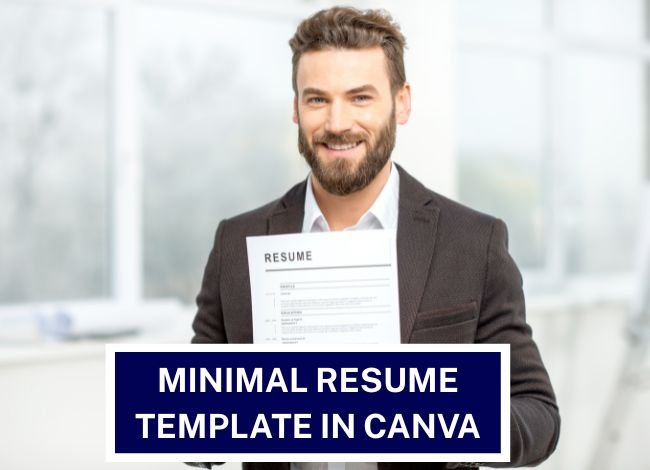
Minimal resume template in CanvaIn today’s competitive job market, your resume is often the first impression you make on a potential employer. With recruiters spending only a few seconds scanning each application, a cluttered or poorly designed resume can easily get overlooked. This is why simplicity and clarity are more important than ever. A minimal resume template in Canva provides the perfect balance of professionalism and modern design, helping your qualifications stand out without unnecessary distractions.

Minimal resume templates are built on the principle of “less is more.” Instead of overwhelming the reader with colors, graphics, and complex layouts, these templates highlight the essentials—your skills, achievements, and experiences—in a clean and structured format. The advantage of using Canva is that it allows anyone, regardless of design experience, to create a polished resume with ease. Its drag-and-drop editor, customizable fonts, and ready-made layouts make it possible to design a resume that looks professional while remaining uniquely yours.

A minimal resume design isn’t just about aesthetics. It plays a practical role in ensuring your application passes through Applicant Tracking Systems (ATS). Since many employers rely on ATS to filter resumes, a straightforward layout with clear sections increases the chances of your resume reaching human eyes. With a minimal resume template in Canva, you get a design that is both ATS-friendly and visually appealing, giving you a competitive advantage.

This article explores different types of resume templates—basic, professional, creative, and executive—showing how Canva makes it simple to customize each one. By the end, you’ll understand why minimalism is one of the most effective strategies for resume design, no matter your career stage.

Basic Resume Template

A basic resume template in Canva is designed for simplicity, clarity, and ease of use. It focuses on presenting your core information—education, work history, and skills—in a clean and straightforward format. Unlike flashy designs filled with graphics or bright colors, a basic resume keeps the spotlight on your qualifications. This makes it particularly effective for entry-level applicants, fresh graduates, or professionals who prefer a no-nonsense approach.

The main strength of a basic resume lies in its readability. Recruiters often review dozens, if not hundreds, of resumes in a single day. A cluttered or overly complicated layout can slow them down, while a minimal design allows them to immediately identify your strengths. When created in Canva, a basic resume template ensures consistency in formatting, balanced use of white space, and professional typography.

Another important benefit of using a minimal resume template in Canva is its compatibility with Applicant Tracking Systems (ATS). Many traditional resumes with complex graphics or unconventional layouts fail to get parsed correctly by ATS software. A basic Canva template avoids that problem by keeping everything neatly organized into standard sections like Work Experience, Skills, and Education.

For someone starting out, this style also provides flexibility. If you don’t have years of work history, you can emphasize internships, academic projects, or volunteer roles. Canva’s customization features let you re-arrange sections so the most relevant details come first. Over time, as you gain more experience, this basic template can easily be updated to reflect your career growth without needing an entirely new design.

College Resume Template

A college resume template in Canva is specifically designed for students, recent graduates, or individuals who may not yet have extensive professional experience. Instead of focusing heavily on long work histories, these templates highlight academic achievements, extracurricular activities, and transferable skills. For those applying to internships, scholarships, or part-time jobs, a minimal design ensures that accomplishments are presented clearly and professionally.

The strength of a minimal resume template in Canva for college students lies in its ability to bring attention to details that matter most at this stage of a career. For example, you can showcase your GPA, relevant coursework, research projects, or leadership positions in student organizations. Unlike cluttered layouts, a minimal template keeps this information organized in clean sections, ensuring nothing important gets lost.

Another benefit of using a Canva-based college resume is the ease of customization. Students often apply to multiple opportunities across different industries. Canva allows you to quickly adjust sections—such as placing “Education” at the top for academic applications or prioritizing “Skills” for internship opportunities. This flexibility saves time while still maintaining a polished appearance.

Moreover, recruiters and committees reviewing student applications generally prefer simplicity. They are looking for potential, not flashy design. A well-crafted, minimal resume communicates maturity and professionalism while showing that the candidate values clarity. It subtly tells the reader that the applicant knows how to present information effectively, which itself is a valuable skill.

Professional & Modern Resume Template

As you progress in your career, your resume must reflect more than just academic qualifications—it should demonstrate professionalism, credibility, and growth. A professional resume template in Canva is designed with this in mind. It balances structure with elegance, presenting your work history, achievements, and skills in a format that hiring managers can scan quickly while still leaving a strong impression.

Professional Canva templates typically feature clean two-column layouts, subtle lines or dividers, and simple use of bold headings. Unlike college or basic resumes, these templates often allow for a brief career summary at the top, giving you space to highlight your strengths in just a few sentences. This summary is particularly valuable for experienced professionals who want to showcase their expertise before diving into the details of each role.

Alongside professional layouts, Canva also offers modern resume templates, which are increasingly popular in industries such as technology, digital marketing, design, and creative services. Modern resumes maintain minimalism but add a touch of style through unique fonts, carefully chosen color accents, or iconography. For example, a soft accent color might be used to highlight section headers, or a simple graphic might separate skills from work experience.

The beauty of a minimal resume template in Canva—whether professional or modern—is that it combines clarity with personality. You don’t need to use loud graphics to stand out. Instead, a sleek layout with consistent formatting communicates confidence and attention to detail. Modern templates, when used carefully, give your application a contemporary edge without crossing into unprofessional territory.

Ultimately, both professional and modern Canva resumes are about balance. They allow you to emphasize your career achievements while still demonstrating that you are current with design trends. This can be especially useful when competing in industries where first impressions matter not only in content but also in presentation.

Simple, Creative & Functional Resume Template

A simple resume template in Canva is one of the most practical options for professionals in traditional industries such as law, finance, administration, or education. Simplicity ensures the resume looks clean, professional, and easy to read. These templates avoid heavy colors, complex graphics, or unusual fonts. Instead, they rely on white space, neat alignment, and standard sections like Work Experience, Education, and Skills. Recruiters in conservative industries often prefer this straightforward approach because it communicates seriousness and reliability.creative resume templates

On the other hand, Canva also offers creative resume templates that bring personality and style into the design. These are particularly useful for applicants in fields like design, marketing, advertising, or media—where creativity is a part of the job. While still minimal at the core, creative templates may include subtle use of color, unique layouts, icons, or graphic dividers. The key is balance: creativity should never overpower content. A hiring manager should still be able to scan the resume quickly without getting distracted. Canva makes this easy by offering creative templates that are visually appealing yet restrained enough to remain professional.

A functional resume template in Canva serves a different purpose altogether. Instead of focusing on a chronological list of jobs, a functional resume highlights skills and competencies. This format is especially useful for career changers, freelancers, or individuals with gaps in their employment history. By grouping skills under categories such as Leadership, Technical Expertise, or Project Management, a functional template draws attention to strengths rather than timelines.

What makes all three—simple, creative, and functional templates—effective is their minimal design philosophy. By keeping layouts clean and content well-structured, they ensure your resume is both ATS-friendly and visually attractive. Whether you’re aiming for a corporate role, a creative position, or transitioning careers, Canva provides templates that can be adapted to match your unique needs.

Executive Resume Template

An executive resume template in Canva is designed for senior professionals, directors, and C-level leaders who need to present their accomplishments in a powerful yet refined way. Unlike entry-level or student resumes, executive resumes focus less on tasks and more on measurable impact. They highlight achievements such as revenue growth, team leadership, strategy implementation, and organizational success.

Minimalism plays an important role here. A cluttered design can make even the most impressive career achievements hard to follow. A minimal resume template in Canva ensures executive-level experience is communicated clearly and with authority. These templates often feature a strong summary at the top, followed by sections for leadership skills, key achievements, and career highlights. Subtle color accents, bold typography for headings, and strategic use of white space help establish a commanding presence without being overwhelming.

For executives, less truly is more. The clean structure of a Canva template conveys confidence: it shows that you don’t need flashy visuals to stand out—your experience speaks for itself. This understated elegance can be the deciding factor when competing for top-level roles.

FAQs

1. Why should I use a minimal resume template in Canva?
Because it improves readability, ensures ATS compatibility, and allows your skills and experience to shine without distraction.

2. Are Canva resume templates customizable?
Yes. You can adjust fonts, colors, layouts, and even rearrange sections to fit your personal brand and target job.

3. Can a minimal Canva resume work across industries?
Absolutely. Minimal designs are versatile, professional, and adaptable. You can adjust creative elements based on whether you’re in a traditional, modern, or creative field.

4. Do Canva resumes pass Applicant Tracking Systems (ATS)?
Most minimal templates are ATS-friendly. To ensure compliance, avoid using text inside images or overly complex graphics.

5. Is a Canva resume better than a Word resume?
In many cases, yes. Canva offers visually polished templates that save time and give your resume a modern edge. However, always download in a format (like PDF) that remains professional.

Conclusion

A minimal resume template in Canva isn’t just a design choice—it’s a strategy. In today’s competitive job market, where hiring managers make decisions in seconds, a resume must be clean, professional, and easy to navigate. Whether you’re a student applying for internships, a professional climbing the career ladder, or an executive leading organizations, Canva provides customizable minimal templates suited to every stage of your journey.

Minimalism ensures your resume communicates clarity and professionalism. It strips away unnecessary clutter, leaving only what matters most: your skills, achievements, and potential. Combined with Canva’s user-friendly platform, this approach allows anyone to build a resume that is not only visually appealing but also effective in passing ATS scans and impressing recruiters.

In short, a minimal resume template in Canva gives you the perfect balance of simplicity, elegance, and functionality. By focusing on what truly matters, it increases your chances of standing out, securing interviews, and moving closer to your career goals.


Creative resume template for designers

0

Last Updated on November 7, 2026

When it comes to landing a design job, your resume is often the first impression you give to potential employers. A traditional black-and-white document may not be enough to showcase your creativity. This is where a creative resume template for designers becomes a powerful tool. Unlike standard resumes, a creative template combines structure with visually appealing design, enabling you to highlight your skills, experience, and personality all at once.

The design industry is highly competitive, whether you are a graphic designer, a visual designer, or even a beginner just entering the field. Employers are looking for resumes that stand out—not only in terms of content but also in presentation. The right template can help communicate your artistic sensibilities while still being professional and ATS (Applicant Tracking System) friendly.

In this article, we’ll explore different types of resumes tailored for designers. Each section will showcase examples like Graphic Designer Resume, Creative Graphic Designer Resume, Freelance Designer Resume, Visual Designer Resume, Student Resume, Beginner Resume, and Junior Designer Resume. You’ll also learn why each type of resume works, with insights into how to structure your content for maximum impact.

Graphic Designer Resume

A graphic designer resume typically strikes a balance between creativity and professionalism. It should reflect your ability to create clean layouts, choose harmonious color palettes, and use typography effectively. More importantly, it must highlight technical skills such as Adobe Photoshop, Illustrator, InDesign, Figma, or Sketch.

Your resume should also include a strong portfolio link. For graphic designers, the portfolio often carries as much weight as the resume itself. Recruiters want to see not only what you can do but how you apply your creativity in real-world projects.

Key Features of a Strong Graphic Designer Resume:

  • A minimalist yet visually appealing header with your name and job title.
  • Clear sections for skills, experience, and education.
  • A short summary that highlights both creative and technical strengths.
  • A direct link to your online portfolio or Behance/Dribbble profile.

Why This Resume Works

This resume works because it presents the designer as a professional who understands balance. It’s not overdesigned, so it remains easy to read and ATS-friendly. At the same time, the subtle use of colors, icons, and layout demonstrates your design eye. The portfolio link allows employers to dig deeper, making this resume functional as well as creative.

Creative Graphic Designer Resume

For designers who thrive on innovation, a creative graphic designer resume pushes the boundaries of traditional resume design. These resumes often feature bold typography, color gradients, or even infographic-style layouts. The idea is to demonstrate that you can break away from convention while still communicating information clearly.

This type of resume is perfect for roles in advertising agencies, creative studios, or startups where out-of-the-box thinking is highly valued.

Examples of Creative Elements to Include:

  • A unique color scheme that reflects your personal brand.
  • Icons or visual markers for skills such as “Adobe Illustrator,” “UX/UI,” or “Branding.”
  • Infographic timelines that represent your career journey.
  • Creative but readable typography that enhances the document.

Why This Resume Works

This resume works because it mirrors the designer’s professional identity. Employers looking for creative thinkers want resumes that already demonstrate innovation. By presenting your experience in a visually unique way, you give them a glimpse of your design personality. However, the key to making it work is balance—creativity should never compromise readability.Why This Resume Works

Freelance Graphic Designer Resume

Freelancers face a different challenge when it comes to resumes. Unlike traditional designers who may have worked with one or two companies, freelancers often have multiple clients across industries. A freelance graphic designer resume should showcase flexibility, adaptability, and client-oriented results.

Instead of listing just job titles, it’s more effective to emphasize projects and outcomes. For example, rather than writing “Designed logos for clients,” you might say “Created over 30 brand identities that helped small businesses increase customer engagement.”

Essential Sections for a Freelance Resume:

  • Summary: Position yourself as an independent creative professional.
  • Project Highlights: Short descriptions of notable freelance projects with measurable impact.
  • Skills: Both technical and soft skills, including client communication and project management.
  • Client Testimonials (optional): A brief quote from satisfied clients can build trust.

Why This Resume Works

This resume works because it tells a story of versatility and proven results. Companies hiring freelancers often want to see evidence that you can handle diverse projects, manage deadlines, and deliver high-quality outcomes. By structuring your resume around projects instead of roles, you demonstrate adaptability and value.

Visual Designer Resume

A visual designer resume is crafted to showcase expertise in creating digital and print visuals that enhance brand storytelling. Unlike graphic designers, visual designers often focus on the intersection of aesthetics and user experience. Employers in tech companies, design studios, and marketing agencies look for resumes that highlight a candidate’s ability to create consistent visual systems across web, mobile, and branding platforms.

A visual designer’s resume should emphasize proficiency in design systems, typography, UI patterns, and branding strategies. More importantly, it should demonstrate the ability to collaborate with UX designers, developers, and marketing teams.

Key Elements of a Visual Designer Resume:

  • Portfolio Links: To websites, apps, or campaigns you’ve visually designed.

  • Technical Skills: Tools such as Figma, Adobe XD, After Effects, and Sketch.

  • Design Thinking: Evidence that you can solve problems visually, not just decorate.

  • Branding Projects: Highlight projects where you contributed to building or refreshing brand identity.

Why This Resume Works

This resume works because it communicates the designer’s ability to combine beauty with functionality. Employers want to see not only artistic creativity but also an understanding of how design impacts user engagement and brand recognition. A well-structured creative resume template for designers in this category can make you stand out by blending clear professional details with visual storytelling.

Graphic Design Student Resume

For students or recent graduates, creating a resume can feel intimidating—especially when professional experience is limited. However, a graphic design student resume can be impactful when it emphasizes education, coursework, internships, and personal projects.

In this case, a creative resume template helps the student highlight potential rather than years of experience. The design of the resume itself can serve as proof of skill, showing that the student can apply design principles in practical ways.

What to Include in a Student Resume:

  • Education Section: With relevant coursework such as Typography, Motion Graphics, or UX Design.

  • Internship Experience: Any short-term roles in agencies, studios, or freelance projects.

  • Portfolio Projects: Academic or personal projects that demonstrate creativity and technical skills.

  • Extracurriculars: Design club memberships, workshops, or competitions.

Why This Resume Works

This resume works because it demonstrates ambition, eagerness to learn, and design potential. Recruiters understand that students won’t have long work histories, but they do want to see initiative, creativity, and a strong foundation. By using a creative resume template for designers, students can set themselves apart from peers who submit generic Word documents.

Beginner Graphic Designer Resume

When you’re just starting out, you may not have extensive experience, but that doesn’t mean your resume has to look empty. A beginner graphic designer resume should highlight transferable skills, personal projects, and any freelance or volunteer design work.

For example, if you’ve designed posters for community events, created social media graphics for a friend’s startup, or experimented with branding concepts in your free time—these can all be valuable additions to your resume.

Strategies for Beginners:

  • Focus on Skills Over Experience: List software and design principles you’ve mastered.

  • Highlight Personal Projects: Even self-initiated work shows creativity and motivation.

  • Use a Professional Template: This ensures your resume looks polished, even with limited content.

  • Add a Career Objective: Briefly explain your goals and passion for design.

Why This Resume Works

This resume works because it shows initiative and the ability to apply skills, even without years of industry experience. Recruiters value enthusiasm and a growth mindset. A creative resume template for designers ensures the layout itself looks professional, helping beginners compete with more seasoned candidates.

Junior Graphic Designer Resume

A junior graphic designer resume is ideal for those with 1–3 years of experience. At this stage, you’ve likely contributed to real-world projects, collaborated with teams, and developed stronger technical skills. The goal of your resume should be to emphasize growth, learning, and practical achievements.Junior Graphic Designer Resume

Employers hiring junior designers often want individuals who can handle both creative and production tasks—things like designing layouts, assisting with branding, and preparing assets for developers or printers.

Core Features of a Junior Designer Resume:

  • Professional Summary: Highlight your years of experience and design strengths.

  • Experience Section: Focus on contributions you made to projects, even if as part of a team.

  • Skills: Tools, design software, and creative techniques you are confident in.

  • Portfolio Showcase: Demonstrate improvement and versatility in your work.

Why This Resume Works

This resume works because it demonstrates readiness for responsibility. By this point, you are no longer a beginner—you’ve proven your ability to work in professional settings. A clean, creative resume template for designers ensures your application reflects both skill and growth potential, which is exactly what hiring managers want in junior roles.

FAQs

1. Should designers always use creative resume templates?
Not always. While creative templates can make your resume stand out, some companies prefer simple, traditional formats. It’s best to adjust depending on the job role and company culture.

2. Are creative resumes ATS-friendly?
They can be, if designed correctly. Avoid overly complex graphics or text embedded in images. Use clear headings, readable fonts, and proper text formatting.

3. What’s the most important element in a designer’s resume?
Your portfolio link. No matter how creative your resume looks, employers will ultimately want to see your work samples.

4. Can students or beginners use creative templates?
Absolutely. For students and beginners, creative templates help compensate for limited experience by showing potential through design.

5. How long should a designer resume be?
Typically, one page is ideal. However, if you have extensive experience or a wide range of projects, a two-page resume may be acceptable.

Conclusion

A creative resume template for designers is more than just a document—it’s a personal branding tool. Whether you’re a student, beginner, freelancer, or junior designer, the way you present your resume can dramatically impact your chances of landing interviews.

The key is finding the right balance between creativity and professionalism. Your resume should highlight your design skills while remaining clear, concise, and easy to read. Always pair your resume with a strong portfolio, as this is where employers will evaluate your true design ability.

By tailoring your resume for the specific role—whether as a graphic designer, creative designer, freelance designer, visual designer, or student—you show not only your qualifications but also your understanding of how design communicates value.

In today’s competitive job market, the right template could make all the difference. Your resume is your first design project for an employer—so make it a creative one.

Canva resume template for fresh graduates

0

Last Updated on November 7, 2026

Learn from Other Recent Graduate Resume Examples

When you’re just entering the job market, the best way to understand how to build your own resume is by looking at other recent graduate resume examples. These samples serve as a roadmap, showing you how to highlight your strengths even if you lack professional experience. By studying them, you can learn how to balance education, skills, and projects to make a strong first impression.

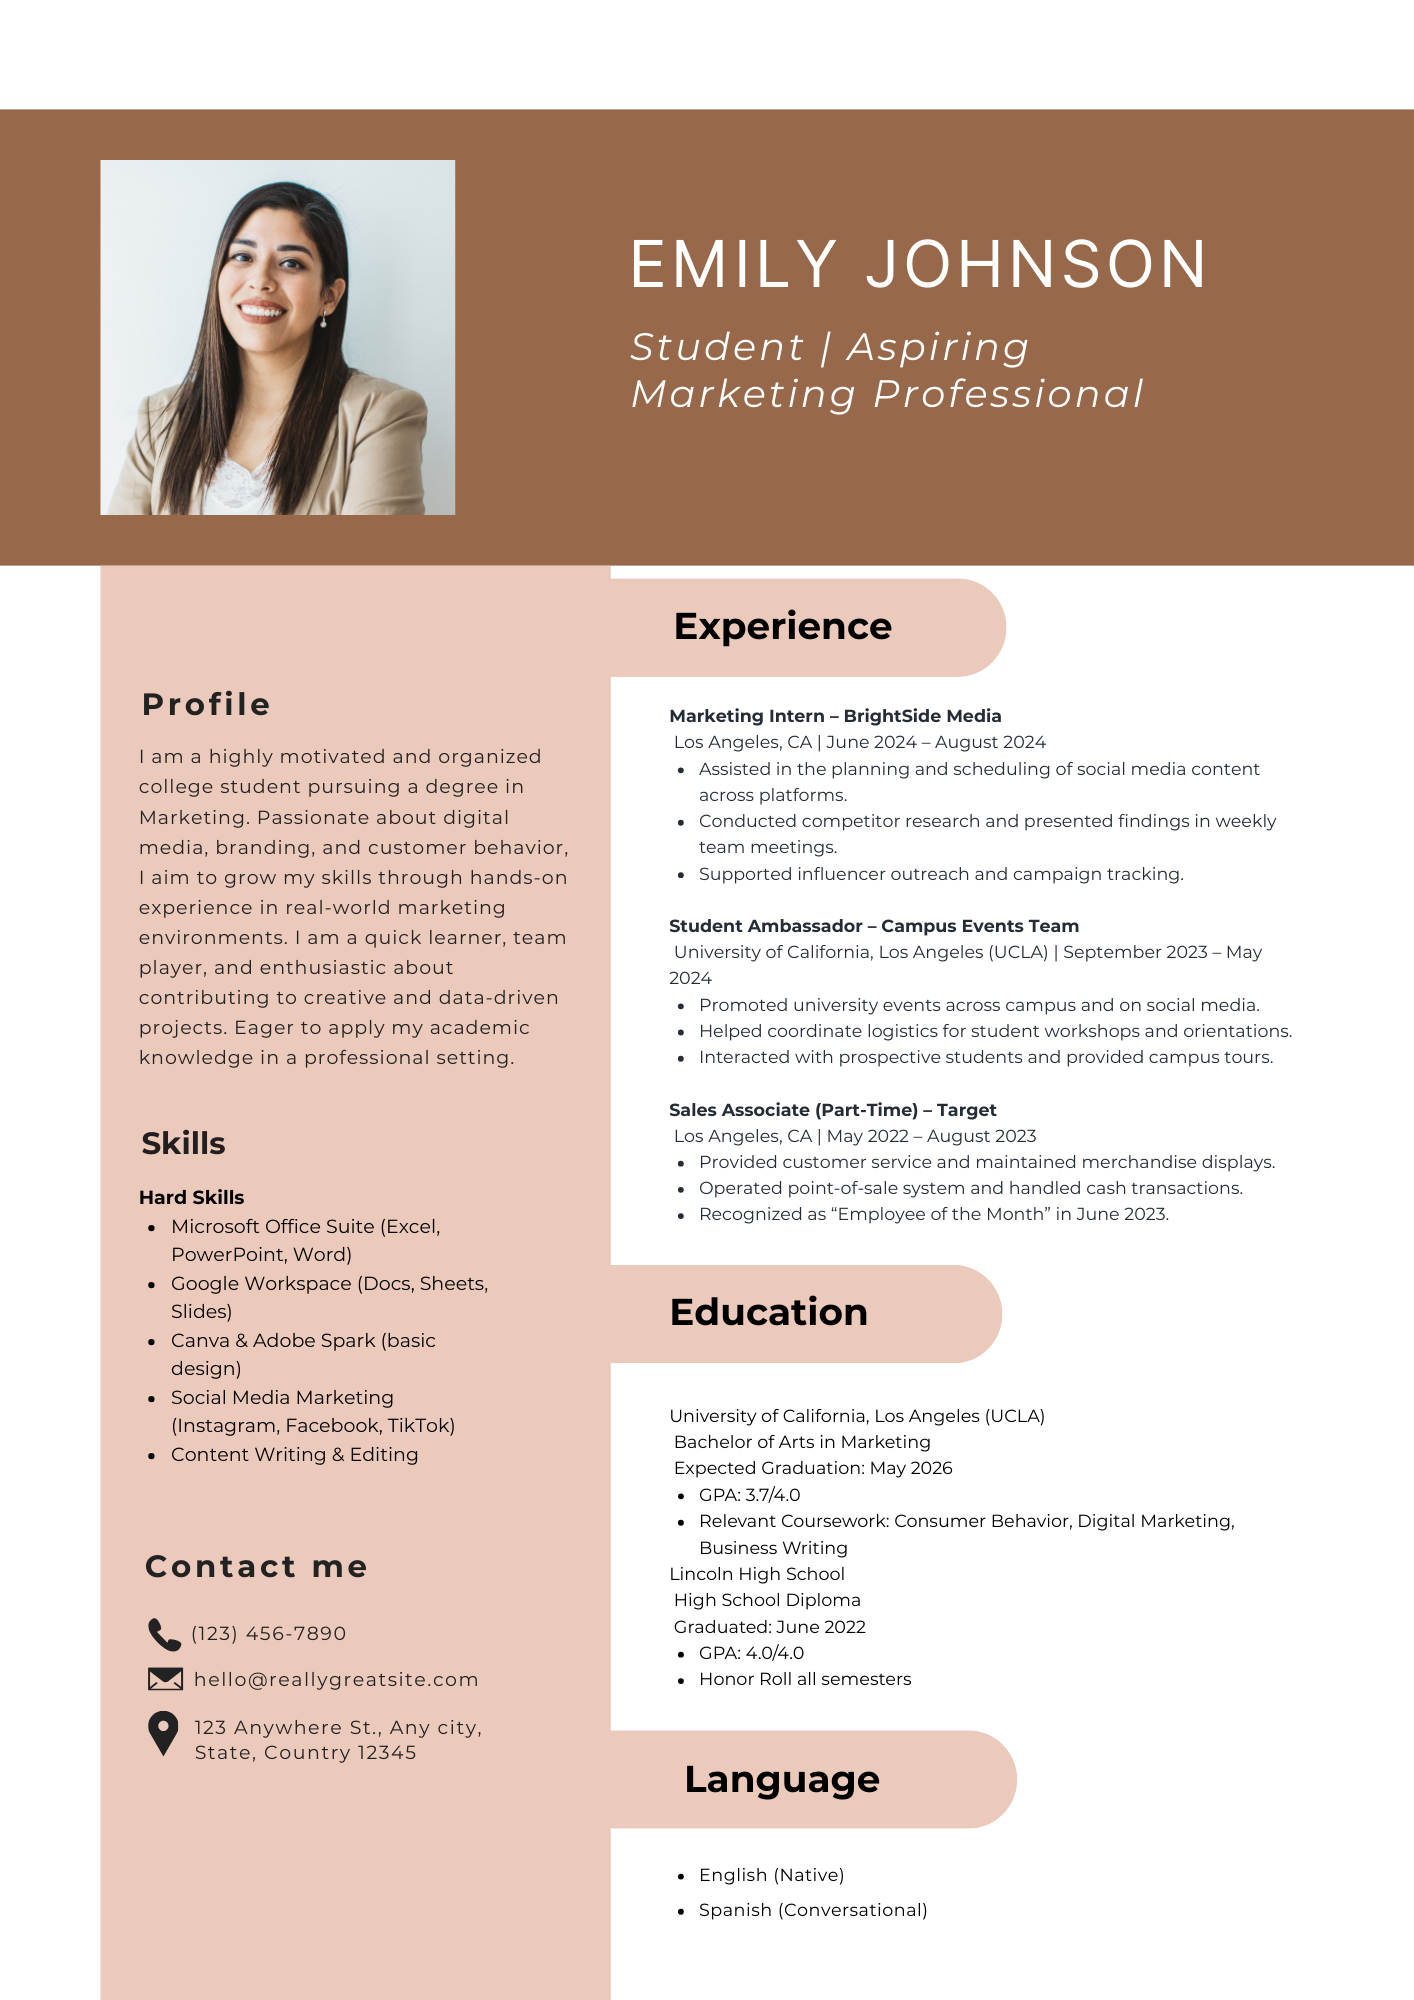
A Canva resume template for fresh graduates is especially helpful here because you can take inspiration from proven resume formats and then customize them with professional, visually appealing layouts. Instead of starting from a blank page, Canva provides ready-to-use structures that mirror successful graduate resumes.

Resume for Recent College Graduate (Without Experience)

Many new graduates fear that not having formal job experience will hold them back. The truth is, employers do not expect fresh graduates to have years of employment. What they do expect is the ability to show potential, transferable skills, and commitment.

If you are creating a resume without work experience, focus on:

  • Academic achievements – list projects, research papers, or coursework that align with your desired role.

  • Volunteer experience – community service, charity work, or campus events can demonstrate teamwork and leadership.

  • Extracurricular activities – highlight positions of responsibility, like being a club president, event organizer, or team captain.

For example, if you majored in Computer Science but have no internships, you can still showcase your senior project, coding competitions, or any apps you developed independently. A Canva template allows you to present this information in a structured, professional format that’s easy for recruiters to scan.

Resume for Recent College Graduate (With Internship)

If you’ve completed one or more internships, your resume instantly gains an edge. Employers know that internships expose you to real workplace challenges and give you transferable skills. Here’s how to maximize that section:

  • List your internship title, company, and duration clearly.

  • Describe responsibilities in a way that highlights relevant skills. For instance, “Assisted with digital marketing campaigns” sounds better than “Helped with office tasks.”

  • Show results when possible—such as “Increased social media engagement by 20% during internship.”

For example, a Marketing graduate who interned at an advertising firm can list:
“Assisted with client social media campaigns, created Canva graphics for promotions, and analyzed weekly performance reports.”

This type of phrasing combines responsibility with achievement, making your resume more impactful. Again, a Canva resume template for fresh graduates makes it easy to format this professionally with neat sections for experience, dates, and bullet points.

Use an Eye-Catching Resume Header

The very first thing a hiring manager notices on your resume is the header section. This is where your name and contact information appear, and it acts like the front door to your professional identity. If the header is messy, incomplete, or hard to read, the recruiter may move on without even reviewing the rest of your qualifications. That’s why creating an eye-catching yet professional resume header is crucial.

With a Canva resume template for fresh graduates, you get the advantage of well-designed headers that already balance simplicity and modern style. Instead of struggling to make your contact details stand out, Canva provides clean formatting options that highlight your name while keeping the rest of the section polished.

What to Include in Your Resume Header

Your header should immediately tell an employer who you are and how to contact you. Essential details include:

  • Full Name – Use a bold, larger font to make it noticeable.

  • Phone Number – A number where you can be reached easily.

  • Professional Email Address – Avoid casual emails; stick to something that includes your name.

  • Location – Usually city and state are enough. Full addresses are less necessary today.

  • LinkedIn Profile or Portfolio Link – If you have a professional LinkedIn, portfolio, or GitHub (for tech grads), add the link.

Optional additions could include a personal website or online portfolio if you’re in a creative or technical field.

Design Tips for an Attractive Header

Canva makes it simple to design a resume header that looks polished but not overdone. Keep these tips in mind:

  • Prioritize readability – Choose clean fonts like Arial, Helvetica, or Calibri. Canva templates already provide good options.

  • Use hierarchy – Your name should be the largest text, while contact details remain smaller.

  • Keep colors professional – You can add subtle color accents for creativity, but avoid neon or distracting shades.

  • Avoid clutter – Only include information that helps recruiters reach you or view your work.

For example, instead of cramming in every social media link, focus only on professional platforms like LinkedIn or Behance (for designers).

Why the Header Matters for Fresh Graduates

As a new graduate, you may not have years of experience to showcase, but a well-structured header instantly creates a strong impression. It signals professionalism, attention to detail, and a readiness for the corporate world.

Recruiters often receive dozens, sometimes hundreds of applications. A clean header designed using a Canva resume template for fresh graduates ensures your resume looks polished and easy to navigate, increasing the chance that the hiring manager will continue reading.

Write a Convincing Resume Objective

As a fresh graduate, you don’t yet have a long career history to rely on. That’s why your resume objective becomes one of the most powerful parts of your application. This short statement—placed near the top of your resume—summarizes who you are, what you bring to the table, and what career goal you’re aiming for.

A convincing resume objective not only gives employers a quick snapshot of your profile but also demonstrates your enthusiasm and clarity of purpose. When paired with a Canva resume template for fresh graduates, your objective stands out clearly thanks to structured formatting and smart use of fonts and spacing.

Why a Resume Objective Matters for Fresh Graduates

Hiring managers typically spend less than 10 seconds scanning a resume before deciding whether to read further. For recent graduates, the resume objective helps compensate for limited work experience by:

  • Highlighting your education and transferable skills.

  • Showing your career ambitions.

  • Proving your enthusiasm and willingness to learn.

Unlike seasoned professionals who use a resume summary, fresh graduates need an objective to showcase potential rather than past accomplishments.

How to Write a Strong Resume Objective

When crafting your objective, keep it clear, concise, and tailored to the role. A good structure looks like this:

  1. Who you are – Identify yourself as a recent graduate and mention your field.

  2. What you bring – Highlight your key strengths, skills, or academic achievements.

  3. What you want – State your career goal and how you hope to contribute to the organization.

Examples of Resume Objectives for Fresh Graduates

Here are some tailored examples you can adapt:

  • For Business Graduates:
    “Recent Business Administration graduate with strong organizational and analytical skills. Seeking an entry-level role in project coordination where I can support team success and grow into a management career.”

  • For Computer Science Graduates:
    “Detail-oriented Computer Science graduate with hands-on experience in Python, Java, and cloud computing projects. Looking for an entry-level software developer role to apply technical expertise and problem-solving skills.”

  • For Marketing Graduates:
    “Creative Marketing graduate skilled in Canva, social media management, and SEO strategies. Eager to contribute fresh ideas and digital marketing knowledge to a growing brand.”

Each of these is short (2–3 sentences), targeted, and emphasizes both skills and career goals.

Placement and Formatting in a Canva Resume

One of the best advantages of using a Canva resume template for fresh graduates is that you can place your objective in a prominent location—usually right below your header. Canva layouts often dedicate space for this, ensuring it stands out without overwhelming the page.

Use simple, professional fonts and keep it around 50–70 words. Remember, this is your “elevator pitch”—long enough to impress but short enough to be scanned quickly.

Write a Detailed Educational Background

For most recent graduates, the education section is the backbone of the resume. Since you may not yet have years of professional experience, your academic qualifications, coursework, and achievements often carry the most weight. A carefully crafted education section can prove to employers that you have the right foundation, skills, and knowledge to succeed in the role you are applying for.

Using a Canva resume template for fresh graduates makes this even easier because the design already emphasizes clear sectioning, consistent formatting, and visual hierarchy—ensuring that your academic background is highlighted in the best way possible.

What to Include in the Education Section

When writing this section, keep it detailed but relevant. Here are the key elements to cover:

  • Degree Name and Major – Clearly state your degree (e.g., Bachelor of Science in Computer Engineering).

  • University or College Name – Include the full institution name for credibility.

  • Graduation Year (or Expected Graduation) – If you’re still a student, you can add “Expected May 2026,” for example.

  • Relevant Coursework – Mention classes directly related to the role (e.g., Data Structures, Digital Marketing, Financial Modeling).

  • Academic Achievements – Dean’s List, honors, scholarships, or awards should be listed if they strengthen your profile.

  • Final Year Projects or Thesis – This can showcase problem-solving, research, and applied knowledge.

Example of a Strong Education Section

Bachelor of Science in Electrical Engineering
XYZ University, 2023

  • GPA: 3.8/4.0 (include only if strong and relevant).

  • Coursework: Digital Circuit Design, Microcontrollers, Power Systems.

  • Capstone Project: “Smart Energy Monitoring System Using IoT” – designed and implemented a real-time energy tracking system that improved efficiency by 12%.

This example not only lists the basics but also demonstrates real-world application of academic skills.

How to Format the Education Section in Canva

A Canva resume template for fresh graduates usually includes a neatly separated area for education. Some templates highlight it at the top (which is ideal for recent graduates), while others allow flexibility in placement.

Formatting tips:

  • Keep your degree name and university bolded for quick readability.

  • Use bullet points sparingly to list achievements or projects.

  • Stick to reverse chronological order (latest education first).

  • If you have multiple degrees, keep the section consistent in style.

Why a Detailed Education Section Matters

Employers hiring fresh graduates understand that your main strength lies in your academic preparation and potential. A detailed education section allows you to:

  • Show technical and theoretical expertise through coursework.

  • Prove dedication and excellence through GPA, honors, or scholarships.

  • Highlight applied learning through projects, research, or thesis work.

In short, this section compensates for limited job history and positions you as a capable, skilled candidate ready for the professional world.

Write an Experience Section that Highlights Your Relevant Skills

For many fresh graduates, the experience section can feel like the most intimidating part of the resume. Since you may not have years of full-time employment, it’s easy to assume you don’t have anything valuable to add. The truth is, even without traditional jobs, you probably have more relevant experience than you realize—whether from internships, part-time roles, volunteer work, or academic projects.

The goal is to frame your experience in a way that highlights transferable skills. Using a Canva resume template for fresh graduates ensures your experience section is structured clearly, with consistent formatting and visual balance, making it easy for recruiters to spot the most important details.

What to Include in the Experience Section

Even if you haven’t worked in a professional job yet, you can still include experiences that show responsibility, skills, and initiative:

  • Internships – Paid or unpaid internships provide practical exposure and are highly valued.

  • Part-Time Jobs – Roles like retail, tutoring, or customer service can highlight communication, problem-solving, and teamwork.

  • Freelance or Project Work – Any short-term work that used your skills, even if informal.

  • Volunteer Work – Demonstrates commitment, leadership, and soft skills.

  • Academic Projects – Capstone projects, research work, or group projects that mirror workplace collaboration.

Example of an Experience Entry

Marketing Intern
ABC Advertising Agency | June 2023 – August 2023

  • Assisted in developing digital marketing strategies for small business clients.

  • Designed promotional graphics using Canva and increased campaign engagement by 18%.

  • Analyzed weekly social media performance and presented reports to senior managers.

Part-Time Customer Service Associate
RetailMart | Jan 2022 – May 2023

  • Handled customer inquiries and resolved issues with a 95% satisfaction rate.

  • Trained two new team members on customer service protocols.

  • Improved checkout efficiency by streamlining common processes.

These examples show action, skills, and results—three things employers love to see.

Tips for Writing the Experience Section

  • Use Action Verbs – Start bullet points with words like “developed,” “organized,” “assisted,” or “led.”

  • Quantify Achievements – Numbers make your experience more credible (e.g., “improved efficiency by 15%”).

  • Focus on Transferable Skills – Even if unrelated to your target job, show how your role taught skills like teamwork, communication, or problem-solving.

  • Keep Formatting Consistent – Job titles, companies, and dates should follow the same style.

Canva templates make this simple by giving you pre-formatted sections where all experience entries look professional and evenly spaced.

Why the Experience Section Matters

Recruiters know fresh graduates won’t have lengthy job histories, but they want to see evidence of:

  • Practical exposure to professional environments.

  • Skills in action, not just listed in theory.

  • Growth mindset—the willingness to learn and take responsibility.

A clear, well-written experience section helps employers connect the dots between your academic background and your readiness to contribute in the workplace.

Demonstrate a Diverse Mix of Technical and Soft Skills

One of the biggest challenges fresh graduates face is proving that they’re job-ready despite limited professional experience. This is where the skills section becomes a game-changer. By highlighting a balanced mix of technical skills (hard skills) and soft skills (interpersonal abilities), you show recruiters that you are not only knowledgeable but also capable of thriving in a team environment.

Using a Canva resume template for fresh graduates makes this easier, as Canva provides creative ways to present your skills—through lists, columns, icons, or even subtle progress bars—while keeping the design professional and ATS-friendly.

The Importance of Technical Skills

Technical skills are concrete abilities you’ve learned through education, projects, or hands-on practice. These vary depending on your career path. Recruiters often scan resumes specifically to see if you have these hard skills because they directly relate to the tasks of the job.

Examples of Technical Skills by Field:

  • Information Technology (IT): Programming (Python, Java, C++), database management, cloud computing, cybersecurity basics.

  • Marketing: Canva design, SEO optimization, Google Analytics, social media advertising, content writing.

  • Finance: Microsoft Excel, financial modeling, data analysis, accounting software.

  • Engineering: CAD design, MATLAB, circuit analysis, project management tools.

Including these technical skills proves that you can apply your academic knowledge to practical workplace challenges.

The Value of Soft Skills

Soft skills often set apart one candidate from another, especially at the entry level. Employers know technical skills can be taught on the job, but soft skills reflect your personality and adaptability.

Examples of Essential Soft Skills:

  • Communication: Ability to express ideas clearly, both in writing and speaking.

  • Problem-Solving: Approaching challenges with creativity and logic.

  • Teamwork: Collaborating effectively with colleagues and contributing to group success.

  • Adaptability: Remaining flexible in changing environments.

  • Leadership Potential: Taking initiative and motivating others even in small ways.

For example, a group project in college may demonstrate teamwork and leadership, while customer service experience reflects strong communication and conflict resolution.

How to Present Skills in a Canva Resume Template

A Canva resume template for fresh graduates often provides skill-focused layouts where you can:

  • List technical and soft skills separately for clarity.

  • Use columns to balance multiple skills without making the section too long.

  • Highlight job-relevant skills first to grab recruiter attention.

  • Add visual elements like small icons or bars (but keep them subtle to stay ATS-friendly).

For instance, instead of dumping all skills into one list, you could divide your section like this:

Technical Skills: Python, Java, Canva design, SEO optimization, Data Analysis.
Soft Skills: Communication, Leadership, Problem-Solving, Adaptability.

This organization makes your resume more readable and impactful.

Why the Skills Section Matters for Fresh Graduates

Since employers know you’re just starting your career, they often focus heavily on this section. By demonstrating a diverse mix of technical and soft skills, you assure recruiters that you’re both knowledgeable and capable of growing into the role.

Use a Template Made for a Recent College Graduate Resume

After putting effort into writing the right content—your education, skills, and experiences—the final step is presentation. No matter how strong your achievements are, if your resume looks cluttered, outdated, or hard to read, recruiters may overlook it. This is why using a Canva resume template for fresh graduates can give you a real advantage.

Canva offers hundreds of professional resume templates that are easy to customize. These templates are designed with recruiters in mind: clean layouts, balanced spacing, and modern typography that make your application stand out without looking overdesigned.

Why Choose Canva Templates as a Fresh Graduate?

  1. Professional Design Without the Stress
    As a graduate, you don’t need to spend hours figuring out formatting in Word or Google Docs. Canva provides ready-made designs where everything is aligned perfectly.

  2. Customizable for Your Needs
    You can adjust colors, fonts, and sections to match your personal brand. For creative fields, adding subtle color or icons is a plus. For corporate roles, stick with simple and minimal templates.

  3. ATS-Friendly Options
    Many employers use Applicant Tracking Systems (ATS) to filter resumes. Canva includes minimalistic templates that use standard fonts and layouts, ensuring your resume passes ATS screening.

  4. Time-Saving
    Instead of designing from scratch, you can build your resume in under an hour by simply replacing placeholder text with your own details.

How to Choose the Right Canva Resume Template

When browsing through Canva, keep in mind:

  • Industry Relevance – A sleek, modern design may work for a graphic design role, while a traditional layout is better for finance or law.

  • Readability – Recruiters skim resumes quickly, so avoid overly decorative fonts or busy designs.

  • Simplicity – White space, consistent margins, and balanced sections matter more than flashy elements.

  • One-Page Layouts – For fresh graduates, a one-page resume is ideal. Canva has plenty of single-page designs that look professional.

Example: Transforming Content with Canva

Imagine you’ve already written your resume in plain text. It may look like a basic document, hard to differentiate from others. Now, place that same information into a Canva resume template for fresh graduates:

  • Your name becomes bold and centered in a stylish header.

  • Education and skills appear in neatly organized sections.

  • Subtle lines, icons, or color accents guide the recruiter’s eyes.

The difference is striking—you’ve transformed a simple list into a professional, visually engaging resume.

Common Mistakes to Avoid

Even with Canva templates, be mindful of these pitfalls:

  • Overusing Graphics – Too many icons, colors, or charts can distract from your actual content.

  • Using Non-Professional Fonts – Stick with clean, modern fonts like Arial, Helvetica, or Calibri alternatives available in Canva.

  • Neglecting ATS-Friendliness – If applying online, choose simple designs that software can easily read. Save your creative versions for printed resumes or networking events.

Why Employers Appreciate Well-Designed Resumes

A resume made with a Canva template shows employers that you are detail-oriented, modern, and serious about presenting yourself well. It communicates professionalism before they even read your skills or experiences.

In today’s competitive job market, where recruiters may receive hundreds of applications, having a polished and visually appealing resume can be the difference between being shortlisted or overlooked.

Frequently Asked Questions About Writing a Resume as a Recent Grad

Q1: Should I include my GPA on my resume?

You should only include your GPA if it’s strong—generally 3.5 or higher. If your GPA is average or below, it’s better to leave it out and focus on your skills, projects, and internships instead. Recruiters are more interested in your ability to contribute than just a number.

Q2: How long should a fresh graduate resume be?

For most graduates, one page is ideal. Recruiters spend very little time scanning resumes, and keeping it concise makes it easier for them to see your value quickly. However, if you have multiple internships, projects, or certifications, extending to two pages is acceptable.

Q3: Can I use a Canva resume template for online job applications?

Yes! A Canva resume template for fresh graduates works perfectly for online applications as long as you choose a simple, ATS-friendly design. Avoid overly graphic-heavy templates, as some Applicant Tracking Systems may have difficulty reading them.

Q4: What if I don’t have any work experience at all?

That’s completely fine—employers understand that fresh graduates are just starting out. Instead of traditional jobs, highlight academic achievements, volunteer work, extracurricular leadership roles, and final-year projects. These demonstrate initiative, teamwork, and transferable skills.

Q5: Do Canva resumes look professional enough for corporate jobs?

Absolutely. Canva offers a wide range of minimalistic and professional templates that are recruiter-approved. As long as you avoid flashy colors or distracting designs, your Canva resume will look just as professional—if not better—than one made in Microsoft Word.

Conclusion

Creating a resume as a recent graduate may seem overwhelming, but with the right strategy and tools, you can present yourself confidently to potential employers. The key is to focus on education, transferable skills, and practical experiences like internships, part-time jobs, and projects.

A Canva resume template for fresh graduates makes the process easier by giving you a polished, professional design that highlights your strengths without requiring design expertise. From crafting a convincing objective to balancing technical and soft skills, each section of your resume plays a vital role in telling your story.

Remember:

  • Your header introduces you.

  • Your objective sells your ambition.

  • Your education and projects prove your potential.

  • Your experience and skills show you’re job-ready.

When combined in a clear, well-designed Canva template, these elements create a resume that not only looks great but also captures the recruiter’s attention.

Simple resume template for teachers

0

Last Updated on November 7, 2026

When it comes to applying for a teaching position, your resume is often the very first impression you make on a school or hiring manager. A well-crafted resume does more than list your qualifications—it showcases your ability to communicate clearly and organize information effectively. In the competitive education field, using a simple resume template for teachers ensures that your skills and experience stand out without being overshadowed by unnecessary design elements. A clean and professional format communicates competence, reliability, and attention to detail, which are essential qualities for any teacher.

Unlike resumes for creative industries, teacher resumes are best kept simple and straightforward. The goal is to make it easy for the reader to find your teaching experience, educational background, certifications, and skills in just a few seconds. Remember, school administrators often review dozens of applications in a short time, so clarity and organization are key.

How to Format a Teacher Resume

Formatting is one of the most critical aspects of a teacher’s resume. Even the most qualified applicant can lose opportunities if the resume looks cluttered or disorganized. A simple teacher resume format allows recruiters to quickly identify your strengths without struggling through distracting graphics or inconsistent layouts.

Some best practices for formatting include:

  • Use a professional, easy-to-read font such as Arial, Calibri, or Times New Roman.
  • Keep font sizes between 10–12 points for body text and 14–16 points for section headings.
  • Maintain consistent spacing between sections for a clean appearance.
  • Use reverse chronological order—list your most recent job and education first.
  • Stick to one or two pages in length, depending on your teaching experience.

By following these guidelines, you create a resume that not only looks professional but also passes applicant tracking systems (ATS) without errors.

Use a Teacher Resume Template

Many job seekers struggle with formatting from scratch, and that’s where a teacher resume template becomes extremely helpful. A template provides a clear structure, ensuring you don’t miss important sections while also saving time.

A simple resume template for teachers usually contains:

  • A professional header with your name and contact details.
  • A concise resume summary or objective tailored to the teaching role.
  • Work experience, with a focus on accomplishments in teaching or related fields.
  • An education section highlighting your degree and certifications.
  • A skills section showcasing both hard and soft teaching skills.
  • Optional areas such as awards, professional development, languages, or hobbies.

The benefit of using a template is consistency—it keeps your resume organized, ATS-friendly, and visually appealing without unnecessary distractions. Templates are also adaptable; you can modify them to suit specific teaching levels, such as elementary, middle school, or high school positions.

What to Include in a Teacher Resume

A teacher’s resume is more than just a document—it’s your personal marketing tool. It must show your qualifications, teaching style, and achievements in a way that convinces the school you’re the right candidate. A simple resume template for teachers should include these key sections:

  • Contact Information: Your name, phone number, professional email, and location.
  • Resume Summary or Objective: A short statement that highlights your career goals or achievements.
  • Work Experience: Teaching roles, student-teaching, tutoring, or any relevant educational jobs.
  • Education: Your degree(s), certifications, and relevant coursework.
  • Skills: Both technical (hard) and interpersonal (soft) skills related to teaching.
  • Certifications and Awards: Teacher training, honors, or recognitions.

Optional sections like languages, professional development, or hobbies can also add value if they’re relevant to the teaching role.

How to Write Your Contact Information Section

Your contact information should be clear and easy to find at the very top of your resume. Hiring managers should never have to hunt for your phone number or email.

How to Format a Teacher Resume

Include the following:

  • Full Name – Bold and slightly larger than the rest of the text.
  • Phone Number – Use a number you can answer professionally.
  • Email Address – Stick to a professional email (e.g., firstname.lastname@gmail.com). Avoid casual addresses like cuteboy123@domain.com.
  • Location – City and state are enough; no need for a full street address.
  • Professional Links – LinkedIn profile, online teaching portfolio, or website (if relevant).

A sample contact section could look like this:
Jane Smith | (123) 456-7890 | jane.smith@email.com | New York, NY | linkedin.com/in/janesmith

How to Write a Teacher Resume Summary or Objective

The resume summary or objective is often the first thing a hiring manager reads. In just 2–3 sentences, it should showcase who you are as a professional and what you can bring to the school.

Teacher Resume Summary Example

“Passionate high school science teacher with over 7 years of experience designing engaging lesson plans, integrating technology into the classroom, and mentoring new educators. Proven record of improving student performance and creating positive learning environments.”

Teacher Resume Objective Example

“Recent education graduate seeking an elementary teaching position. Skilled in lesson planning, classroom management, and child development. Eager to apply knowledge and enthusiasm to help students reach their full potential.”

Using a simple resume template for teachers makes it easy to place your summary or objective in a highlighted section at the top of the document so it immediately grabs attention.

How to Make Your Teaching Work Experience Stand Out

Work experience is the backbone of any resume, and for teachers, it shows how effectively you’ve managed classrooms, developed lesson plans, and supported student growth. The key is not just to list responsibilities but to highlight accomplishments. A recruiter should be able to see the impact you made in your previous roles.

For example, instead of writing:

  • “Taught English to high school students.”

Write something stronger and achievement-focused:

  • “Designed and implemented an English curriculum that improved student test scores by 18% over two semesters.”

This approach demonstrates value. By using a simple resume template for teachers, you can structure your work experience in a clear, easy-to-read way that focuses on your results.

What if You Don’t Have Work Experience?

Not every aspiring teacher has years of classroom experience. If you’re a recent graduate or transitioning from another career, you can still create a strong resume. Highlight your transferable skills and practical experiences such as:

  • Student teaching assignments – These are valuable and should be listed like professional experience.
  • Tutoring or mentoring roles – Show how you helped students improve academically.
  • Volunteer work – Any involvement in education-related community service.
  • Relevant coursework – Courses on pedagogy, child psychology, or classroom management.

Example:
“Completed a six-month student teaching program at ABC Elementary, managing a classroom of 25 students, preparing lesson plans, and integrating interactive teaching methods.”

A simple resume template for teachers is especially helpful for beginners because it ensures your strengths—education, certifications, and skills—are presented clearly even if your professional experience is limited.

Use Action Words to Make Your Teaching Resume POP!

Hiring managers see hundreds of resumes. Using action verbs makes your resume more dynamic and persuasive. Instead of bland phrases like “responsible for” or “helped with,” use words that show initiative and leadership.

Strong action words for teaching resumes include:

  • Designed – “Designed innovative lesson plans to increase student engagement.”
  • Facilitated – “Facilitated group discussions to encourage critical thinking.”
  • Implemented – “Implemented new grading system that improved efficiency.”
  • Mentored – “Mentored student teachers in classroom management strategies.”
  • Enhanced – “Enhanced learning by integrating digital tools into daily lessons.”
  • Coordinated – “Coordinated extracurricular activities that improved student participation.”

Action words instantly give your resume energy and show that you actively contributed to student success. Combined with a simple resume template for teachers, these words help your application stand out in both human and ATS screening.

How to List Your Education Correctly

For teachers, education is one of the most important sections of a resume. Schools want to know not only what degree you hold but also whether you have the proper certifications to teach. In a simple resume template for teachers, the education section is usually placed right after work experience (or at the top if you’re a recent graduate).

How to List Your Education Correctly

When listing your education, always include:

  • Degree name (e.g., Bachelor of Science in Secondary Education)
  • University or college name
  • Graduation year
  • Honors or distinctions (if any)

Example:
Bachelor of Arts in Education, Mathematics
Dhaka University, 2020
Graduated with Honors

If you hold teaching certifications, such as a state teaching license, TEFL/TESOL, or Montessori training, add them here or in a separate “Certifications” section.

Top 10 Skills for a Teacher Resume

A resume without a strong skills section feels incomplete. Recruiters look for a balance of hard skills (technical and subject-related) and soft skills (interpersonal and classroom management). By using a simple resume template for teachers, you can display these skills neatly so they’re easy to scan.

Hard Skills for Teachers:

  • Lesson planning and curriculum design
  • Classroom technology (Google Classroom, Microsoft Teams, Smart Boards)
  • Assessment and grading systems
  • Special education strategies
  • Subject expertise (Math, English, Science, etc.)

Soft Skills for Teachers:

  • Strong communication skills
  • Leadership and classroom management
  • Patience and adaptability
  • Creativity in lesson delivery
  • Collaboration with colleagues and parents

A well-balanced skills section shows that you not only know how to teach but also how to connect with students and work effectively within a school community.

Other Resume Sections You Can Include

While the essential sections—contact info, summary, experience, education, and skills—are enough to create a strong application, adding a few extra sections can make your resume stand out even more. A simple resume template for teachers often includes space for these optional sections:

Awards & Certifications

If you’ve been recognized for excellence in teaching, classroom innovation, or leadership, list it here. Example:
“Best Innovative Teacher Award, 2022 – Recognized for implementing creative digital learning tools in the classroom.”

Languages

Being bilingual or multilingual is a valuable skill, especially in diverse schools. Mention your proficiency level (basic, intermediate, fluent).

Interests & Hobbies

This section is optional, but if your hobbies relate to education, child development, or community service, they can make you appear more relatable and well-rounded. For example:
“Organizing debate clubs, volunteering in literacy programs, or coaching school sports.”

By combining these sections into your resume using a simple resume template for teachers, you present yourself as a highly qualified, versatile candidate who brings more than just classroom knowledge to the table.

Match Your Cover Letter with Your Resume

Submitting a resume without a cover letter can sometimes feel incomplete. While the resume highlights your achievements, the cover letter gives you a chance to show your personality and enthusiasm for teaching. To make the application look polished and professional, match your cover letter design with your simple resume template for teachers. Use the same font, formatting, and header style so the documents look like a set.

A well-matched cover letter shows consistency, attention to detail, and professionalism—qualities every school administrator values.

Contact Details

Just like on your resume, include your name, phone number, email, and location at the top of your cover letter. If you’re sending a digital copy, adding your LinkedIn profile or portfolio link can also be helpful.

Example:
Sarah Johnson
New York, NY | sarah.johnson@email.com | (123) 456-7890

Hiring Manager’s Contact Information

Right below your details, add the school’s information and the name of the hiring manager (if available). This shows that you’ve done your research.

Example:
Mr. David Miller
Principal, Greenfield High School
New York, NY

Opening Paragraph

Your opening paragraph should be engaging and should immediately state the position you are applying for. Instead of a generic “I am applying for the teaching position,” try something more personalized:

“As a dedicated and enthusiastic elementary school teacher with over 4 years of experience creating student-focused lesson plans, I am excited to apply for the Grade 4 Teacher position at Greenfield High School.”

The Body

The middle section (one or two paragraphs) should connect your skills and achievements with the school’s needs. Mention your teaching experience, classroom management strategies, and how you have positively influenced student growth. If possible, use quantifiable achievements (e.g., “Raised class test scores by 15% in one year”).

Highlight a few key skills that were already included in your simple resume template for teachers—this creates consistency between the two documents.

Closing Paragraph

The closing should reinforce your enthusiasm and invite the hiring manager to take the next step. Example:

“I would welcome the opportunity to bring my passion for teaching and proven classroom strategies to your school. I look forward to the chance to discuss how I can contribute to Greenfield High’s success.”

Formal Salutations

End your letter with a professional closing. Common choices include:

  • Sincerely,
  • Respectfully,
  • Best regards,

Followed by your full name.

Example:
Sincerely,
Sarah Johnson

By aligning your cover letter with your simple resume template for teachers, you create a unified, professional impression that makes your application more memorable.

Key Takeaways

Creating a strong resume as a teacher is not about flashy graphics or complicated layouts—it’s about clarity, structure, and relevance. Whether you are an experienced educator or just starting your career, using a simple resume template for teachers helps you focus on the essentials.

  • Keep your resume format clean, professional, and ATS-friendly.
  • Include core sections: contact information, summary or objective, experience, education, skills, and certifications.
  • Highlight achievements, not just responsibilities, to make your teaching work experience stand out.
  • If you don’t have experience, emphasize student teaching, tutoring, or volunteer work.
  • Use strong action verbs to bring your resume to life.
  • Showcase both hard skills (lesson planning, classroom technology) and soft skills (communication, adaptability).
  • Add optional sections like awards, languages, or hobbies for extra value.
  • Match your cover letter design and tone with your resume for a professional, unified application.

A resume is more than a list of jobs—it’s a reflection of your teaching philosophy, passion, and ability to inspire students.

Conclusion

A teaching career requires dedication, patience, and the ability to make a difference in the lives of students. To get that opportunity, your resume must present you as the right fit for the school. A simple resume template for teachers ensures that your skills and experiences are highlighted in a clear, professional, and impactful way.

By following the strategies in this guide—from formatting tips to writing a compelling summary and crafting a matching cover letter—you can create an application that stands out in a crowded job market. Whether you’re a new graduate or an experienced teacher, remember: simplicity, clarity, and relevance are the keys to a resume that gets results.

With the right resume, you won’t just apply for jobs—you’ll open doors to classrooms where you can truly make a difference.

Professional resume template for engineers

0

Last Updated on November 7, 2026

Professional resume template for engineersLanding an engineering job today requires more than just technical expertise—it requires presenting your skills, education, and experience in a way that recruiters and Applicant Tracking Systems (ATS) can quickly understand. A professional resume template for engineers gives you the structure to showcase your qualifications while ensuring your application stands out in a crowded job market.

Recruiters often receive dozens or even hundreds of resumes for a single engineering role. That means you have only a few seconds to capture their attention. A disorganized or poorly formatted resume may never even make it past automated systems. This is why using a well-structured engineering resume template is not optional—it’s essential.

Unlike generic resumes, an engineering resume must combine technical details with professional achievements. Employers want to see proof of your problem-solving skills, project contributions, and ability to deliver results. A professional resume template for engineers ensures these details are highlighted effectively, improving your chances of landing interviews.

Engineering Resume Example

To better understand how a professional engineering resume should look, here’s an example of a simple yet effective structure:

John Doe – Mechanical Engineer
Email: johndoe@email.com | Phone: +1-234-567-890 | LinkedIn: linkedin.com/in/johndoe

Professional Summary
Results-driven mechanical engineer with 5+ years of experience in product design, CAD modeling, and manufacturing optimization. Adept at reducing costs and improving performance through innovative engineering solutions. Certified in SolidWorks and Six Sigma.

Experience
Mechanical Engineer – ABC Manufacturing
Jan 2020 – Present

  • Designed and optimized HVAC components, achieving 12% energy efficiency improvement.

  • Collaborated with cross-functional teams to enhance product lifecycle management.

Junior Engineer – XYZ Technologies
Jun 2016 – Dec 2019

  • Assisted in CAD modeling and product testing.

  • Implemented quality control measures that reduced errors by 8%.

Education
Bachelor of Science in Mechanical Engineering – MIT, 2016

Skills
CAD Modeling, SolidWorks, AutoCAD, Lean Manufacturing, MATLAB, Communication, Team Collaboration

Certifications
Certified SolidWorks Professional (CSWP), Six Sigma Green Belt

This example demonstrates the balance between technical knowledge and professional results. Notice how it avoids unnecessary design elements but focuses on clarity, measurable achievements, and relevant keywords. When building your own, a professional resume template for engineers ensures you can structure these sections seamlessly without missing key details.

How to Build Your Engineering Resume (Step-By-Step)

Crafting a compelling engineering resume requires more than filling in basic details. Employers want resumes that are clear, relevant, and structured in a way that communicates both technical ability and practical achievements. By following these steps, you can confidently use a professional resume template for engineers to build a resume that captures attention and passes ATS filters.

#1. Pick the Right Format for Your Engineering Resume

The very first step is selecting the right resume format. Your format sets the tone and determines how easily a recruiter can scan through your information.

  • Reverse-Chronological Format
    This is the most widely used format and is strongly recommended for engineers. It lists your most recent work experience first and moves backward. This format is ideal if you have consistent work experience and want to show career growth.

  • Functional (Skills-Based) Format
    This format focuses more on skills rather than work history. It is best suited for fresh graduates, career changers, or those with employment gaps.

  • Combination (Hybrid) Format
    This is a mix of both, highlighting key skills while also showing work experience in detail. It works well for mid-level professionals who want to emphasize both technical expertise and career progression.

???? Among these, the reverse-chronological format works best for most engineers. Employers in technical industries often value career progression and want to see your most recent projects first.

Use Our Tried & Tested Template

To save time, start with a professional resume template for engineers that is clean, ATS-friendly, and easy to customize. A good template avoids flashy graphics, unnecessary colors, or complicated layouts that confuse Applicant Tracking Systems. Instead, it focuses on simplicity, readability, and professional presentation.

A reliable template typically includes:

  • A header section with your contact details.

  • A professional summary or objective.

  • A clear work experience section with bullet-pointed achievements.

  • Education, certifications, and skills sections.

Using a pre-designed engineering resume template saves time while ensuring that all essential details are properly structured.

#2. Add Contact Information

Your contact details are small but critical. If presented incorrectly, recruiters might have difficulty reaching you. Always use professional and updated information.

Your contact section should include:

  • Full Name – Write your legal name, not nicknames.

  • Phone Number – Make sure it’s an active number recruiters can easily reach.

  • Email Address – Always use a professional email (firstname.lastname@gmail.com), not casual usernames.

  • LinkedIn Profile – Engineering recruiters often check LinkedIn for additional details.

  • Portfolio or GitHub Link – If you’re in fields like software, mechanical design, or civil engineering, showcasing projects or designs can strengthen your resume.

Example Contact Section

Jane Smith – Electrical Engineer
Email: janesmith@email.com | Phone: +1-234-567-890
LinkedIn: linkedin.com/in/janesmith | Portfolio: janesmithengineering.com

???? A professional resume template for engineers ensures this section is always placed at the top in a clean, easy-to-read style. It doesn’t need graphics or icons—just clarity.

Resume Summary, Experience & Education

#3. Write an Engineering Resume Summary or Objective

The top of your resume is prime real estate. It’s the very first thing a recruiter reads, so it must immediately communicate value. A professional resume template for engineers always includes space for either a resume summary or a resume objective.

  • Resume Summary – Best for experienced engineers. It highlights years of experience, specialized skills, and major achievements.

  • Resume Objective – Best for fresh graduates or career changers. It emphasizes career goals and eagerness to contribute.

Example Resume Summary (Experienced Engineer):
“Dedicated civil engineer with 8 years of experience in structural design, project management, and sustainable construction. Proven ability to deliver multimillion-dollar projects under budget while maintaining safety and quality standards.”

Example Resume Objective (Graduate Engineer):
“Motivated mechanical engineering graduate with hands-on project experience in CAD design and prototyping. Eager to contribute problem-solving skills and creativity to an innovative engineering team.”

???? Tip: Keep this section short—3 to 5 lines maximum. Your template should format it neatly so it stands out without taking too much space.

#4. Make Your Engineering Work Experience Stand Out

Your work experience is the heart of your engineering resume. Employers want to see how you applied your technical knowledge to solve real-world problems. A professional resume template for engineers organizes this section clearly, usually in reverse-chronological order.

When describing past jobs, focus on achievements, not just responsibilities. Use numbers, metrics, and results.

Weak Example:
“Responsible for managing project timelines.”

Strong Example:
“Managed civil engineering projects worth $5M+, completing them 10% ahead of schedule while reducing material costs by 8%.”

Every bullet point should answer: What did I achieve? How did my work impact the project, team, or company?

What if You Don’t Have Work Experience?

Not all engineers have long careers behind them. If you’re a student or recent graduate, you can still build a strong resume. Instead of professional jobs, highlight:

  • Internships and apprenticeships.

  • Academic projects and lab work.

  • Competitions, design challenges, or hackathons.

  • Volunteer work related to engineering (community construction projects, technical clubs, etc.).

Employers value practical knowledge, even if it wasn’t gained in a paid role. The right template ensures your projects and internships are showcased professionally.

#5. List Your Education the Right Way

Education plays a vital role in engineering resumes. Recruiters want to know where you studied, what you specialized in, and if you have advanced degrees or honors.

A professional resume template for engineers includes a dedicated education section that typically goes right after work experience (or at the top if you’re a recent graduate).

What to Include:

  • Degree type (B.Sc., M.Sc., Ph.D.)

  • Major (e.g., Civil Engineering, Electrical Engineering)

  • Institution and location

  • Graduation year (omit if it was over 15 years ago and you’re experienced)

  • Honors, awards, or thesis titles (if highly relevant)

Example:
Bachelor of Science in Mechanical Engineering
Massachusetts Institute of Technology (MIT), 2018
Dean’s List, Senior Design Project: “Energy-Efficient Automotive Systems”

???? Tip: If you hold multiple degrees or certifications, always list the highest level first. A clean resume template ensures this section is formatted consistently and doesn’t get lost between experience and skills.

Skills, Certifications & Resume Sections

#6. List Your Engineering Skills

One of the most important sections of any engineering resume is the skills section. Recruiters and ATS software often scan this part to quickly assess whether you meet the job requirements. A professional resume template for engineers ensures your skills are highlighted in a dedicated section, making them impossible to miss.

When listing skills, focus on a balance between hard technical skills and soft interpersonal skills. Employers want professionals who not only understand complex engineering concepts but can also collaborate, lead, and communicate effectively.

30 Engineering Skills to Put on Your Resume

Depending on your engineering field (civil, mechanical, electrical, software, chemical, etc.), you should tailor your skills. Below is a wide selection of skills commonly used in engineering resumes:

15 Soft Engineering Skills

Soft skills matter just as much as technical knowledge. An engineer who can communicate, lead, and adapt is far more valuable than one who only codes or designs. Include skills such as:

  1. Problem-Solving

  2. Critical Thinking

  3. Communication

  4. Collaboration

  5. Time Management

  6. Creativity

  7. Leadership

  8. Adaptability

  9. Decision-Making

  10. Negotiation

  11. Teamwork

  12. Analytical Thinking

  13. Presentation Skills

  14. Conflict Resolution

  15. Attention to Detail

15 Hard Engineering Skills

Hard skills showcase your technical expertise. These skills often vary by specialization but generally include:

  1. CAD Design (AutoCAD, SolidWorks)

  2. Electrical Testing & Troubleshooting

  3. Programming (Python, C++)

  4. Structural Analysis Tools

  5. Product Lifecycle Management (PLM)

  6. Finite Element Modeling

  7. Statistical Process Control (SPC)

  8. HVAC Design Software

  9. CAM Programming

  10. Robotics Engineering

  11. Hydraulics & Pneumatics

  12. Simulation Tools (ANSYS, COMSOL)

  13. Machine Learning for Engineering Data

  14. Control Systems Engineering

  15. Safety & Compliance Standards

By dividing skills into soft and hard categories, your resume becomes more readable and targeted.

#7. Add Your Engineering Certifications & Licenses

Certifications and licenses set you apart from other candidates. They prove credibility and demonstrate that you’ve achieved recognized professional standards.

Some popular certifications and licenses engineers can include:

  • PE (Professional Engineer) License

  • Certified SolidWorks Professional (CSWP)

  • Six Sigma Certification (Green Belt, Black Belt)

  • LEED Certification (Leadership in Energy and Environmental Design)

  • Certified Engineering Technician (CET)

  • AutoDesk Certified Professional

  • OSHA Safety Certification

???? A professional resume template for engineers places certifications in their own section so they don’t get buried under skills or education.

#8. Make Use of Additional Resume Sections

Beyond the standard sections (summary, experience, education, and skills), you can strengthen your resume with additional sections. These can include:

  • Projects: Showcase major engineering projects, designs, or systems you’ve worked on.

  • Awards: Highlight recognition from employers, universities, or engineering organizations.

  • Publications/Research: For engineers in academia or R&D, list journal publications or conference papers.

  • Languages: Bilingual or multilingual engineers are highly valuable in global companies.

  • Professional Affiliations: Membership in organizations like ASME, IEEE, or NSPE adds credibility.

Using a professional resume template for engineers ensures all these sections are neatly structured and easy for recruiters to find.

Cover Letter & Key Takeaways

#9. Attach a Cover Letter to Your Engineering Resume

Even though many job seekers skip it, a cover letter can significantly increase your chances of landing an interview. Recruiters use it to understand your personality, communication style, and motivation for applying.

When paired with a professional resume template for engineers, a strong cover letter makes your application complete and more compelling.

Why a Cover Letter Matters

  • It allows you to explain your story beyond bullet points.

  • You can highlight why you’re a good fit for the specific company.

  • It demonstrates initiative and effort, qualities every employer values.

How to Write an Engineering Cover Letter

  1. Header Section – Include your name, contact info, and the employer’s details.

  2. Introduction – Mention the job title you’re applying for and give a strong opening line.

  3. Body Paragraphs – Explain your relevant achievements, engineering skills, and career highlights.

  4. Closing Paragraph – Express enthusiasm, thank the reader, and include a call-to-action (request for interview).

Example Opening Line:
“As a licensed civil engineer with 6 years of experience designing sustainable infrastructure, I am excited to apply for the Project Engineer role at ABC Construction.”

???? Pro tip: Always customize your cover letter for each job. Avoid generic copy-paste versions.

Key Takeaways

Creating a resume may feel overwhelming, but with the right structure, it becomes much simpler. Using a professional resume template for engineers helps you focus on content instead of formatting, ensuring your resume stands out for the right reasons.

Here are the main takeaways from this guide:

  • Choose the reverse-chronological format if you have work experience; opt for functional or hybrid formats if you’re a student or career switcher.

  • Start with clear contact information and a compelling summary or objective.

  • Showcase work experience with achievements and numbers, not just responsibilities.

  • Highlight education properly, especially if you’re a fresh graduate.

  • Add both hard and soft engineering skills, tailoring them to the job description.

  • Include certifications, licenses, and additional sections (projects, publications, awards) to boost credibility.

  • Always write a personalized cover letter to demonstrate genuine interest.

A well-crafted engineering resume is not about flashy design—it’s about clarity, relevance, and professionalism. By following these steps and using a proven template, you increase your chances of catching a recruiter’s eye and moving forward in the hiring process.

Conclusion

Engineering is a field that demands precision, problem-solving, and the ability to deliver results. Your resume should reflect those same qualities. By using a professional resume template for engineers, you’re not just creating a document—you’re building a structured representation of your career, skills, and achievements.

A well-designed engineering resume template ensures that every section—summary, experience, education, skills, certifications, and even additional details—is presented clearly and professionally. It saves you time, reduces errors, and maximizes your chances of passing Applicant Tracking Systems while impressing recruiters.

Remember, your resume is often the first impression you make on an employer. A sloppy or disorganized resume suggests carelessness, while a professional one demonstrates attention to detail and commitment—qualities every engineering employer values.

Whether you’re a fresh graduate preparing for your first job, a mid-level engineer aiming for a promotion, or a seasoned professional targeting senior leadership roles, the right template can make all the difference. Combine it with a tailored cover letter, highlight measurable results, and continuously update your resume as your career progresses.

In short, success in today’s job market doesn’t just depend on your technical expertise; it also depends on how effectively you communicate it. A professional resume template for engineers is the bridge between your skills and the opportunities you deserve.

Receipt Scanning Apps that Pay

0

Last Updated on November 7, 2026

In today’s digital-first world, money-making opportunities often hide in the most unexpected places—like your purse, wallet, or shopping bag. Believe it or not, your crumpled store receipts can now earn you actual money, thanks to receipt scanning apps that pay.

Gone are the days when receipts were simply proof of purchase. With the rise of big data and market analytics, brands are more eager than ever to understand consumer behavior. That’s where you come in. Receipt scanning apps reward everyday users for uploading photos of their shopping receipts, transforming them into valuable data insights for companies—and cash rewards for you.

These apps pay in various ways: some offer points redeemable for gift cards, while others provide direct cashback via PayPal, Venmo, or even bank transfer. From grocery store receipts to gas station slips, and even online order confirmations, there’s real earning potential in the paper trail you leave behind.

Why Are These Apps Popular?

  • Zero investment: You don’t have to buy anything extra—just keep doing your usual shopping.
  • Passive income: Snap a quick photo, and you’re done. Earnings accumulate with minimal effort.
  • Accessible to all: Whether you’re a college student, stay-at-home parent, or side hustle enthusiast, these apps are easy to use and free to download.
  • Stackable with coupons or cashback cards: Maximize savings by combining multiple rewards strategies.

Who Is This Guide For?

  • Anyone looking for easy ways to earn money from home
  • Women managing household expenses and searching for creative budget solutions
  • Tech-savvy shoppers who want to turn shopping habits into rewards
  • Curious individuals exploring new passive income options in 2025

This guide dives deep into the best receipt scanning apps that actually pay, how they work, how to get the most from them, and whether they’re really worth your time.

Get ready to turn your receipts into rewards—one scan at a time.

How Receipt Scanning Apps Work

At first glance, the concept of earning money by snapping photos of your receipts might seem like magic. But the process behind receipt scanning apps that pay is actually simple, smart, and rooted in consumer data collection. Let’s break down how these apps work and why they’re willing to reward you for something you already do—shop.How Receipt Scanning Apps Work

The Basic Process: Scan, Upload, Get Paid

Here’s how the majority of receipt apps operate:

  1. Make a Purchase: You shop at your favorite grocery store, restaurant, gas station, or retailer—just like you normally would.
  2. Open the App: Launch the receipt scanning app on your phone (most are available on both Android and iOS).
  3. Take a Picture of the Receipt: Using the app’s built-in camera, snap a clear photo of your receipt. Some apps also allow digital/e-receipts via email forwarding.
  4. Receipt Verification: The app reads your receipt using Optical Character Recognition (OCR) technology and verifies eligible purchases.
  5. Earn Points or Cashback: Once verified, you receive rewards—usually in the form of points or cashback—that can be redeemed for gift cards or cash via PayPal, Venmo, or direct deposit.

That’s it. The entire process often takes less than a minute, and most apps will notify you once your receipt has been approved and your balance updated.

Why Do Companies Pay You for Receipts?

You might be wondering—what’s in it for them?

Receipt scanning apps partner with brands and research firms that are eager to understand consumer behavior. By analyzing anonymous shopping data, they gain insights into:

  • Buying trends (e.g., what products are selling)
  • Brand loyalty (e.g., are people switching from Coke to Pepsi?)
  • Pricing effectiveness (e.g., does a sale increase sales volume?)
  • Regional preferences (e.g., what snacks are most popular in the South?)

This real-time, crowd-sourced data helps companies make smarter decisions, develop better marketing strategies, and stay competitive.

The value of your receipt isn’t in your personal information—it’s in your purchase data.

Types of Receipts Accepted

Most apps accept a wide range of receipts, including:

  • Grocery store receipts (Walmart, Kroger, Aldi, etc.)
  • Restaurant and fast food receipts (McDonald’s, Starbucks, local diners)
  • Gas station receipts (Shell, Chevron, BP)
  • Pharmacy and health store receipts (CVS, Walgreens)
  • Online shopping invoices (Amazon, Target.com, etc.)

Each app has its own set of rules. Some only accept grocery receipts, while others accept almost anything, even small-dollar items.

What Makes a Receipt Eligible?

To ensure your receipt is accepted, it should:

  • Be clear and not crumpled or torn
  • Show the store name, date, and items purchased
  • Be submitted within the app’s time limit (usually 7–14 days old)

Some apps may offer bonus rewards for specific product brands or store locations, so be sure to review any special promotions inside the app before shopping.

Do You Need to Buy Special Products?

Not necessarily. While some apps give bonus points for featured items, many reward you for any purchase. This flexibility makes it easy to earn even if you’re not shopping for brand-specific deals.

However, if you want to maximize your earnings, check the app for current offers before heading to the store.

What About E-Receipts?

Some apps allow you to connect your email or Amazon account to automatically pull digital receipts. This is especially handy for online shoppers who want rewards without scanning a physical slip.

Popular apps like Ibotta, Fetch, and Rakuten support email receipt integration—saving you even more time.

Top Receipt Scanning Apps That Actually Pay in 2025

With hundreds of apps claiming to offer rewards for receipts, it can be difficult to know which ones actually deliver. Below, we’ve compiled a list of the top-rated receipt scanning apps that truly pay. These have earned strong reputations for ease of use, timely payouts, and user satisfaction—making them ideal picks for 2025.Top Receipt Scanning Apps That Actually Pay in 2025

1. Fetch Rewards

  • Best For: Quick and easy rewards for any receipt
  • How It Works: Just snap a photo of any retail receipt and earn points—no need to select offers beforehand.
  • Payout Options: Gift cards to Amazon, Target, Visa, Starbucks, and more
  • Bonus Tip: Enter a referral code when signing up to get bonus points instantly.

Why It Stands Out:
Fetch is arguably the most user-friendly app on the market. Unlike some apps that require you to activate offers or buy specific brands, Fetch rewards nearly every purchase. Plus, its sleek interface and fast point processing make it a favorite among beginners and veterans alike.

2. Ibotta

  • Best For: Grocery store cashback and brand-specific offers
  • How It Works: Before shopping, activate cashback offers on the app. Then scan your receipt or link your store loyalty card.
  • Payout Options: PayPal, gift cards, or bank deposit
  • Bonus Tip: Use the browser extension for online purchases.

Why It Stands Out:
Ibotta provides higher cashback amounts than most apps, especially for grocery items and name brands. It also partners with more than 500,000 retailers, including Walmart, Target, and Walgreens. If you’re willing to do a little pre-shopping planning, Ibotta can seriously boost your cashback.

3. Receipt Hog

  • Best For: Earning coins for receipts from a variety of stores
  • How It Works: Upload a receipt and earn coins based on the store type and amount spent.
  • Payout Options: PayPal, Amazon gift cards
  • Bonus Tip: Use the app daily for extra bonuses and sweepstakes entries.

Why It Stands Out:
Receipt Hog gamifies the experience. Alongside earning coins, you can enter prize draws, take surveys, and unlock slots for bonus points. It accepts a wide variety of receipts, including non-grocery ones like gas stations and restaurants.

4. Shopkick

  • Best For: Earning rewards without always making a purchase
  • How It Works: Earn “kicks” (points) by scanning barcodes in-store, watching videos, or submitting receipts.
  • Payout Options: Gift cards to retailers like Walmart, Best Buy, Sephora
  • Bonus Tip: You can earn kicks just for walking into participating stores!

Why It Stands Out:
Shopkick rewards users even before they buy anything. If you enjoy browsing or window shopping, you can earn points simply by entering stores or scanning barcodes on shelves—no receipt necessary.

5. CoinOut

  • Best For: Simplicity and direct cash rewards
  • How It Works: Upload almost any receipt to instantly earn cash. No need to activate offers.
  • Payout Options: PayPal, bank transfer, Amazon gift card
  • Bonus Tip: Enable automatic receipt forwarding for online purchases.

Why It Stands Out:
CoinOut gained national attention after appearing on Shark Tank. It doesn’t require product-specific purchases, and it accepts a wide range of receipts. Its cash rewards may be small per receipt, but they add up over time—and you get paid in real money.

6. InboxDollars

  • Best For: Multipurpose earners—survey takers, receipt scanners, and deal hunters
  • How It Works: Upload grocery receipts and also earn from surveys, watching videos, and reading emails.
  • Payout Options: Check, PayPal, or eGift cards
  • Bonus Tip: Combine activities for faster cashout.

Why It Stands Out:
InboxDollars isn’t just a receipt app—it’s a full-scale rewards platform. The combination of earnings sources means users can reach payout thresholds more quickly. It’s ideal for anyone looking to earn extra cash in multiple ways.

7. Rakuten (Formerly Ebates)

  • Best For: Online shopping cashback and e-receipts
  • How It Works: Shop through Rakuten’s portal or browser extension to earn cashback.
  • Payout Options: Check or PayPal, issued quarterly
  • Bonus Tip: Activate double cashback deals during holidays or special events.

Why It Stands Out:
Rakuten is unmatched for online shoppers. It automatically tracks purchases and pays out cashback for thousands of partner stores. Combine it with a receipt app like Ibotta or Fetch for double the rewards.

Comparison at a Glance

App NameAccepted ReceiptsPayout TypeUnique Benefit
Fetch RewardsAny retail receiptGift cardsNo brand restrictions
IbottaGroceries, retailPayPal, gift cardsHigh-value cashback offers
Receipt HogWide varietyPayPal, AmazonSurveys + sweepstakes
ShopkickBarcodes, receiptsGift cardsEarn without purchases
CoinOutAny receiptPayPal, bankNo offer activation needed
InboxDollarsGrocery, onlineCheck, PayPalMulti-tasking reward options
RakutenOnline receiptsPayPal, checkBig cashback on online shopping

How Many Apps Can You Use?

There’s no rule that says you can only use one. In fact, savvy users often scan the same receipt into 2–3 different apps to maximize returns. Just make sure to scan receipts within the valid timeframe (usually within 7–14 days).

How to Maximize Your Earnings Using Receipt Scanning Apps

While receipt scanning apps are easy to use, earning a few extra dollars a month can feel slow unless you apply smart strategies. If you’re serious about turning your shopping habits into a consistent reward stream, you need more than just casual uploads—you need a plan.

Below are tried-and-true tips to help you get the most out of receipt scanning apps that pay.

1. Stack Multiple Apps for the Same Receipt

Yes, you read that right—you can scan one single receipt into several apps. For example, a receipt from Walmart could be scanned into:

  • Fetch Rewards
  • CoinOut
  • Receipt Hog
  • Ibotta (if qualifying products are included)

Why it works:
Each app processes data differently and rewards you for different aspects of the receipt. By stacking apps, you’re multiplying your earnings with no extra effort.

2. Scan Quickly—Don’t Wait Too Long

Most apps have a receipt submission window. Typically, it’s within 7 to 14 days of the purchase date. Older receipts will be rejected, which means money left on the table.

Pro tip:
Make it a daily habit. Set a reminder to scan all receipts at the end of the day, or do it immediately after leaving the store.

3. Take Advantage of Digital and Email Receipts

Many apps support digital receipts from online retailers. For example:

  • Rakuten and Ibotta offer browser extensions or linked accounts to automatically track purchases.
  • Fetch lets you connect your email or Amazon account to scan digital receipts.

Why it matters:
Online shopping is booming, and e-receipts are just as valuable as paper ones—don’t miss out on earnings just because you bought from your phone.

4. Watch for Bonus Offers and Challenges

Apps like Ibotta and Fetch run frequent promotions:

  • Spend X amount at a certain store to earn a bonus
  • Buy specific brands for high-value rewards
  • Daily spin-to-win or scratch cards (e.g., Receipt Hog)

Why it matters:
These time-sensitive promotions can boost your earnings significantly. Some users report earning double or triple their usual points during bonus events.

5. Refer Friends for Passive Earnings

Most receipt apps offer referral programs:

  • Share your referral code
  • Your friend signs up and scans a receipt
  • You both get bonus points or cash

Example:
Fetch Rewards often gives 2,000 to 4,000 bonus points per successful referral—that’s equivalent to a $2–$4 jump in earnings.

Tip: Share your link in Facebook groups, on TikTok, or via WhatsApp to grow your earnings passively.

6. Plan Your Shopping Around App Offers

Apps like Ibotta and Shopkick allow you to check offers before you shop. This lets you:

  • Choose the right brands
  • Shop at bonus-offering retailers
  • Combine offers for maximum return

Example:
You might find a $1.00 cashback offer on a specific cereal at Target. Combine that with a manufacturer coupon and earn from the receipt app—it’s a triple savings strategy.

7. Don’t Ignore Small or Unusual Receipts

It’s tempting to skip receipts under $5 or from obscure places like gas stations or car washes—but don’t!

Apps like CoinOut and Receipt Hog accept nearly any receipt, regardless of total. Even receipts from:

  • Dollar stores
  • Fast food joints
  • Local grocers

Small points add up over time—consistency is the real key.

8. Stay Organized With a Receipt System

If you frequently forget to scan, try this:

  • Keep a “Scan Me” envelope or pouch in your bag
  • Set weekly reminders on your phone
  • Dedicate 5 minutes every Sunday to scan your week’s receipts

You’ll avoid losing receipts and maximize your returns without stress.

9. Track Your Monthly Earnings

Use a spreadsheet or note-taking app to monitor:

  • Which apps paid you what amount
  • How many receipts you submitted
  • Referral bonuses earned

Why it helps:
Seeing your cumulative progress keeps you motivated and helps you focus on the best-performing apps.

10. Combine with Other Savings Tools

To truly maximize your savings and earnings, combine receipt apps with:

  • Cashback credit cards
  • Coupon apps (like Honey or RetailMeNot)
  • Grocery loyalty programs
  • Banking apps with cashback

Layering these strategies can stretch your dollar much further and even turn shopping into a semi-profitable habit.

Realistic Monthly Earnings Breakdown

Type of UserMonthly ScansMonthly Earnings
Casual Shopper10–15 receipts$5–$10
Moderate User30–50 receipts$15–$30
Power User (stacked)60+ receipts$40–$80+

Keep in mind, users who refer others or participate in frequent challenges can even exceed these numbers.

Who Should Use Receipt Scanning Apps?

Receipt scanning apps aren’t for everyone—but they can be a game-changer for the right people. Whether you’re a deal-hunting parent or a busy student looking for side cash, there’s real value in these apps for a wide range of users. In this section, we break down who benefits the most from using receipt scanning apps that pay, and how they can fit into different lifestyles.

1. Busy Moms and Dads

Parents often spend regularly on groceries, baby items, clothes, school supplies, and household essentials. If you’re already juggling a tight budget, earning passive rewards from everyday shopping can be a simple way to stretch your dollars.

Why it helps:

  • Turn essential expenses into cashback
  • Earn gift cards for birthdays, holidays, or treats
  • Use rewards to lower grocery costs over time

Example:
A mom who scans 15–20 receipts a month with Fetch, Ibotta, and Receipt Hog could earn $30–$50/month in combined rewards.

2. College Students and Young Adults

Students on a tight budget can use receipt apps to offset costs of eating out, school supplies, and gas. With minimal effort, scanning receipts becomes a low-barrier way to earn.

Why it helps:

  • Requires no upfront investment or time commitment
  • Great for campus convenience store or fast food receipts
  • Combine with survey apps like InboxDollars for extra cash

Bonus tip:
Many apps offer sign-up bonuses and referral cash—perfect for students sharing with roommates and friends.

3. Couponers and Budget-Conscious Shoppers

If you already coupon or plan your shopping around deals, then receipt scanning is a natural extension of your routine. It allows you to stack savings and rewards for maximum financial benefit.

Why it helps:

  • Double-dip on deals and cashback
  • Use receipt rewards to pay for your next coupon haul
  • Stay organized and track savings habits

Example:
Using Ibotta to activate offers, scanning receipts into Fetch, and using a cashback card can result in $5+ savings per trip.

4. Side Hustlers and Passive Income Seekers

Looking to add another stream of micro-income? Receipt scanning is a fantastic no-risk way to pad your earnings. Combined with survey sites, cashback platforms, or affiliate programs, it builds passive earning momentum.

Why it helps:

  • Requires little effort—just consistency
  • Easily integrated with other money-making methods
  • Works while you shop, dine, or fill gas

Perfect for:

  • Stay-at-home workers
  • Freelancers
  • Remote jobbers who already use online tools

5. Frequent Shoppers and Online Buyers

If you shop often at major retailers like Amazon, Walmart, or Target, you’re in a great position to earn consistently. Most receipt apps accept both physical and e-receipts, so even online purchases count.

Why it helps:

  • Seamlessly connects to email or Amazon accounts
  • Capture rewards from every order, in-store or online
  • Turn your shopping habit into value creation

Apps to use:

  • Rakuten for online cashback
  • Fetch for Amazon order e-receipts
  • Ibotta for online grocery pickups

6. Environmentally Conscious Individuals

You already recycle—why not reuse receipts digitally before discarding them? Receipt scanning adds an extra layer of sustainability to your shopping behavior.

Why it helps:

  • Reduces waste by giving receipts another purpose
  • Supports mindful spending and data-sharing practices
  • Encourages smarter shopping habits

It’s a small step with a surprisingly rewarding outcome—both financially and environmentally.

7. Retirees and Seniors with Fixed Incomes

Living on a fixed budget can be stressful. These apps provide a no-cost, no-risk way to earn rewards on essential purchases like medication, groceries, and gas.

Why it helps:

  • Adds a buffer to monthly expenses
  • Simple and user-friendly apps work on any smartphone
  • Provides a sense of participation in digital income trends

Many seniors also enjoy tracking their spending with these apps, which promote budgeting awareness.

Who Should Probably Skip These Apps?

  • Minimal shoppers: If you rarely shop or never keep receipts, the reward potential will be very limited.
  • Privacy-sensitive users: If you’re not comfortable sharing shopping data—even anonymously—these apps may not feel right.
  • Disorganized users: If you frequently lose receipts or forget to scan them, your earnings potential drops significantly.

Summary Table: Who Benefits Most

User TypeBenefits
Busy parentsEarn rewards from routine shopping
StudentsBudget-friendly income with no time stress
CouponersStack savings with existing shopping strategies
Side hustlersAdds passive income to a diverse money portfolio
Frequent shoppersMonetize every online or in-store purchase
Eco-conscious usersReuse receipts before recycling
RetireesBudget support without tech overwhelm

Are Receipt Scanning Apps Safe to Use?

Generally, yes. Most legitimate receipt apps follow strict data privacy policies and do not collect personally identifiable information (PII) from your receipts or device.

However, like with any app that interacts with your purchases or email, there are a few things to understand and precautions to take.

What Data Do These Apps Collect?

Most receipt scanning apps collect:

  • Store names and locations
  • Product names and prices
  • Purchase dates and payment methods (cash/credit)
  • Anonymized user behavior (shopping frequency, spending trends)

They do not typically collect:

  • Credit card numbers
  • Names or addresses from the receipt
  • Sensitive account details

This data is then used to analyze consumer trends, help brands improve products, and assist market researchers. It’s not shared with advertisers in a way that links back to you personally.

What About Email and Online Receipt Integration?

Some apps (like Rakuten, Ibotta, or Fetch) offer email scanning options where they can detect e-receipts. This may sound invasive, but the access is permission-based and limited to specific folders or domains (like Amazon or Walmart).

Still, if you’re privacy-conscious, you can opt out of email scanning features and stick to manual uploads instead.

How to Stay Safe While Using These Apps

To ensure your data and privacy remain protected, follow these best practices:

  1. Only download from official app stores (Google Play, Apple App Store)
  2. Check app reviews and ratings before installing
  3. Read the app’s privacy policy
  4. Avoid granting unnecessary permissions (like location, contacts)
  5. Don’t use apps that ask for login credentials to unrelated services
  6. Keep your apps updated to ensure security patches are in place

Trusted apps like Fetch, Ibotta, CoinOut, and Rakuten have been vetted by millions of users and industry experts. They also comply with privacy laws like GDPR and CCPA.

Pros and Cons of Receipt Scanning Apps

Here’s a final breakdown to help you weigh your options:

✅ Pros:

  • Free to use
  • Earn money from everyday shopping
  • Takes less than 60 seconds per receipt
  • No financial investment required
  • Stackable with coupons and cashback cards
  • Supports better budgeting and expense tracking
  • Passive income opportunity with referrals and bonuses

❌ Cons:

  • Low payouts per receipt
  • Some receipts may get rejected
  • Privacy concerns (though usually minor)
  • Occasional app bugs or delays
  • Takes time to build up rewards for payout

Final Verdict: Are Receipt Scanning Apps Worth It?

Yes, if you shop regularly and are willing to stay consistent.

Receipt scanning apps won’t make you rich—but they can make your money go further. Think of them as digital cashback tools that reward your spending habits, turning trash (receipts) into treasure (rewards).

You’ll typically earn:

  • $10–$30/month casually
  • $40–$80+/month with consistent scanning and app stacking

That’s up to $1,000 a year just for documenting purchases you’d make anyway.

For moms, students, side hustlers, and budgeters alike, these apps provide a low-effort way to supplement income and reduce financial pressure. Best of all, you’re in full control—no risks, no fees, just rewards.

Cashback Apps Moms Should Use

0

Last Updated on November 7, 2026

Cashback Apps Moms Should UseBeing a mom means wearing multiple hats—nurturer, budget manager, meal planner, teacher, and often, breadwinner too. In a world where prices are rising faster than paychecks, every cent counts. That’s where cashback apps moms love step in as quiet financial heroes.

Cashback apps moms rely on allow them to earn money back on everyday purchases, from groceries and diapers to gas and online shopping. They turn your regular spending into smart saving. Whether you’re managing a large household or budgeting as a new mom, cashback apps are an easy and effective way to stretch your money further.

Here’s why cashback apps moms everywhere are loving:

Effortless Savings

Cashback apps take the hard work out of saving. No need for paper coupons or remembering discount codes. Just shop like usual and earn money back automatically. Some apps even track purchases through linked loyalty cards or bank accounts.

Flexible for Every Lifestyle

Whether you’re a stay-at-home mom shopping in-store or a working mom doing late-night online shopping, there’s a cashback app to fit your lifestyle. Many apps work seamlessly on both Android and iOS, making them accessible to virtually everyone.

Works with Everyday Purchases

Cashback apps reward you for things you’re already buying—like groceries, baby wipes, coffee, or gas. You’re not spending extra to save money; you’re just being rewarded for smart shopping.

Boosts Household Budget

A few cents here and a couple of dollars there may not seem like much at first, but over time, these earnings add up. Many moms report saving hundreds annually just from uploading receipts or shopping through an app.

Safe and Simple to Use

Modern cashback apps use secure technology and have easy-to-use interfaces. Most don’t require complex setup or personal banking info—just a few taps and you’re good to go.

Top 10 Cashback Apps Moms Should Have on Their Phones

Now that we’ve seen how cashback apps moms use can make a big impact on household savings, let’s break down the top 10 most recommended apps.
Top 10 Cashback Apps Moms Should Have on Their Phones

These apps are not only reliable and user-friendly but also tailored for the everyday needs of modern moms—from groceries and gas to clothing and diapers.

1. Rakuten (formerly Ebates)

Rakuten is one of the most trusted cashback apps on the market. It partners with over 3,500 stores including Walmart, Macy’s, and Target. You simply shop through the app or browser extension, and Rakuten sends you a check or PayPal payment quarterly.Rakuten

  • ???? Cashback Rate: Up to 40%
  • ????️ Best For: Online shopping
  • ???? Bonus: $30 sign-up bonus after your first $30 purchase

2. Ibotta

A favorite among moms, Ibotta gives cashback on groceries, baby items, personal care, and more. You can either scan your receipt or link your loyalty cards to earn instantly after purchase.

  • ???? Cashback Rate: Varies by product
  • ???? Best For: Grocery and household shopping
  • ???? Bonus: Up to $20 in welcome bonuses for new users

3. Fetch Rewards

Fetch is incredibly simple—just scan your receipts (from any store!) and earn points. Redeem those points for gift cards to Amazon, Target, and other top retailers.

  • ???? Cashback Format: Points to gift cards
  • ???? Best For: Fast scanning and small purchases
  • ???? Bonus: Get bonus points for using a referral code

4. Dosh

Dosh offers automatic cashback when you link your credit or debit card. Shop or dine at participating retailers and the app does the rest—no receipt scanning required.

  • ???? Cashback Rate: 2% to 10%
  • ???? Best For: Passive cashback
  • ???? Bonus: $5 bonus for linking your card

5. Honey

Honey is more than just a coupon finder. Its “Honey Gold” rewards system allows you to earn points at hundreds of retailers, which you can convert into gift cards.

  • ???? Cashback Format: Points (Honey Gold)
  • ???? Best For: Online deals and discounts
  • ???? Bonus: Combines coupon savings and cashback

6. Shopkick

Earn “kicks” by walking into stores, scanning barcodes, or making purchases. Redeem your kicks for gift cards. It turns shopping into a mini scavenger hunt, which is fun for moms and kids alike.

  • ???? Earning Format: Kicks (points)
  • ????️ Best For: In-store rewards and engagement
  • ???? Bonus: Earn without making a purchase

7. Upside (formerly GetUpside)

Great for moms who drive a lot. You can get cashback on gas, groceries, and restaurants. Just claim an offer in the app, upload your receipt, and get paid.

  • ???? Cashback Rate: Up to 25¢ per gallon
  • ???? Best For: Gas and restaurant purchases
  • ???? Bonus: Referral bonuses add up quickly

8. Swagbucks

This all-in-one platform lets you earn Swagbucks (SBs) by shopping, watching videos, taking surveys, and uploading receipts. Redeem SBs for PayPal cash or gift cards.

  • ???? Cashback Format: Swagbucks points
  • ???? Best For: All-purpose earning
  • ???? Bonus: Daily earning opportunities beyond shopping

9. CouponCabin

CouponCabin combines high-percentage cashback with promo codes. It’s perfect for comparing rates and maximizing your return.

  • ???? Cashback Rate: Up to 15%
  • ???? Best For: Competitive cashback and coupon stacking
  • ???? Bonus: Weekly bonus offers and new member perks

10. Receipt Hog

Snap a photo of your receipt and earn coins that can be exchanged for cash or gift cards. Offers extra rewards like sweepstakes and surveys.

  • ???? Cashback Format: Coins
  • ???? Best For: Easy receipt scanning
  • ???? Bonus: Fun visuals and bonus games

How to Maximize Savings with Cashback Apps

Installing cashback apps moms prefer is just the beginning. To truly get the most value, you need to use them wisely and strategically. As a mom juggling countless tasks, your time is precious—so here’s how to make every second (and cent) count with these smart tips.

1. Stack Your Savings Strategically

One of the most powerful techniques to boost your savings is stacking—combining cashback apps with other discount tools like:

  • Store Coupons (Target Circle, Kroger coupons, etc.)
  • Loyalty Programs (CVS ExtraCare, Walgreens Balance Rewards)
  • Credit Card Rewards (like 1.5% cashback cards)
  • Promo Codes (found via Honey or RetailMeNot)

Example: Buy diapers at Target with a 5% store discount, use a cashback credit card, activate Ibotta offers, and scan the receipt in Fetch Rewards. You just saved on four levels!

2. Use Multiple Apps for the Same Receipt

Many apps don’t compete with each other—meaning you can scan the same grocery receipt in Fetch Rewards, Ibotta, Receipt Hog, and CoinOut. That’s multiple payouts from one purchase.

???? Pro Tip: Save your receipts for at least 7 days and batch-upload them when the kids are napping or during downtime.

3. Enable Notifications and Browser Extensions

Install browser extensions for Rakuten, Honey, and CouponCabin. These tools automatically alert you when cashback is available on a website. They also auto-apply coupon codes at checkout.

For mobile shoppers, enable push notifications so you never miss flash deals or bonus cashback offers.

4. Check Offers Before Shopping

Don’t wait until after you shop to look for cashback. Open your apps before buying anything, whether it’s groceries or online gifts. This simple habit ensures you never miss a reward opportunity.

✔️ Checklist Before Shopping:

  • Check Ibotta for current grocery deals
  • Check Rakuten or Honey for online retailers
  • Check Upside if you’re heading to the gas station
  • Check Shopkick for in-store offers

5. Refer and Earn with Friends

Many cashback apps offer generous referral bonuses when your friends join using your link. Some pay up to $10–$30 per friend. Plus, your friends get a welcome bonus too.

???? Example:

  • Fetch Rewards: Earn up to 4,000 points per referral
  • Ibotta: Often runs $10–$20 referral promos
  • Dosh: Earn $10 for each card-linked referral

Create a simple post or message for your mom group chat or parenting community and let them know how they can earn too.

6. Redeem Regularly and Track Progress

Don’t let your rewards sit idle. Many apps have a minimum redemption amount (e.g., $5 for PayPal or gift cards). Set a reminder every month to cash out your rewards.

???? Track Your Earnings Monthly
Consider creating a simple spreadsheet or using a note-taking app to track:

  • Total cashback earned
  • Gift cards redeemed
  • Bonuses from referrals
  • Most profitable apps

Seeing real progress will keep you motivated and help you find which apps are worth your time.

Real-Life Stories – How cashback apps moms are saving smartly every day

Sometimes, the best motivation comes from real moms just like you—busy, budget-conscious, and brilliant at finding smart ways to save. Here are a few inspiring stories from moms who’ve made cashback apps part of their daily routine and are reaping the benefits.

????‍???? Jessica – “The Grocery Budget Boss”

Jessica is a stay-at-home mom with three kids under the age of 10. With grocery prices rising fast, she felt the pressure of sticking to a tight budget.

Her Secret Weapons: Ibotta, Fetch Rewards, and Receipt Hog

“Every Sunday, I plan my meals and match Ibotta offers with items I’ll buy. After shopping, I scan my receipts into Fetch and Receipt Hog too. I save about $40–$50 a month. It may not sound huge, but over the year, that’s $600! That goes toward school clothes and birthday gifts.”

Key Lesson: Scanning just a few receipts each week can lead to hundreds in annual cashback—without changing your shopping habits.

????️ Monique – “The Online Deal Hunter”

Monique works full-time and has two kids. Between work and home responsibilities, she relies heavily on online shopping for clothes, household items, and gifts.

Her Favorite Apps: Rakuten, Honey, and CouponCabin

“I never shop online without checking Rakuten first. It’s literally free money. Over the holidays, I got $150 back from just buying gifts I would’ve purchased anyway. I use Honey’s extension too—it finds coupon codes while giving me cashback.”

Key Lesson: Moms who shop online regularly can earn big with browser extensions and cashback platforms.

???? Alisha – “The On-the-Go Saver”

Alisha is a single mom with a long daily commute. With rising fuel and lunch prices, she was determined to find ways to save on the go.

Her Go-To Apps: Upside and Dosh

“I used to dread filling up my tank. Now, I check the Upside app before every gas station stop and get money back each time. I also use Dosh for quick bites or coffee runs. I’ve made over $100 this year in cashback with almost no effort.”

Key Lesson: Cashback isn’t just for groceries—moms can earn while filling up or eating out.

???? Tanya – “The Gift Card Giver”

Tanya is a mom of four who loves surprising her kids with little rewards. But with a tight budget, buying extra toys or treats wasn’t always possible.

Her Favorite App: Fetch Rewards

“Every week, I scan receipts and let the points pile up. At the end of each month, I redeem them for Amazon gift cards and buy small gifts or craft supplies for the kids. It’s become a fun little ritual—and the kids look forward to it too.”

Key Lesson: Cashback points can be turned into meaningful experiences and joy for your family.

???? Priya – “The Family Finance Queen”

Priya is a budgeting expert and mom of two who treats cashback like a side hustle. She’s turned it into a family-wide challenge.

Her Toolbox: Ibotta, Rakuten, Swagbucks, Dosh, and Shopkick

“We made a fun family game out of it—who can earn the most rewards this week? My husband uses Rakuten at work, and my kids love helping me scan items in Shopkick. At the end of the year, we pooled the cashback and booked a weekend getaway. All from passive savings!”

Key Lesson: Get the whole family involved to make cashback fun and purposeful.

Benefits Beyond Money – Why cashback apps moms trust and love

Yes, cashback apps help moms save money—but the benefits go far beyond a growing PayPal balance or a stack of gift cards. For many moms, these apps offer emotional relief, increased confidence, and even valuable life lessons for their children.

Let’s dive into the hidden, powerful reasons why moms fall in love with cashback apps.

1. ????‍♀️ Financial Empowerment and Peace of Mind

Moms often carry the financial weight of the family on their shoulders, making every dollar count. Cashback apps give them a small but steady sense of control. Saving a few dollars here and there might not seem dramatic—but it adds up, and it feels empowering.

“It’s not just the money,” says one mom. “It’s knowing I’m making smart decisions for my family, even in small ways.”

When you’re managing a household budget, even small wins—like $10 cashback from groceries—can relieve stress and give you peace of mind at the end of the month.

2. ????‍????‍???? Teaching Kids About Smart Money Habits

Moms are their children’s first financial role models. Using cashback apps is a fun and practical way to show kids how to save, how to plan, and how rewards come from smart decisions.

Let your kids help:

  • Scan receipts with Fetch Rewards
  • Tap through the Swagbucks app
  • Compare product deals on Ibotta

It becomes a bonding moment, and over time, it teaches them valuable money lessons like budgeting, value comparison, and delayed gratification.

3. ???? Turning Small Savings Into Joyful Moments

Many moms use cashback rewards to:

  • Buy birthday gifts
  • Cover holiday shopping
  • Plan surprise outings or treats

One mom shared, “I used the Amazon gift cards I earned from Fetch and Ibotta to buy a toy my son really wanted. He never knew I didn’t spend a dime out of pocket. That felt amazing.”

Whether it’s a new book for yourself or a pizza night for the kids, these little moments of joy are made possible by the quiet power of cashback apps.

4. ⏱️ Minimal Time Investment, Maximum Return

Moms are some of the busiest people on the planet. Cashback apps respect that. Most apps take just a few taps per week. In many cases—like Dosh or Upside—you earn rewards without lifting a finger once the app is set up.

“I don’t have time for side hustles right now,” said one mom. “But I can scan a receipt in 5 seconds while my toddler naps.”

That’s what makes cashback apps special: no complicated learning curve, no extra expense, and no commitment of hours every week. Just smart, passive savings.

5. ???? Safe, Secure, and Stress-Free

Privacy and security are top concerns for moms using any digital tool. Fortunately, most major cashback apps are highly secure:

  • They don’t require full bank access
  • Sensitive data is encrypted
  • They operate under trusted brands like PayPal, Capital One, and Rakuten

Many apps also give users the option to redeem rewards without linking accounts—by choosing gift cards instead of direct transfers.

6. ????️ Motivation to Shop Smarter (Not More)

Cashback apps don’t encourage overspending—they reward smart, intentional shopping. Moms begin to plan their grocery trips with cashback in mind, compare prices, and choose value-first products.

Over time, this builds a mindset of mindfulness:

  • Am I getting the best deal?
  • Can I use my points for this?
  • Is there a bonus offer for this brand?

This habit leads to smarter decisions not just for cashback—but for overall household spending.

Recap: Why Moms Love Cashback Apps (Beyond the Obvious)

✅ Empowerment and confidence in budgeting
✅ Opportunities to teach kids about money
✅ Surprise joys through small rewards
✅ Quick and easy to use—ideal for busy lives
✅ Safe and secure, without needing risky financial info
✅ Creates lasting habits of smart shopping

Final Tips and Best Practices for Moms Using Cashback Apps

You’ve seen the power of cashback apps—from saving money on everyday purchases to creating joyful family moments. Now it’s time to wrap up with a simple roadmap for getting started and succeeding with these tools long term.

Whether you’re just downloading your first cashback app or looking to refine your strategy, these final tips will help you make the most of every dollar.

Quick-Start Checklist for Moms

Here’s a no-stress, step-by-step action plan to begin your cashback journey:

  1. Download 3 to 5 Trusted Apps
    Start with Ibotta, Rakuten, Fetch Rewards, Dosh, and Upside. They’re easy to use, highly rated, and offer rewards across a variety of categories.
  2. Link Your Loyalty Cards or Bank Cards
    Apps like Ibotta and Dosh allow you to link store accounts or debit/credit cards for seamless, automatic cashback. It saves you time and makes earning effortless.
  3. Scan All Receipts, Even Small Ones
    Don’t toss those grocery or gas receipts! Apps like Fetch and Receipt Hog accept almost any receipt—and they add up fast.
  4. Activate Offers Before Shopping
    Make it a habit to check for available offers before hitting the store or shopping online. You’ll avoid missing valuable opportunities.
  5. Cash Out Often
    Don’t let your rewards sit unused. Most apps allow redemptions starting at $3 to $5. Set a monthly reminder to transfer points into gift cards or PayPal cash.
  6. Refer Friends and Multiply Your Earnings
    Moms love to share what works. Use your referral links in Facebook mom groups, WhatsApp chats, or parenting forums to earn even more.

???? Advanced Tips to Boost Your Cashback Strategy

Want to become a true cashback pro? These advanced practices will supercharge your earnings:

  • Use Browser Extensions
    Tools from Rakuten, Honey, and CouponCabin help you never miss cashback when shopping online.
  • Compare Cashback Rates Before Buying
    Some apps offer different cashback percentages at the same store. Check multiple apps to find the best rate.
  • Set Cashback Goals
    Whether it’s saving for back-to-school supplies, holiday gifts, or a spa day for yourself—set a target. Seeing progress toward that goal adds motivation.
  • Bundle Deals with Other Rewards
    Combine cashback with credit card points, loyalty rewards, and manufacturer coupons. This stacking method can earn you triple rewards for a single purchase.
  • Use a Spreadsheet or Tracker App
    Keep a simple monthly tracker to see how much you’ve earned, spent, and redeemed. It’ll show you which apps give you the best return on your time.

???? Common Mistakes to Avoid

Even with the best intentions, a few missteps can reduce your earnings. Here’s what to watch for:

  • ❌ Forgetting to scan receipts before they expire (some apps have a 7–14 day limit)
  • ❌ Shopping without activating the cashback offer first
  • ❌ Ignoring referral bonuses or waiting too long to redeem rewards
  • ❌ Linking expired or unused cards
  • ❌ Giving up too early—remember, rewards grow over time!

Final Thoughts: Moms Deserve to Save More

Let’s be real—moms are superheroes. They balance budgets, wipe tears, cook meals, and manage households with grace and grit. Cashback apps are one small way for moms to reward themselves, reduce financial stress, and turn ordinary tasks into income-generating moments.

You don’t need to become a financial expert. You just need a few apps, a few minutes, and a consistent habit.

The best part? The savings from cashback apps moms use are real, the joy is real, and the empowerment that comes with it is 100% yours.

Micro Tasks to Earn Money During Nap Time: Smart Side Hustles for Women at Home

0

Last Updated on November 7, 2026

In the heart of every busy household lies a sacred moment of peace—nap time. For moms and women managing life from home, this brief pause in the day offers more than just a chance to catch their breath. It presents a powerful opportunity to earn money without disrupting the daily routine. With the rise of the gig economy and remote work culture, micro tasks have emerged as one of the most practical Side Hustles for Women looking to supplement their income while staying present at home.

But what exactly are micro tasks?
They’re small, manageable jobs that require minimal time and no long-term commitment. These tasks range from completing online surveys and tagging images to writing short reviews and testing apps. Most importantly, they can be completed in 10–30 minutes—making them ideal for the pockets of free time during a child’s nap.

The beauty of micro tasks lies in their flexibility. You don’t need to commit hours or have a professional workspace. You simply need a smartphone or computer, a stable internet connection, and the motivation to turn moments of quiet into cash.

Whether you’re looking to pay for weekly groceries, build up savings, or simply enjoy some guilt-free spending money, Side Hustles for Women like micro tasks offer an approachable, stress-free way to begin. Thousands of women have already tapped into this growing trend, proving that small tasks can lead to big results—especially when tackled consistently.

What Are Micro Tasks and Why Are They Perfect as Side Hustles for Women?

Being a mom often feels like juggling a dozen things at once—with one hand tied behind your back. Between caring for your children, managing the household, and possibly even homeschooling or freelancing, time becomes your most valuable resource. That’s where micro tasks shine. They fit into those tiny, precious pockets of time—especially during nap time—and allow you to turn minutes into money.

What Exactly Are Micro Tasks?

Micro tasks are short, simple jobs that can be completed in a few minutes. These tasks usually don’t require specialized skills or a long-term commitment. They can often be done from a mobile device or laptop and offer quick payouts or ongoing opportunities for earning.

Examples of micro tasks include:

  • Tagging photos for AI training
  • Filling out quick online surveys
  • Writing short reviews
  • Categorizing products or articles
  • Transcribing short audio clips
  • Testing apps or websites
  • Watching videos or ads

Each task may only pay a small amount (from a few cents to several dollars), but they add up quickly—especially when you complete them consistently during short breaks throughout the day.

Why Micro Tasks Are Ideal for Moms at Home

Let’s explore why these tiny jobs are actually a big deal and one of the best Side Hustles for Women managing home and family:

✅ 1. Work on Your Own Time

You don’t need to clock in at 9 or worry about deadlines. Micro tasks are available 24/7, and you can complete them when it’s most convenient—whether it’s during your child’s nap, bedtime, or a quiet morning moment.

✅ 2. No Need for Special Equipment

Most micro tasks require nothing more than a smartphone, tablet, or laptop. You don’t need editing software, a fancy desk setup, or technical gear.

✅ 3. Beginner-Friendly Opportunities

Many platforms welcome beginners and require no formal experience. Some may ask you to pass a simple qualification test, but most are open to anyone willing to put in the effort.

✅ 4. Low Mental Load

Unlike complex freelance projects, micro tasks are typically simple and repetitive. This is a huge benefit for moms who are already mentally and emotionally stretched. You can earn without needing to “think hard” or stay deeply focused for long periods.

✅ 5. Immediate Satisfaction

With micro tasking, you often get paid quickly—sometimes the same day. This can be incredibly motivating compared to waiting weeks for freelance payments or the unpredictable nature of building a business.

✅ 6. No Long-Term Commitment

Don’t want to work tomorrow? No problem. Micro tasks don’t require contracts or client relationships. You can take on tasks when you’re ready and walk away when you’re not.

Real-Life Example

Let’s say your toddler naps for 1.5 hours every afternoon. In that time, you log into a survey site and complete 4 surveys at $1.50 each. Then, you hop onto a task site like Clickworker or Appen and categorize 25 images at $0.10 each. That’s $6 (surveys) + $2.50 (image tagging) = $8.50 in under two hours. Over five nap-time workdays, that’s $42.50 a week—enough to cover diapers, groceries, or a date night treat.

And if you find a rhythm and optimize your time? That figure can double.

Top Platforms Offering Micro Tasks for Quick Earnings

So, you’re ready to dive in—but where do you find these micro tasks? Thankfully, several platforms cater to flexible, bite-sized work and are perfect for moms looking to earn during nap time. These websites and apps are beginner-friendly, legit, and pay in real money or gift cards.

Below is a curated list of top micro task platforms that work well for at-home women with limited time—perfect starting points for Side Hustles for Women.

✅ 1. Amazon Mechanical Turk (MTurk)

Best for: Surveys, data tagging, research tasks, and AI model training.

MTurk is one of the oldest and most reputable platforms. Here, companies post tasks (called HITs or Human Intelligence Tasks), and workers choose which ones to complete. The pay varies—some are just a few cents, others several dollars.

  • Pros: Large volume of tasks, flexible work.
  • Cons: Some tasks pay low; earnings can be slow at first.

???? Tip: Focus on “batch tasks” or surveys with high approval ratings to boost efficiency.

✅ 2. Clickworker

Best for: Text creation, categorization, web research, product data management.

Clickworker offers a wide range of micro tasks with varying pay rates. They also offer UHRS (a higher-paying platform you access through Clickworker).

  • Pros: Global availability, quick payouts via PayPal.
  • Cons: Some tasks require qualification tests.

???? Tip: Take their assessments early to unlock more earning opportunities.

✅ 3. Swagbucks

Best for: Surveys, watching videos, shopping cashback, playing games.

Swagbucks lets you earn SB points for simple tasks. These points convert into PayPal cash or gift cards.

  • Pros: Multiple earning options, low payout threshold.
  • Cons: Some offers are low-paying unless you’re strategic.

???? Tip: Focus on the daily “To-Do List” and high-value surveys to maximize earnings.

✅ 4. Appen

Best for: AI data training, transcription, search engine rating.

Appen offers both short-term micro tasks and long-term projects. Many jobs involve evaluating search results, categorizing content, or transcribing audio clips.

  • Pros: Higher pay than most platforms, flexible schedule.
  • Cons: Application process may take time.

???? Tip: Apply to multiple projects simultaneously to increase your chances of getting approved.

✅ 5. UserTesting

Best for: Testing websites and mobile apps, giving feedback.

Each test takes about 10–20 minutes and pays around $10. You’ll need a microphone and clear communication skills to record your feedback.

  • Pros: High pay per task.
  • Cons: Tests are limited and require approval based on your profile.

???? Tip: Fill out your demographic profile completely to receive more test invitations.

✅ 6. Microworkers

Best for: Simple social media tasks, signups, product testing.

Microworkers allows you to complete very quick jobs like liking posts, watching videos, or registering on websites.

  • Pros: Very low entry barrier, worldwide access.
  • Cons: Low pay per task, some tasks can be repetitive.

???? Tip: Focus on “TTV” (Tasks That Verify) campaigns for better payouts.

✅ 7. InboxDollars

Best for: Surveys, emails, video watching, games.

Similar to Swagbucks, InboxDollars pays you cash for tasks you already do online.

  • Pros: Real cash earnings (not just points), $5 sign-up bonus.
  • Cons: Survey disqualifications can be frequent.

???? Tip: Use the mobile app version to earn while you cook or do light house chores.

✅ 8. TaskRabbit (for physical micro tasks)

Best for: Local errands, organizing, minor repairs.

If you can occasionally leave home (or have someone to watch the kids), TaskRabbit connects you to local gigs like helping someone move, organizing closets, or assembling furniture.

  • Pros: Higher payouts; some jobs pay $20–$50/hour.
  • Cons: Not virtual; requires travel and availability.

???? Tip: Look for low-effort tasks you can complete quickly in your neighborhood.

Micro Task Ideas Tailored for Moms During Nap Time

When your little one finally drifts off to sleep, it’s your golden window—not just for rest, but for real earnings. With the right strategy, even 30 to 90 minutes of nap time can become a productive source of extra income. In this section, we’ll explore the best micro task ideas perfectly suited for short bursts of focus.

These tasks don’t require deep concentration, special tools, or long commitment—and they’re flexible enough to pause anytime your baby wakes.

✅ 1. Paid Online Surveys

Time Required: 5–15 minutes per survey
Earning Potential: $0.50 to $5+ per survey

Websites like Swagbucks, InboxDollars, and Toluna allow users to share opinions for rewards. While the pay isn’t high, the tasks are easy and require no prior experience.

???? Best For: New moms looking for effortless ways to ease into online earning.

✅ 2. Product Testing and Reviews

Time Required: 15–30 minutes
Earning Potential: Free products + $5 to $50 per review

Sites like Influenster and UserTesting send you products or apps to try. Your job? Use them and give honest feedback. Some companies even pay for detailed written reviews.

???? Pro Tip: Build a strong profile and leave consistent feedback to receive more opportunities.

✅ 3. Short Blog Posts or Ad Copywriting

Time Required: 30–60 minutes per piece
Earning Potential: $5 to $25 per article

If you have a knack for writing, platforms like iWriter or Textbroker are great places to start. You’ll write product descriptions, blog intros, or short ad scripts. Some moms use this as a stepping stone to freelance writing.

???? Best For: Moms with good grammar and creative flair.

✅ 4. Audio Transcription Snippets

Time Required: 5–30 minutes per clip
Earning Potential: $0.30 to $1 per audio minute

Websites like Rev, GoTranscript, and TranscribeMe offer short audio clips that need transcribing. Since most nap times are quiet, transcription is an ideal task during this time.

???? Pro Tip: Use headphones and a foot pedal (optional) for speed and accuracy.

✅ 5. Categorizing Images or Tagging Data

Time Required: 10–20 minutes
Earning Potential: $0.05–$0.50 per task

These simple jobs include labeling photos, tagging social media posts, or identifying objects in images. Offered on sites like Clickworker, Appen, and Spare5.

???? Why It Works: Tasks are repetitive, easy to do while multitasking, and require minimal thinking.

✅ 6. Mobile App Testing and Reviews

Time Required: 10–15 minutes per app
Earning Potential: $1 to $10 per review

Get paid to test new mobile apps and leave feedback. Websites like Testbirds and Apperwall specialize in this area.

???? Tip: Focus on new app releases—they usually pay more for first reviews.

✅ 7. Social Media Microtasks

Time Required: 5–20 minutes
Earning Potential: $0.25 to $5 per task

Help small businesses by scheduling posts, commenting on brand content, or reviewing their Instagram stories. Microworkers, Fiverr (gig-style), and even Facebook groups offer such tasks.

???? Perfect For: Moms already scrolling social media during nap time—why not monetize it?

✅ 8. Answering Quick Questions or Captchas

Time Required: 2–10 minutes
Earning Potential: $0.01–$0.10 per task

Websites like 2Captcha and Remotasks pay users to solve simple puzzles or validate AI-generated responses.

???? Low Stress: These tasks are simple and don’t require a lot of brainpower—ideal when you’re mentally drained.

✅ 9. Watching Videos or Ads

Time Required: Passive or background activity
Earning Potential: Up to $0.50 per hour

Platforms like InboxDollars or PrizeRebel allow you to earn small amounts just by watching videos. While it’s not a huge payout, it’s great for hands-free earning during light chores.

???? Smart Stack: Watch videos while folding laundry or prepping dinner for double productivity.

✅ 10. AI Training Tasks

Time Required: 15–60 minutes
Earning Potential: $2 to $10 per task

Help improve artificial intelligence by rating voice commands, evaluating chatbot responses, or reviewing content. Appen and Remotasks are key platforms here.

???? Why It Pays Better: These tasks contribute to major tech systems and often require attention to detail, so the pay is higher.

How Much Can You Really Earn?

Here’s a sample nap-time earning scenario (in a 60-minute window):

  • 2 short surveys = $3
  • 1 image categorization set = $2
  • 1 mobile app test = $5
  • 15-minute transcription = $3
  • Total: $13 per nap

Multiply that by 5 days a week, and you’ve got $65 a week—or about $260/month, all while your baby sleeps.

How to Maximize Productivity and Earnings in Short Time Blocks

When nap time hits, every minute counts. Whether you have 30 minutes or a luxurious 90, optimizing your workflow ensures you’re not just busy—but profitably productive. In this section, you’ll learn smart hacks and proven strategies to help you get the most out of every second during those golden, quiet hours of your Side Hustles for Women journey.

1. Create a Nap-Time Routine

Just like your baby has a sleep schedule, your earning efforts should follow a loose structure. A simple 3-step process helps:

  • Step 1: Log into your top 2–3 micro task platforms.
  • Step 2: Sort tasks by highest payout or easiest effort.
  • Step 3: Work in 25-minute focused blocks, followed by a 5-minute break.

This structure keeps your brain focused and prevents decision fatigue. When you sit down knowing exactly what to do, you’ll avoid wasting the first 15 minutes browsing.

2. Batch Similar Tasks Together

Switching between different types of tasks—surveys, transcription, tagging—causes micro-delays that lower your efficiency. Instead, group similar tasks during each nap session.

For example:

  • Monday = Survey Day
  • Tuesday = Product Reviews
  • Wednesday = Transcription Only

This rhythm allows you to build muscle memory and speed, boosting your output without increasing effort.

3. Track Your Earnings and Time

Use a simple spreadsheet or a free app like Toggl or Clockify to track how long you’re spending on each task and how much you’re earning per hour.

Why it matters: You may discover that one platform earns you $8/hr while another brings in $2/hr. With this insight, you can cut the low-performers and focus only on high-yield tasks.

PlatformTime SpentEarnings$/Hour
Clickworker1 hr$6$6/hr
Swagbucks45 mins$3$4/hr
Rev (Transcribe)1 hr$10$10/hr

???? Pro Tip: Set a minimum hourly goal (e.g., $8/hour) and only pursue tasks that help you reach it.

4. Use Browser Extensions and Productivity Tools

Here are a few helpful tools to automate and streamline your workflow:

  • Grammarly: Speeds up writing/editing tasks.
  • Rakuten/Honey: Earn cashback passively while shopping or testing products.
  • Task sorter extensions: Some platforms allow plugins to filter or prioritize high-paying jobs.

You can also bookmark the login pages of your favorite platforms for one-click access the moment nap time begins.

5. Eliminate Distractions

Even five seconds on social media can break your flow. Protect your productivity like it’s nap time gold.

Tips to stay distraction-free:

  • Silence your phone or put it in “Focus Mode.”
  • Work in a quiet, tidy space.
  • Keep a water bottle and snack nearby so you don’t need to leave your workspace.
  • Set a timer to stay aware of your available window.

???? If your baby wakes early, choose tasks you can exit quickly—like surveys or video watching.

6. Use the Pomodoro Technique

This classic time management method works perfectly for moms.

How it works:

  • Work for 25 minutes (1 Pomodoro)
  • Take a 5-minute break
  • Repeat up to 4 times, then take a longer break

During nap time, 2 Pomodoros (50 minutes of focus) can result in a solid $10–$20 of earnings, depending on your task.

7. Set Weekly Micro Goals

Goals give direction and motivation. Start with something realistic, then build as you grow.

Example Goals:

  • Earn $50 this week
  • Complete 15 surveys
  • Transcribe 60 minutes of audio
  • Try 3 new microtask platforms

As you meet those goals, you’ll build momentum, confidence, and consistency.

8. Plan Ahead for the Week

Before Monday hits, plan your nap-time earning schedule like a pro.

  • Identify your baby’s most consistent nap windows
  • Create a “weekly task plan” and assign platforms per day
  • Track how well each day goes and adjust if needed

This system helps you treat your hustle like a business—even if it’s just part-time.

Real-World Success Example

Jessica, a stay-at-home mom from Ohio, began using MTurk and Clickworker during her son’s two daily naps. She set a goal to earn $5 per session and used a spreadsheet to track her time. Within 4 months, she averaged $275/month—enough to start contributing to her family’s grocery fund and save for a weekend getaway.

Final Thoughts – Build Momentum and Scale Slowly

Micro tasks might seem like small change at first—but over time, they can create major impact. For stay-at-home women or moms juggling family life, this isn’t just about extra income—it’s about independence, confidence, and the power to contribute through meaningful Side Hustles for Women without stepping away from what matters most.

Let’s wrap up with some lasting insights on how to scale your efforts and turn nap-time hustles into long-term wins.

1. Turn Micro Tasks into a Routine, Not a Chore

It’s easy to treat micro-tasking as something you “try for a week.” But consistency is where the magic happens.

  • Instead of forcing yourself to earn $20 in one session, focus on building a habit.
  • Make nap-time hustling a peaceful, focused ritual—like sipping your coffee or reading your favorite blog.

The more consistent you are, the more money you’ll earn—and the faster you’ll spot higher-paying opportunities.

2. Use Micro Tasks as a Gateway to Bigger Opportunities

Many successful work-from-home moms started with micro tasks before leveling up into more profitable freelance work.

Here’s how the progression often looks:

Micro TaskSkill GainedBigger Opportunity
Survey TakingOpinion sharing, demographicsMarket research panels
Product ReviewsWriting, detail analysisBlog writing or product testing
Data CategorizationPattern recognitionVirtual assistant work
TranscriptionTyping, audio comprehensionPodcast editing or captioning
App TestingUI/UX knowledgeQA testing, app reviewing

If you enjoy a certain task, consider building a mini-portfolio or taking an online course to turn it into a service. This lets you transition into work that pays $20–$50 per hour.

3. Build a Digital Earning Toolkit

As you gain experience, start investing in tools that improve your earning potential.

Suggested tools:

  • Noise-canceling headphones – Perfect for transcription or focus.
  • External keyboard and mouse – Speeds up data entry and typing.
  • Blue light glasses – Reduce eye fatigue during long screen sessions.
  • Google Sheets or Notion – Track your platforms, tasks, and earnings.

Your micro-task setup doesn’t need to be fancy—just smart and efficient.

4. Join Online Communities for Support and Opportunities

Being part of micro task communities can open doors you didn’t know existed. Moms often share tips, high-paying task alerts, and honest reviews of platforms.

Recommended groups/forums:

  • Reddit: r/beermoney, r/workonline
  • Facebook groups: “Work from Home Moms,” “Remote Side Hustles”
  • Discord communities related to gig work

???? Pro Tip: Ask questions and contribute. Many moms land private invites or early access to beta projects this way.

5. Don’t Underestimate Your Impact

You might think, “It’s just a few dollars a day.” But here’s the real power:

  • $5/day = $150/month
  • $150/month = $1,800/year
  • $1,800/year = A family trip, emergency fund, or seed money for a business

And let’s not forget what’s harder to measure: the self-worth, confidence, and discipline you’re building along the way.

Final Words: You’ve Got This

You don’t need to launch a full-time business, start a YouTube channel, or build an Etsy empire overnight. Just by showing up consistently during nap time—and taking small steps—you’re creating something meaningful.

You’re proving that motherhood doesn’t limit opportunity—it just shifts it. It may not be loud or flashy, but the quiet power of earning during nap time speaks volumes.

So go ahead. Open your laptop, log into your favorite task site, and take the next step into the world of Side Hustles for Women—where small actions build big outcomes. Your dreams—no matter how small they start—are worth chasing.

Paid Online Focus Groups for Women

0

Last Updated on November 7, 2026

In today’s fast-paced digital world, more women are searching for flexible, reliable ways to earn money from home. Whether you’re a stay-at-home mom, a college student, a part-time worker, or someone simply looking for extra income without the stress of a 9-to-5 job, paid online focus groups offer a unique and rewarding opportunity.

But what exactly is a focus group?

A focus group is a small, guided discussion where participants share their opinions about a product, service, or idea. Businesses and research firms use these insights to improve their marketing strategies, test new products, or gather real-time feedback. Traditionally, these discussions were held in person, but now—thanks to technology—online focus groups have become the new norm.

This shift to virtual settings has opened the door for more women to participate, regardless of their schedule or location. Whether you’re managing a household or juggling a side hustle, these groups let you earn money by simply speaking your mind from the comfort of home.

Why Are Companies Willing to Pay?

Big brands, startups, healthcare companies, and even political organizations need honest feedback before launching a product or campaign. Instead of relying solely on surveys, they prefer focus groups because they can hear directly from real people—like you.

By participating, you’re helping shape products, advertisements, and services that could reach millions. And the best part? You’re getting paid for your insights.

Who Is This Ideal For?

Paid online focus groups are especially suited for:

  • Stay-at-home moms
  • Women working part-time or freelance
  • College students
  • Retired women looking for extra income
  • Women interested in beauty, fashion, health, parenting, or consumer products

You don’t need any special skills, degrees, or prior experience. Just a willingness to speak your truth and provide thoughtful opinions.

In this comprehensive guide, we’ll walk you through how online focus groups work, what you can expect to earn, trusted websites to join, and expert tips to help you maximize your income. Whether you’re new to the concept or ready to dive in, this article is tailored for women who want to earn money online in a smart, flexible, and empowering way.

How Online Focus Groups Work

Participating in online focus groups is surprisingly simple. You don’t need a marketing degree or tech expertise—just a working internet connection, a device like a phone or laptop, and your honest opinions.

Here’s a step-by-step breakdown of how the process typically works:

1. Register with a Market Research Platform

Start by signing up on legitimate market research websites that host paid focus groups. During registration, you’ll be asked to fill out a profile with personal and demographic details such as:

  • Age
  • Gender
  • Occupation
  • Hobbies & interests
  • Marital or parental status
  • Education level
  • Shopping habits

This information helps companies match you with studies that fit your background. For women, there are often specific opportunities related to parenting, fashion, health, beauty, household products, and more.

Tip: Be as accurate and detailed as possible. This increases your chances of getting invited.

2. Complete Pre-Screener Surveys

Once registered, you’ll start receiving invitations to apply for specific focus groups. These invitations often come with a screener survey, which helps determine if you qualify for that particular group.

Example: If a company wants to hear from moms with toddlers, they’ll only accept women who meet that criteria.

Most screeners are short (2–5 minutes) and include questions about your habits, preferences, or life situation. Not everyone gets selected—but that’s okay. The more you apply, the higher your chances of landing a spot.

3. Receive the Invitation and Confirm Participation

If you’re selected after the screener, you’ll get an official invite with:

  • The focus group’s date and time
  • Topic overview
  • Duration (usually 30–120 minutes)
  • Payment amount and method

You must confirm your availability promptly. These groups often have limited slots and fill quickly.

4. Join the Online Focus Group Session

On the day of the session, you’ll join via a video conferencing platform like Zoom, Google Meet, or a proprietary app. A professional moderator will guide the discussion. Don’t worry—these sessions are friendly and casual. You’re not being judged; you’re simply sharing thoughts.

You might be shown:

  • Advertisements
  • Product packaging
  • Concept designs
  • Brand ideas

And then asked:

  • “Would you buy this?”
  • “How does it make you feel?”
  • “What would you change?”

You’ll be expected to speak openly and honestly. No answers are “right” or “wrong”—just real.

5. Get Paid After Participation

Most focus groups pay within 24 hours to 2 weeks of completion. Payment methods include:

  • PayPal
  • Digital gift cards (Amazon, Visa, etc.)
  • Direct bank deposit
  • Occasionally, physical checks

Payment details are usually shared before the session, so you always know what to expect.

What Types of Focus Groups Are Available?

There’s a wide variety of topics, especially geared toward women:

  • Parenting & Childcare Products
  • Beauty & Skincare Feedback
  • Health & Wellness Opinions
  • Food & Beverage Testing
  • Shopping Behavior Analysis
  • Media Consumption Habits
  • Online Shopping Experience

Some sessions are 1-on-1 interviews, while others are group discussions with 5 to 10 participants.

Is It Safe?

Yes—if you use reputable platforms. Most sessions are confidential, and your personal data is protected. Always avoid companies that ask for upfront fees or promise “guaranteed money.”

Why Focus Groups Are a Great Opportunity for Women

In a world that often demands women to juggle multiple roles—caregiver, professional, homemaker, student, and more—it’s essential to have flexible earning options that adapt to unique lifestyles. That’s where paid online focus groups truly shine. They offer more than just extra cash; they empower women to participate in decisions that shape brands and products.

Here’s why online focus groups are a perfect fit for women across all walks of life:

1. Flexible and Family-Friendly Scheduling

Whether you’re raising children, managing a part-time job, or simply prefer working outside the traditional 9-to-5, focus groups let you earn on your schedule. Most sessions are held in the evening or during weekends—times when kids are asleep or chores are done.

No daily commute. No long shifts. Just log in, participate, and get paid—all while staying present for your family or personal responsibilities.

2. No Special Skills or Qualifications Needed

One of the best things about online focus groups is how accessible they are. You don’t need a college degree, professional training, or years of experience. Your life experience and opinions are enough.

Whether you’re a mom of three, a makeup lover, a college student, or a fitness enthusiast—you qualify simply by being you. Companies want a wide range of voices to represent real-world users.

3. Your Voice Influences Real Products

For many women, it’s empowering to know that their input is shaping:

  • A new skincare product for sensitive skin
  • A health app for expecting moms
  • A grocery store’s new food label design
  • An ad campaign targeting women in their 30s

You’re not just answering questions—you’re helping companies build better, more inclusive solutions. Your insights have real impact, which makes this work feel meaningful.

4. Remote Earning with Minimal Setup

Focus groups don’t require office visits or complicated equipment. All you need is:

  • A device with a camera and mic (phone, tablet, or computer)
  • A stable internet connection
  • A quiet space for an hour or two

It’s an ideal setup for women who want to work from home or while traveling. Some moms even join sessions during nap time!

5. Opportunity to Fund Personal Goals

The money earned from focus groups can help women achieve goals like:

  • Saving for a child’s education
  • Covering grocery or utility bills
  • Paying down debt
  • Investing in a hobby or side business
  • Treating themselves to something special

Even just $100 a week from 1–2 focus groups can add up to $400 or more a month—a game changer for many households.

6. Diverse Topics Tailored to Women’s Experiences

The majority of consumer research revolves around products and services used daily by women. That means you’ll often be asked to share opinions on:

  • Makeup and beauty products
  • Baby items and parenting tools
  • Household cleaners
  • Women’s health services
  • Shopping habits and online buying behavior

This makes sessions not only easier to relate to—but also more enjoyable and personally relevant.

❤️ Real Women. Real Impact.

Unlike survey bots or generic panels, focus groups are about authentic human connection. As a participant, you’re part of a conversation that matters—and that makes you feel heard, respected, and valued.

Earning Potential & Payout Methods

Now that you understand how online focus groups work and why they’re a great fit for women, let’s talk about one of the most exciting parts: how much you can actually earn and how you get paid.

Spoiler alert: It can be more than you think.

How Much Can You Earn from Online Focus Groups?

The earning potential depends on several factors, including:

  • The platform or company hosting the study
  • The topic of discussion
  • The length of the session
  • Your demographic profile (some target groups pay more)

Here’s a general breakdown of what you can expect:

Session LengthAverage Payment
30 minutes$25 – $50
60 minutes$50 – $150
90–120 minutes$100 – $300+

Some highly specialized groups—like medical studies or business-to-business interviews—may pay $400 or more for a single session.

That means if you participate in just one or two well-paying focus groups a week, you could easily earn $500–$1,000+ per month, all from home.

What Types of Focus Groups Pay the Most?

Generally, focus groups that involve:

  • Health & wellness topics
  • Parenting & baby products
  • Financial services or insurance
  • Beauty & skincare testing
  • Professional career insights (e.g., teachers, nurses, marketers)

…tend to offer higher payouts. If you fit a niche or high-demand demographic, you’ll often be eligible for premium-paying sessions.

Example: A focus group for mothers of infants testing a new diaper brand might pay $200 for a 90-minute discussion.

How Will You Be Paid?

The majority of legitimate focus group companies pay within 24 hours to 2 weeks after you complete a session. Payment methods vary slightly by platform, but common options include:

✅ 1. PayPal

Fast, global, and easy. You’ll need a verified PayPal account to receive instant payments from many sites.

✅ 2. Digital Gift Cards

Amazon, Visa, Walmart, or other major brand gift cards are often offered as rewards—especially for short or lower-paying sessions.

✅ 3. Direct Bank Deposit

Some platforms, like User Interviews, offer secure transfers to your bank account.

✅ 4. Physical Checks (Less Common)

Old-school but still used by certain U.S.-based research companies.

✅ 5. Points-Based Rewards

Some platforms use a points system, where you accumulate points and redeem them for cash or gift cards once you meet a minimum threshold.

???? Tip: Always confirm how you’ll be paid and when before committing to a session. Reputable platforms clearly state the payment terms upfront.

Watch Out for Red Flags

To ensure you’re earning money safely and efficiently, avoid:

  • Any site that asks for upfront fees
  • Focus groups that seem too vague or don’t specify the topic
  • Requests for sensitive information like your SSN or banking passwords
  • Companies with no contact information or poor online reviews

Legitimate focus groups pay you—they never charge you.

Real-World Example

Let’s say you participate in:

  • 2 focus groups a week, each paying $100
  • That’s $800/month
  • If you increase it to 3–4 sessions per week, that’s up to $1,200–$1,600/month

Now imagine pairing this with other side hustles or freelance work. Suddenly, focus groups aren’t just extra money—they’re a part-time income stream.

Top Legit Platforms Offering Paid Focus Groups for Women

Finding legitimate, high-paying focus group platforms can feel overwhelming—especially with so many scams floating around. That’s why we’ve done the research for you. Below is a list of trusted websites and companies that consistently offer paid online focus groups specifically suited for women from various backgrounds and lifestyles.

✅ 1. Respondent.io

Best for: High-paying professional and consumer studies

Respondent.io is one of the most respected platforms for online research studies. They offer both B2B (business-related) and B2C (consumer-related) opportunities, including those focused on parenting, shopping, health, skincare, and lifestyle choices.

  • Typical Pay: $100 – $300 per study
  • Payment Method: PayPal (within 5 days)
  • Bonus: $20 referral bonus when someone you refer completes a study
  • Pro Tip: Create a detailed profile to qualify for more studies

✅ 2. User Interviews

Best for: Everyday consumer and niche studies

User Interviews connects participants with brands seeking feedback on websites, apps, marketing materials, and more. They frequently look for moms, beauty product users, health-conscious individuals, and women in various industries.

  • Typical Pay: $50 – $200+
  • Payment Method: Bank transfer or virtual gift card
  • Easy to Use: Clean interface and transparent selection process

✅ 3. FocusGroup.com

Best for: Large-scale consumer studies

FocusGroup.com is part of Schlesinger Group, a well-established global research network. They regularly run online sessions on food, beverages, parenting, education, financial products, and more.

  • Typical Pay: $75 – $250
  • Payment Method: Prepaid Visa cards or gift cards
  • Trusted Since: 1988

✅ 4. Recruit & Field

Best for: Lifestyle and beauty-related groups

Recruit & Field specializes in online focus groups targeting women interested in skincare, fashion, household products, and family dynamics. They’re known for quick communication and high-paying opportunities.

  • Typical Pay: $100 – $250
  • Payment Method: PayPal
  • Bonus: Clear instructions and organized sessions

✅ 5. WatchLAB

Best for: Creative product and lifestyle testing

WatchLAB conducts focus groups online and in-person. They frequently target mothers, remote workers, wellness seekers, and tech-savvy women. Their sessions can be fun and interactive, covering everything from pet products to digital tools.

  • Typical Pay: $75 – $300
  • Payment Method: PayPal or gift cards
  • Nationwide (USA-based) but offers remote sessions

✅ 6. PingPong

Best for: UX testing and product feedback

Though more oriented toward UX/UI interviews, PingPong has grown popular with women offering insights on shopping behavior, mobile apps, and online services. Great for those who enjoy tech or app reviews.

  • Typical Pay: $40 – $150 per session
  • Payment Method: PayPal
  • Bonus: Global participation allowed

✅ 7. Survey Junkie (SJ Pulse)

Best for: Surveys + occasional in-depth interviews

Survey Junkie’s Pulse program includes diary studies, product testing, and live focus groups, especially useful for women who prefer short sessions and quick payouts.

  • Typical Pay: $20 – $100
  • Payment Method: Points redeemed for PayPal or gift cards
  • Mobile App Available: Easy to use on the go

Tips to Maximize Your Earnings from Online Focus Groups

Getting accepted into paid focus groups can be competitive—but with the right strategy, you can turn it into a consistent and rewarding source of side income. In this final part, we’ll cover expert-level tips to help women make the most out of online focus group opportunities.

✅ 1. Sign Up for Multiple Platforms

Don’t rely on just one site. Each platform offers a limited number of studies at a time, and you won’t qualify for every screener. The key is volume and variety.

Suggested action:

  • Join 5–7 reputable platforms (see Part 5)
  • Bookmark their dashboards or check daily
  • Set email alerts so you never miss an opportunity

✅ 2. Complete Your Profile Thoroughly and Accurately

When you sign up, you’ll be asked to fill out a personal and demographic profile. This is your first impression—and what recruiters use to match you with relevant studies.

Tips for profile success:

  • Be specific (e.g., instead of “parent,” write “mother of 2 toddlers”)
  • Keep your job title clear and industry-relevant
  • Update changes (like job, parenting status, or location)

Bonus: Some platforms prioritize users who regularly update their profiles.

✅ 3. Apply to Screeners Quickly

Focus group spots are limited and often filled on a first-come, first-served basis. Once you receive an email invitation, don’t wait hours or days to apply.

Strategy:

  • Check your email 2–3 times daily
  • Use a separate email inbox for focus group alerts
  • Apply immediately if a study matches your profile

✅ 4. Be Honest and Consistent in Screeners

Screener surveys often ask the same question in different formats to verify your consistency. If your answers seem inconsistent or inaccurate, you might be disqualified—even if you’re a great fit.

What to do:

  • Read each question carefully
  • Avoid exaggerating or guessing
  • Be truthful about your habits, income, or usage

✅ 5. Build a Good Reputation

Some focus group platforms keep an internal “rating” of participants. Being professional and responsive can lead to repeat invitations and priority selection.

Dos:

  • Show up on time
  • Dress presentably (for video calls)
  • Speak clearly and politely
  • Don’t multitask during the session

✅ 6. Track Your Applications and Payments

To stay organized and treat your focus group participation like a real side hustle, keep a simple spreadsheet or notebook with:

  • Date you applied
  • Study topic
  • Platform name
  • Scheduled session date/time
  • Payment amount and method
  • Payment status

This helps you spot which platforms are most profitable and ensure you never miss a payment.

✅ 7. Look for Specialized and High-Paying Opportunities

Women with specific experiences—such as:

  • Mothers of newborns
  • Users of a particular skincare brand
  • Professionals in healthcare or education
  • Online shoppers or tech users

…are often highly targeted and better paid. Don’t hesitate to highlight these niche experiences on your profile.

✅ 8. Use Social Media and Forums for Extra Leads

Join focus group Facebook groups, Reddit communities, and online forums where people share active study links and invite codes. These communities often alert you to hidden gem opportunities that don’t appear on main dashboards.

✅ 9. Refer Others for Bonus Income

Some platforms (like Respondent.io) offer referral bonuses when someone you invite completes a study. If you have friends, family, or fellow moms who might be interested, refer them!

✅ 10. Stay Patient and Positive

You won’t qualify for every group—and that’s okay. It’s normal to get disqualified sometimes. Focus groups are one of the most rewarding online income streams, but like all good things, they require consistency and patience.

Final Thoughts: Is This Worth It for Women?

Absolutely. Paid online focus groups are one of the most flexible, low-barrier, and empowering ways for women to earn money from home. You can:

  • Influence real-world brands and products
  • Earn $50–$300 per session
  • Work around your lifestyle, not the other way around
  • Enjoy the process while helping businesses better serve people like you

Whether you’re saving for your child’s future, funding your creative goals, or just looking for guilt-free spending money—online focus groups are a smart, sustainable solution.

So go ahead—register on a few platforms, fill out your profile, and take that first screener. You might just find your favorite new side hustle.

How to Sell Crochet Patterns Online

0

Last Updated on November 7, 2026

In a world where side hustles are on the rise and handmade goods are gaining popularity, how to sell crochet patterns online has become a lucrative and creative opportunity for crafters worldwide. For crochet enthusiasts, this isn’t just a way to make money—it’s a chance to share your art with the world while building a personal brand and enjoying the freedom of digital entrepreneurship.

Let’s explore why this opportunity is so appealing, especially in today’s economy:

The Handmade Market Is Booming

From fashion to home décor, people are increasingly leaning toward handmade, unique, and personalized products. The crochet community has seen massive growth in online spaces like Pinterest, Instagram, Etsy, and YouTube—making how to sell crochet patterns online an even more valuable skill to learn. This growing interest creates a built-in demand for original crochet patterns—especially ones that help people create trendy, cozy, and thoughtful handmade pieces.

Whether it’s an adorable baby hat, a chunky winter scarf, or boho-style wall art, consumers want the personal touch that crochet offers. And many are willing to pay for well-written, easy-to-follow patterns that guide them to create something beautiful with their own hands.

Digital Products = Passive Income Potential

Unlike physical products that require inventory, packaging, and shipping, crochet patterns are digital downloads. Once you’ve created the pattern and uploaded it, it can be sold repeatedly—without the need to restock or recreate the product.

This makes crochet patterns a perfect passive income source and one of the best examples of How to Sell Crochet Patterns Online effectively. You invest your time once to develop a pattern and then earn from it over and over again. It’s also incredibly scalable—you can sell to 10 people or 10,000 without additional effort.

Low Startup Costs

You don’t need a lot of money to get started. Basic tools like a good camera (or smartphone), a free design tool like Canva or Google Docs, and a little marketing know-how are enough to launch your first crochet pattern product.

Most sellers begin by using free or low-cost platforms like Etsy, Ravelry, or Gumroad. With no need to buy yarn for mass production or worry about shipping logistics, the barrier to entry is incredibly low.

Work From Anywhere, Anytime

Selling crochet patterns online gives you total flexibility. Whether you’re a stay-at-home mom, a student, a full-time professional, or retired, this side hustle can be managed on your own schedule. As long as you have internet access, you can run your business from home, on vacation, or even during your lunch break.

Build a Global Audience

With platforms like Etsy, Ravelry, Instagram, and your own website, your patterns can be discovered by customers from all around the world. This global reach means more exposure, more sales potential, and a larger community of followers who are excited to see what you’ll release next.

Imagine someone in Canada crocheting your pattern for their winter wardrobe, while someone in Australia makes it for a summer market—it’s all possible when you sell online.

Create High-Quality Crochet Patterns

If you truly want to master How to Sell Crochet Patterns Online, your product must stand out with professional quality and originality. That means your pattern must not only be beautiful and original—but also well-written, clear, and easy to follow. Whether you’re targeting beginners or experienced crocheters, crafting a professional-quality pattern is the foundation of your business.

Let’s explore the essential steps to creating crochet patterns that your customers will love (and recommend!).

Start With a Unique, Marketable Design

Your design is the heart of your pattern. Start by identifying what’s currently popular but also add your unique twist. Do some research on:

  • Pinterest trends (search for “crochet pattern ideas”)
  • Top sellers on Etsy or Ravelry
  • Seasonal projects (e.g., cozy fall scarves, Christmas ornaments, summer crop tops)

Avoid copying other designers. Instead, use trends as inspiration and inject your own style, personality, or story into your creations. Think about your target audience—do they want quick and easy projects, stylish wearables, or detailed heirloom pieces?

Use Consistent, Beginner-Friendly Language

When writing your pattern, keep the instructions clear and consistent. Use standard crochet abbreviations and terms, and decide upfront whether you’ll use US or UK crochet terminology—then stick to it throughout the pattern.

A few tips:

  • Use bold headings for each section (e.g., Materials, Gauge, Stitches Used, Instructions).
  • Include a list of abbreviations and what they mean.
  • Break instructions into steps. Avoid long, complex paragraphs.
  • Use bullet points, numbered rows, and indentations to enhance readability.

???? Example:
Rnd 1: Ch 2, work 6 sc in second ch from hook. (6 sts)
Rnd 2: 2 sc in each st around. (12 sts)

Add Clear Visuals and Stitch Guides

Even experienced crocheters often rely on visuals. To increase the appeal and usability of your pattern, add the following:

  • Photos of the finished item (from multiple angles)
  • Close-ups of difficult steps or unique stitches
  • Crochet charts or diagrams (optional but appreciated by advanced users)
  • Size guides or measurements if applicable

You don’t need a professional camera—modern smartphones with good lighting and a clean background work well. Consider using natural light near a window, and avoid cluttered or distracting backgrounds.

Include Detailed Materials and Gauge Information

One of the most common frustrations for buyers is unclear materials or gauge details. To avoid confusion:

  • List specific yarn brands, fiber content, and weights.
  • Specify hook size, optional tools (like stitch markers or tapestry needles), and any extras (e.g., buttons, zippers, stuffing).
  • Provide gauge information in rows and stitches per inch/cm.

Example:

Materials:

  • Worsted weight yarn (e.g., Red Heart Soft)
  • Size H/5.0 mm crochet hook
  • Yarn needle, scissors
  • (Optional) 1” buttons for closure

Make Your Pattern Test-Ready

Before you publish, test your pattern—or better yet, have someone else test it. Recruit crocheters with varying skill levels (many testers are willing to help in exchange for a free copy or shoutout).

Pattern testing helps:

  • Identify confusing steps
  • Catch errors in stitch count or instructions
  • Get feedback on layout and usability

Encourage testers to be honest and thorough. It will help you publish a more polished and professional final product.

Format Your Final Pattern Into a Professional PDF

Once your pattern is polished, format it as a downloadable PDF. Include:

  • A cover page with title, your brand, and a photo
  • Table of contents (for longer patterns)
  • Clear, styled headings and page breaks
  • Your logo, website, or social handles
  • Copyright and terms of use (e.g., selling finished items allowed, but not reselling the pattern)

Use free tools like Canva, Google Docs, or Adobe Express to create a clean layout. Bonus: you can add clickable links and branding to cross-promote your other patterns.

Prepare Your Crochet Patterns for Sale

Now that you’ve created a beautiful and easy-to-follow crochet pattern, it’s time to package and prepare it for sale. A polished presentation builds trust, enhances customer experience, and positions your product as premium—even if it’s your first pattern.

Let’s walk through the essential steps to get your pattern ready for your first sale.

Format Your Pattern as a Professional PDF

Your crochet pattern should be delivered in a universally accessible format—PDF is the gold standard. Here’s how to make it look professional:

  • Use a clean and consistent layout with headings, bullet points, and numbered rows.
  • Include a cover image on the first page—your best shot of the finished item.
  • Organize content with sections: Materials, Abbreviations, Gauge, Instructions, Finishing Notes, etc.
  • Add page numbers if the pattern is multiple pages long.
  • Include clickable links to your shop, social media, or other patterns for upselling.

???? Tools You Can Use:

  • Canva (free templates for pattern layouts)
  • Google Docs or Word (then export as PDF)
  • Adobe InDesign (for more advanced formatting)

Add Your Branding

Branding builds recognition and sets you apart in a competitive market. Even a simple logo, color scheme, and business name make your pattern look more legitimate and trustworthy.

What to include:

  • Your logo or watermark
  • Your brand name and tagline
  • Links to your website or Etsy shop
  • A short About the Designer section

Branding isn’t just aesthetics—it tells your customers that you’re serious, consistent, and worth following.

Include Legal and Licensing Info

This is one of the most overlooked parts by new pattern sellers—but it’s important to protect your work and set expectations.

Add a short licensing or copyright note such as:

“This pattern is for personal use only. You may sell finished products made from this pattern, but you may not redistribute, resell, or copy this pattern in any form.”

Some sellers allow commercial use with credit. Others don’t. Decide what’s right for your brand and stick to it.

Also, always include your contact information (email or shop link) in case the buyer has questions or issues.

Price Your Pattern Wisely

Pricing can be tricky. Go too high and scare away buyers; too low and you undervalue your work. Here are some tips:

  • Research competitors on Etsy, Ravelry, and Lovecrafts.
  • Patterns typically range from $3 to $10, depending on complexity, design originality, and target audience.
  • Simple accessories (like dishcloths or keychains) are usually priced lower.
  • Larger or more detailed patterns (like garments or amigurumi) can be priced higher.

???? Tip: You can start with a lower price to build up reviews and then increase your price as demand grows.

Also consider offering:

  • Bundles (3 patterns for a discount)
  • Introductory launch pricing
  • Coupon codes for social media followers or email subscribers

Write a Compelling Product Description

Your pattern description helps customers decide if they want to buy. Make it detailed but easy to scan.

Include:

  • What the project is (e.g., “A cozy beginner-friendly crochet ear warmer.”)
  • Skill level (Beginner, Intermediate, Advanced)
  • What materials and tools are required
  • What the finished item can be used for (gift, wearables, décor)
  • Number of pages in the PDF
  • Stitch abbreviations used
  • How the file will be delivered (e.g., instant digital download)

???? Example description snippet:

This chunky headband crochet pattern is perfect for beginners and makes a cozy winter gift. The step-by-step PDF includes clear instructions, photos, and a printable format. Ideal for craft fairs, gifts, or just for yourself!

Prepare Product Images and Thumbnails

Online shoppers rely heavily on visuals. Your product images should show off your pattern in its best light:

  • Take clear, well-lit photos of the finished item.
  • Show the item in use (e.g., someone wearing the scarf).
  • Use close-ups to show stitch detail.
  • Create a thumbnail image with the pattern name and your brand.

If you’re uploading to multiple platforms, ensure image sizes meet their specific requirements.

Where to Sell Your Crochet Patterns Online

Now that your crochet pattern is polished and ready, it’s time to choose where to sell it. The platform you choose affects your visibility, pricing flexibility, branding, and customer experience. Luckily, you don’t have to pick just one—many successful sellers use multiple channels to reach broader audiences.

Let’s explore the best places to sell your crochet patterns online, along with pros, cons, and success tips for each.

Etsy – The Go-To Marketplace for Handmade and Digital Goods

Etsy is arguably the most popular platform for selling crochet patterns. It’s beginner-friendly and has a huge built-in audience that actively searches for patterns every day.

✅ Pros:

  • Massive customer base
  • Easy setup with no need to build your own website
  • Instant digital delivery for pattern files
  • Ability to run sales, coupons, and promotions

❌ Cons:

  • Transaction and listing fees
  • High competition
  • You’re renting space—you don’t own the platform

???? Tips for Etsy Success:

  • Use relevant keywords in your title, description, and tags
  • Offer eye-catching photos and a detailed pattern summary
  • Encourage reviews and offer quick responses to questions
  • Optimize your Etsy SEO (search engine optimization)

???? Bonus: Create bundles (e.g., “3 Winter Patterns for One Low Price”) to boost average order value.

Ravelry – A Hub for Yarn Enthusiasts

Ravelry is a specialized platform built specifically for knitters and crocheters. It’s one of the top places where serious yarn crafters go to find and buy patterns.

✅ Pros:

  • A highly engaged and relevant audience
  • Free to list patterns (you only pay fees on sales)
  • Great tools for managing pattern downloads and updates
  • Ability to offer free and paid versions

❌ Cons:

  • Less customization for branding
  • Community-focused rather than search-focused
  • Requires some learning to navigate effectively

???? Tips for Ravelry Success:

  • Join crochet groups and engage with users
  • Encourage pattern testers to link their projects to your pattern page
  • Offer pattern support or create a support thread in your group

Your Own Website (Shopify, WooCommerce, or WordPress)

For ultimate control, nothing beats your own website. You can use platforms like Shopify, WooCommerce (with WordPress), or even Squarespace to sell directly to customers.

✅ Pros:

  • Full control over branding, pricing, and design
  • No commission fees (except for payment processors)
  • Ability to grow an email list and blog for organic traffic
  • Great for establishing long-term brand authority

❌ Cons:

  • Requires more setup and maintenance
  • You must drive your own traffic (no built-in audience)
  • Monthly fees and technical responsibilities

???? Tips for Website Success:

  • Use SEO strategies to attract Google traffic
  • Create a freebie pattern to grow your email list
  • Offer blog content to showcase your expertise and link to your shop

???? Tools like Gumroad or Payhip can also be embedded into websites for easy digital downloads without needing a full eCommerce setup.

Other Marketplaces: Craftsy, Lovecrafts, and Payhip

Several niche marketplaces cater to crafters and allow digital pattern sales:

  • Craftsy – Known for craft courses and patterns
  • Lovecrafts – A global platform for knitters and crocheters
  • Payhip – Simple, fee-based platform for selling digital downloads

These platforms may not have the same traffic as Etsy, but they offer additional exposure and often have fewer competitors.

✅ Pros:

  • Additional sales channels
  • Less saturated than Etsy
  • Easy to manage digital files

❌ Cons:

  • May not drive high volume alone
  • Limited customization options

Social Media Shops and Link-in-Bio Tools

Your social media platforms—especially Instagram, Pinterest, and Facebook—can be powerful tools for showcasing your patterns and linking to your shop.

  • Instagram: Share project photos, reels, and carousel posts with behind-the-scenes content.
  • Pinterest: Great for evergreen traffic and links to your shop.
  • Facebook Page/Group: Build community, share releases, and link to product pages.

Use Linktree, Stan.store, or Beacons in your bio to guide followers to your shop, email signup, or freebies.

???? Tip: Use reels or stories to show your pattern in progress and create anticipation for the launch.

Promote Your Crochet Patterns Like a Pro

Creating a high-quality crochet pattern is just the beginning of understanding How to Sell Crochet Patterns Online successfully. To build a sustainable income from your patterns, you need to promote them consistently and smartly. With the right marketing strategies, even new designers can build a loyal customer base and make recurring sales.

Let’s dive into proven ways to promote your crochet patterns and grow your online presence.

Build a Strong Brand Identity

Your brand is more than a logo—it’s how people recognize, remember, and feel about your crochet business. A clear and consistent brand builds trust and helps you stand out in a crowded market.

✔ Key branding elements:

  • Business name: Unique, memorable, and relevant to crochet or crafts.
  • Logo and color palette: Use on all platforms for consistency.
  • Voice and tone: Are you fun and playful or elegant and classic? Let it reflect in your descriptions, emails, and social posts.
  • Storytelling: Share why you design patterns. People connect with people, not just products.

???? Example: “I started designing patterns during maternity leave to stay creative. Now, I love helping other moms make beautiful handmade gifts.”

Leverage Social Media to Build Community

Social media is your digital showroom. Use platforms like Instagram, TikTok, Pinterest, and Facebook to showcase your work and engage your audience.

✔ Content Ideas:

  • Behind-the-scenes videos (your design process)
  • Time-lapse or short clips of a pattern being worked up
  • Pattern styling ideas
  • Customer creations (with permission)
  • Tips and mini tutorials

???? Tips:

  • Use relevant hashtags like #crochetpattern #handmadewithlove #crochetdesigner
  • Post consistently—create a content calendar
  • Use Instagram Stories and Pinterest Pins for long-term visibility

???? Pro tip: Instagram Reels and TikToks showing pattern transformations or fast stitching often go viral and attract new followers.

Build and Use an Email List

Social media is great—but you don’t own your followers. That’s why an email list is one of your most valuable marketing tools.

✔ How to start:

  • Offer a freebie pattern or printable in exchange for sign-ups
  • Use platforms like MailerLite, ConvertKit, or Flodesk
  • Promote the sign-up link on your site, Etsy, and social bios

✔ Email ideas:

  • Announce new pattern releases
  • Offer subscriber-only discounts
  • Share crochet tips or stories behind your designs
  • Highlight top-rated or seasonal patterns

???? Bonus: Add a short “PS” in your emails to link to your Instagram or Etsy shop.

Collaborate With Influencers and Craft Bloggers

Working with creators who already have engaged crochet audiences can significantly boost your reach.

✔ Collaboration ideas:

  • Provide your pattern for free in exchange for a review or social media post
  • Sponsor a giveaway with a popular crochet YouTuber or Instagrammer
  • Guest post or be interviewed on a crochet blog or podcast

Make sure the influencer’s audience matches your niche—if you design baby wear, collaborate with someone whose followers are mostly parents or gift-makers.

Run Ads to Accelerate Growth (Optional)

If you have a budget, consider running Facebook, Instagram, or Pinterest ads. These platforms allow you to target specific audiences, such as people who love crochet, handmade items, or DIY crafts.

✔ Tips for running effective ads:

  • Promote a best-selling or highly rated pattern
  • Use a clear image or short video that highlights the finished product
  • Test different headlines and audience segments
  • Track results and optimize over time

???? Caution: Start small and only scale once you’ve found a message and image that work well.

Encourage Reviews and Social Proof

Social proof is powerful. When potential customers see others loving your patterns, they’re more likely to buy.

✔ How to get reviews:

  • Ask satisfied customers to leave a review (especially on Etsy)
  • Offer a small discount or freebie for repeat buyers who leave feedback
  • Share screenshots of happy customer comments on social media (with permission)

???? Bonus idea: Create a branded hashtag for your patterns and encourage customers to tag you when they share their finished projects!

Tips for Long-Term Success and Sustainable Income

Once your patterns are selling and your audience is growing, it’s time to think beyond just “what’s next”—and plan for long-term success. Building a crochet pattern business that brings in steady income doesn’t happen overnight, but with consistency and smart scaling, you can turn your passion into a thriving brand.

Here’s how to take your pattern-selling side hustle to the next level.

Offer Pattern Bundles, Kits, or Subscriptions

Bundling multiple patterns together increases your average order value and gives customers more incentive to buy.

✔ Bundle Ideas:

  • Themed sets: “Winter Warmers,” “Beginner Baby Patterns,” “Amigurumi Trio”
  • Skill-level sets: Beginner bundle, intermediate bundle
  • Seasonal packs: Holiday or back-to-school themes

You can also launch a monthly membership or pattern subscription model, where members pay a small fee to receive exclusive patterns each month. This creates recurring revenue and builds customer loyalty.

???? Tools like Patreon, Gumroad, or a WooCommerce subscription plugin can help you manage this.

Encourage Repeat Customers and Loyalty

Returning customers are easier to convert than new ones. Encourage them to come back by:

  • Offering discounts for repeat buyers
  • Giving early access to new pattern releases
  • Including “thank you” pages or follow-up emails with bonus content
  • Running seasonal promotions and exclusive deals

???? Add personality to your interactions. A personal thank-you note or custom message in the PDF can go a long way toward building relationships.

Expand Into Related Revenue Streams

Once you’ve built trust as a crochet pattern designer, consider offering additional products and services.

✔ Expansion ideas:

  • Online crochet classes (via Zoom, Skillshare, or Teachable)
  • YouTube tutorials that drive traffic and affiliate income
  • Crochet eBooks with curated patterns, tips, and stories
  • Branded crochet tools or digital trackers
  • Printable planners for crocheters

This helps diversify your income and reach different audience segments.

Stay Up to Date With Trends and Feedback

Crochet trends evolve, and so should your product offerings. Stay in touch with your community and niche.

✔ How to stay fresh:

  • Follow trending hashtags on Instagram and Pinterest
  • Join Facebook groups or forums (like Ravelry discussions)
  • Ask your email subscribers what they want more of
  • Use feedback from reviews to improve patterns and add bonus instructions

???? Tip: Monitor seasons and holidays. Launching themed patterns (like pumpkins for fall or baby booties in spring) can help you ride seasonal search traffic.

Use Automation and Tools to Save Time

As your pattern shop grows, so will your to-do list. Use automation tools to streamline repetitive tasks and free up time for designing and marketing.

✔ Time-saving tools:

  • MailerLite/ConvertKit – email automation and sequences
  • Tailwind – Pinterest and Instagram scheduling
  • Canva – design templates for pattern PDFs, social posts, and promos
  • Gumroad/Payhip – automatic digital file delivery and product pages
  • Google Drive – organize pattern drafts and tester feedback

Use templates wherever possible so you’re not recreating your workflow every time.

Track Your Progress and Set Goals

Long-term success requires reflection and planning. Every few months, review your performance:

  • Which patterns are selling best?
  • Where is your traffic coming from?
  • Which social posts or emails led to the most conversions?

Set new goals:

  • “Release 2 new patterns per month”
  • “Reach 1,000 email subscribers”
  • “Launch a holiday pattern bundle by November”

Tracking progress helps you stay focused and measure what’s working.

Conclusion

How to Sell Crochet Patterns Online can start as a fun creative outlet—but it also has the potential to grow into a reliable, long-term income stream with the right approach. By focusing on quality, marketing smart, engaging with your audience, and scaling thoughtfully, you can build a business that reflects your passion and supports your lifestyle.

Whether you dream of quitting your job, traveling while you work, or simply earning extra cash doing what you love, the tools and opportunities are within reach.

???? Keep stitching, keep sharing, and keep showing up—your crochet business journey is just beginning!